In this post
- At a Glance
- Why This Zipper Pouch Project Works
- Materials and Tools Needed
- Choosing the Right Fabric for Your Bag
- Cutting Chart and Preparation
- Installing the Zipper
- Assembling and Boxing the Corners
- Finishing, Turning, and Pressing
- Variations and Customizing
- Troubleshooting Common Pouch Mistakes
- Care and Washing Instructions
- Frequently Asked Questions
- Your Completed Lined Zipper Pouch
Learning how to sew a clean, fully enclosed accessory is one of the most useful skills you can develop at your machine. This zipper pouch tutorial walks you through every step to create a structured, fully lined bag featuring crisp boxed corners and clean topstitching. Many beginners hesitate when working with zippers, but sewing them into a pouch is straightforward when you assemble the layers in the correct order. Designed for a confident beginner, this project comes together in 1 to 1.5 hours using basic straight seams and standard presser feet. You will construct a durable pouch measuring approximately 9 in x 6 in x 3 in (23 cm x 15 cm x 7.5 cm) that stands upright on its own base, perfect for storing pens, sewing notions, or cosmetics.
At a Glance
| Skill Level | Confident beginner |
|---|---|
| Estimated Time | 1-1.5 hours |
| Finished Size | Approx. 9 in x 6 in x 3 in (23 cm x 15 cm x 7.5 cm) |
| Main Fabrics | Medium weight quilting cotton or lightweight canvas |
| Key Techniques | Zipper insertion, fusible interfacing application, boxed corners, edge topstitching |
Why This Zipper Pouch Project Works
Working on a small, three-dimensional accessory teaches you the fundamentals of bag construction without requiring complex pattern pieces. In this project, you sandwich the zipper tape between the outer fabric and lining, which hides every raw edge inside the seams. This sandwiching technique gives the finished interior a smooth, professional appearance with no exposed thread fraying.
Adding a structured bottom transforms a flat envelope into a roomy, self-standing container. By cutting and stitching square notches into the lower corners, you create a 3 in (7.6 cm) wide base that expands the interior capacity. Mastering these box corners gives you the core technique used in tote bags, duffels, and backpacks.
Materials and Tools Needed
Having the correct notions and cutting tools laid out before you begin ensures smooth assembly from start to finish.
- Exterior Fabric: 1/2 yard (0.5 m) medium weight quilting cotton or lightweight canvas
- Lining Fabric: 1/2 yard (0.5 m) quilting cotton
- Interfacing: 1/2 yard (0.5 m) medium-weight fusible interfacing
- Zipper: 1x 10-inch (25 cm) nylon coil zipper
- Sewing Machine: Fitted with a standard presser foot and a zipper foot
- Needle: Universal sewing needle size 80/12
- Thread: All-purpose polyester sewing thread matching your exterior fabric
- Marking and Cutting: Fabric shears or rotary cutter, clear acrylic ruler, fabric marking chalk or pen
- Notions: Sewing pins or craft clips, iron, and ironing board
Choosing the Right Fabric for Your Bag
Medium weight quilting cotton is the easiest material to handle when practicing this zipper pouch tutorial. It presses flat with a hot iron, does not slip under the presser foot, and comes in a massive variety of prints. If you prefer a pouch with extra body, lightweight canvas makes an alternative exterior fabric that pairs with a regular cotton lining.
Avoid slippery synthetic fabrics such as satin, lightweight rayon, or stretchy knits for this design. These materials shift against the zipper tape during stitching, creating ripples and crooked seams. Stiff upholstery vinyl or heavy denim can also prove difficult for beginner machines to feed when sewing through multiple layers at the corner seams.
Fusible interfacing provides the secret architecture of a well-made pouch. Applying interfacing directly to the wrong side of your exterior cotton pieces prevents the fabric from slouching once the bag is empty. It reinforces the seams, supports the weight of the metal pull on the 10-inch (25 cm) zipper, and keeps the rectangular base firm.
Pro tip: Always test a scrap piece of your exterior fabric with your fusible interfacing first. Use medium heat and a dry iron or light steam according to the manufacturer directions to make sure the adhesive bonds smoothly without bubbling the fabric surface.
Cutting Chart and Preparation
Precise cutting guarantees that your exterior panels, lining pieces, and zipper match up perfectly during assembly. The dimensions below include a 1/2 inch (1.3 cm) seam allowance throughout the entire project.
| Piece Name | Material | Dimensions (Width x Height) | Quantity |
|---|---|---|---|
| Exterior Panels | Exterior Cotton / Canvas | 10 in x 7.5 in (25.5 cm x 19 cm) | 2 |
| Lining Panels | Lining Cotton | 10 in x 7.5 in (25.5 cm x 19 cm) | 2 |
| Interfacing Panels | Fusible Interfacing | 10 in x 7.5 in (25.5 cm x 19 cm) | 2 |
Begin preparation by pressing all fabrics to remove wrinkles. Place the fusible side (the rough, bumpy surface) of each interfacing panel against the wrong side of each exterior fabric panel. Set your dry iron down firmly on the fabric for 10 to 15 seconds per section without sliding it around. Allow the fused pieces to cool completely on your ironing board so the adhesive sets permanently.
Next, cut out the corner notches that will form the boxed base. On the bottom two corners of both exterior panels and both lining panels, use an acrylic ruler to measure and mark a square that is 1.5 in x 1.5 in (3.8 cm x 3.8 cm) from the raw outer edges. Cut these squares out with sharp fabric shears on all four fabric rectangles.
Installing the Zipper
Once your panels are fused and notched, you are ready to attach the zipper closure. A 10-inch (25 cm) nylon zipper provides teeth that are easy to sew near without damaging your machine needle.
- Layer the first side: Lay one exterior panel right side facing up on your work table. Place the 10-inch (25 cm) zipper face down along the top 10-inch raw edge, aligning the top edge of the zipper tape with the top raw edge of the fabric. Lay one lining panel face down over the zipper, aligning the top and side raw edges. The zipper is now sandwiched between the right sides of the two fabrics. Pin or clip through all three layers along the top edge.
- Stitch the first seam: Attach a zipper foot to your machine and select a standard straight stitch with a length of 2.5 mm. Sew along the pinned edge using a 1/4 inch (6 mm) seam allowance. When your presser foot approaches the zipper pull, drop the needle into the fabric, raise the presser foot, slide the zipper pull gently past the needle, lower the foot, and continue stitching to the end. Backstitch at both ends.
- Press and topstitch: Fold both the exterior and lining fabrics away from the zipper teeth so the wrong sides are touching. Press the fabric flat along the seam line using your iron, pulling the fabric taut so it does not bunch near the teeth. Switch back to your standard presser foot, set your stitch length to 3.0 mm, and topstitch 1/8 inch (3 mm) away from the folded edge through both the exterior and lining layers.
- Layer the second side: Lay the remaining exterior panel right side up. Place the unstitched edge of the zipper tape face down along its top edge, matching the raw edges. Lay the remaining lining panel face down on top, creating a second sandwich. Pin the top edge securely.
- Stitch and finish the second side: Sew along the edge using the zipper foot and a 1/4 inch (6 mm) seam allowance, shifting the zipper slider out of the way just as before. Fold the fabrics back, press the seam firmly, and topstitch 1/8 inch (3 mm) from the edge with a 3.0 mm stitch length.
Pro tip: Topstitching along the zipper is not just decorative; it physically anchors the lining away from the zipper track so the fabric never catches in the teeth when opening or closing the bag.
Assembling and Boxing the Corners
Your zipper is now securely attached between both sets of panels, ready for outer perimeter stitching and base formation.
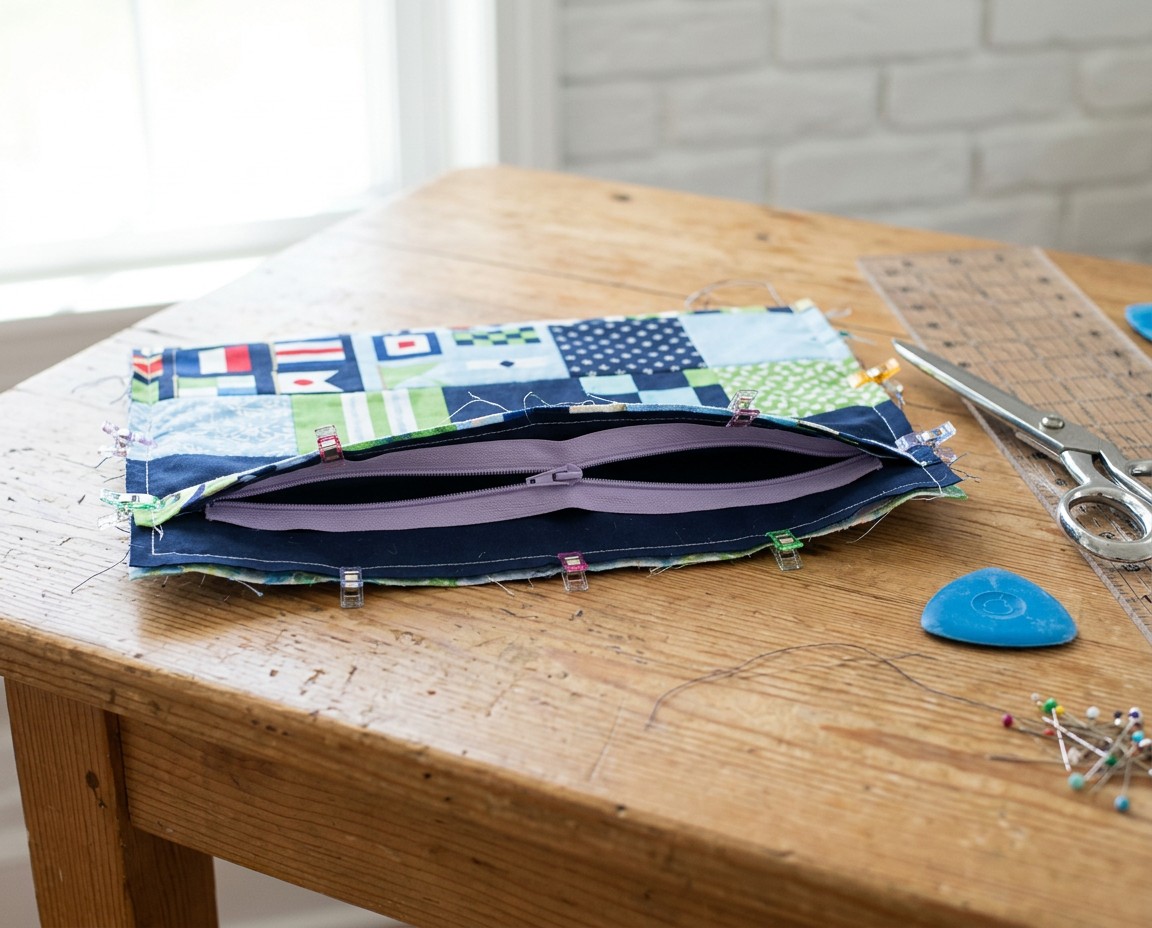
- Open the zipper: Unzip the zipper at least halfway. This step is critical; if the zipper remains closed, you will not be able to turn the pouch right side out after sewing the outer seams.
- Separate and pin the layers: Unfold your project so the two exterior panels sit right sides together, and the two lining panels sit right sides together. Match the perimeter raw edges and align the side seams where the exterior and lining meet at the zipper tape. Push the zipper teeth and seam allowances toward the lining side. Pin or clip around all straight outer edges, leaving the cut-out corner squares unpinned.
- Sew the outer perimeter: Using a regular 80/12 needle and a 2.5 mm stitch length, sew the sides and bottom using a 1/2 inch (1.3 cm) seam allowance. Start along the bottom edge of the lining, sew toward the corner, backstitch, and leave a 3 to 4-inch (7.5 to 10 cm) gap open in the center of the lining bottom for turning. Sew both outer sides completely, crossing directly over the ends of the zipper tape, and sew the entire bottom edge of the exterior panel closed. Do not sew into the 1.5 in (3.8 cm) corner cutouts.
- Form the boxed corners: Take one of the cut-out corner openings. Pull the front and back fabrics apart and flatten the corner so the bottom seam aligns directly on top of the side seam. The raw edges of the cutout should now form a straight horizontal line. Pin the layers together, matching the seam lines in the center.
- Stitch the corners: Sew straight across the flattened corner edge using a 1/2 inch (1.3 cm) seam allowance. Backstitch securely at both the beginning and the end. Repeat this process for the remaining three corner cutouts (the second exterior corner and both lining corners).
Pro tip: To reduce bulk at the boxed corners, press the side seam and bottom seam allowances in opposite directions (one to the left, one to the right) before pinning the corner flat. This allows the seams to nest tightly together under the needle.
Finishing, Turning, and Pressing
With all perimeter and corner seams stitched, you can now bring the right sides of your lined bag to the outside.
- Turn the pouch: Reach your hand through the 3 to 4-inch (7.5 to 10 cm) opening in the lining bottom, grasp the exterior fabric from the farthest corner, and gently pull the entire pouch through the gap. Push the exterior corners out carefully using your fingers or a wooden point turner.
- Close the lining gap: Fold the raw edges of the opening inside by 1/2 inch (1.3 cm) so they align evenly with the stitched seam. Press the opening flat with an iron. Pin the fold closed and topstitch 1/16 inch (1.5 mm) along the edge using your sewing machine, or sew it closed by hand using an invisible ladder stitch.
- Shape and press the bag: Push the lining down inside the exterior body of the pouch. Work the corners of the lining into the corners of the exterior base. Use your fingers to shape the boxed bottom into a neat rectangle. Give the entire pouch a thorough press with your iron, paying special attention to the side seams, the top zipper edge, and the crisp rectangular base.
Variations and Customizing
Once you are comfortable with the basic construction method, you can adapt the visual style of your pouches using different fabrics and color pairings.
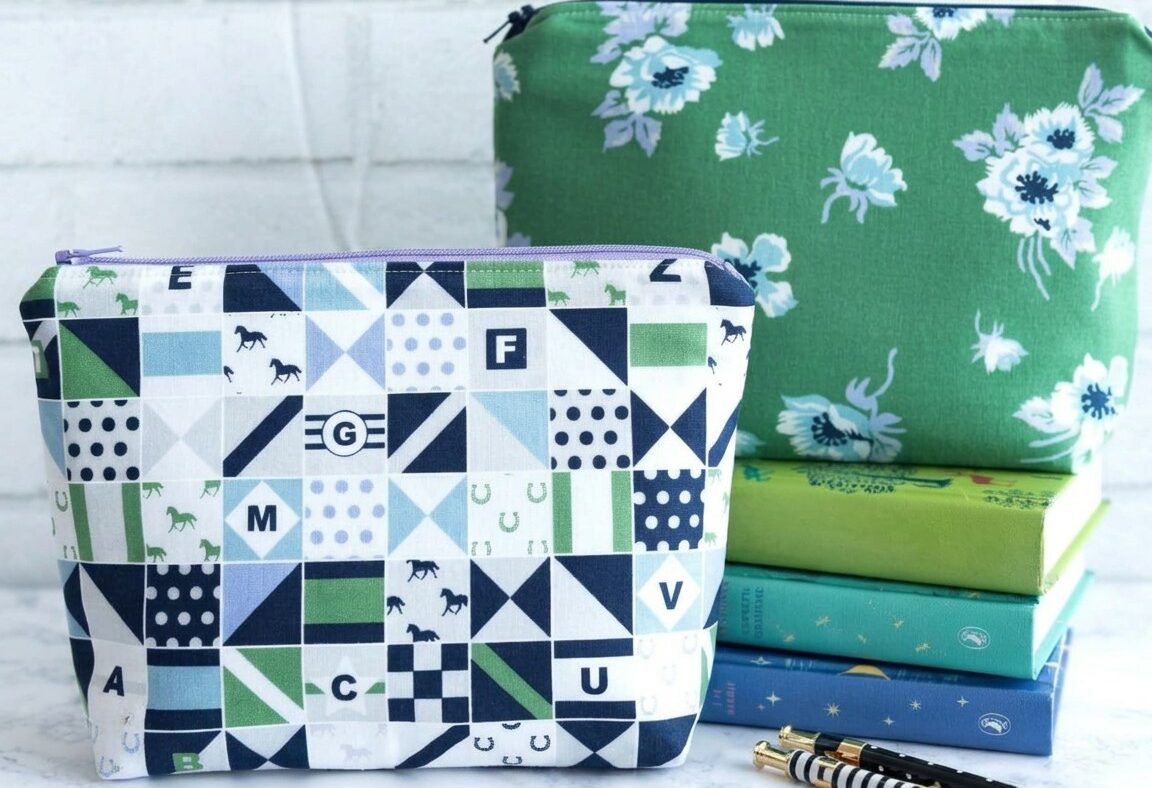
- Patchwork-Style Prints: Combine geometric prints, letters, and motif fabrics on the exterior panels to create a bold, modern look similar to the blue, green, and white horse-print pouch shown in the project photo.
- Classic Florals: Use a rich botanical or green floral print paired with a coordinating solid lining for an elegant, traditional aesthetic.
- Contrasting Zippers: Highlight the closure by choosing a zipper color that contrasts with the exterior fabric, such as pairing a light purple zipper with a geometric blue print, or a dark zipper against a bright floral background.
- Textured Exteriors: Substitute quilting cotton with lightweight canvas on the outer panels while keeping a cotton lining.
Troubleshooting Common Pouch Mistakes
If your pouch does not turn out perfectly on the first try, use this quick reference table to diagnose and correct typical construction issues.
| Problem | Likely Cause | Solution |
|---|---|---|
| Wavy or rippled zipper tape | Fabric or zipper stretched during stitching | Use sewing clips instead of pins to avoid distortion, and let the machine feed dog pull the layers naturally without tugging. |
| Zipper catches on lining fabric | Fabric not pulled taut before topstitching | Press both fabric layers firmly away from the zipper teeth and sew a clean line of edge topstitching 1/8 inch (3 mm) away. |
| Asymmetrical box corners | Side and bottom seams were not aligned | Nest the side seam and bottom seam precisely on top of each other and pin in place before sewing across the corner opening. |
| Pouch looks limp or collapses | Interfacing was omitted or too light | Always apply medium-weight fusible interfacing to the wrong side of both exterior fabric panels before assembly. |
Care and Washing Instructions
Because this bag is constructed from 100% quilting cotton, lightweight canvas, and fusible interfacing, it is simple to maintain. Hand wash or machine wash on a gentle cycle using cold water and mild detergent. Close the zipper fully before washing to prevent the teeth from snagging the fabric fibers.
Reshape the pouch with your hands while it is damp and allow it to air dry flat. Once dry, press the exterior with a medium-hot iron to restore crisp lines along the boxed bottom and side seams. Avoid placing high heat directly on synthetic nylon zipper teeth to prevent melting.
Frequently Asked Questions
What size zipper do I need for this zipper pouch tutorial?
You need a 10-inch (25 cm) nylon coil zipper for this pattern. Using this length allows the zipper teeth to span the entire 10-inch (25.5 cm) width of the cut fabric panels, ensuring clean edge-to-edge closure along the top of your bag.
Can I make this zipper pouch without a sewing machine?
A sewing machine is specified in the required tools for constructing this pouch. Make sure to use short, even stitches along the zipper tape and corner seams to provide adequate strength and durability.
Why do I need to leave the zipper open halfway before sewing?
Leaving the zipper open halfway creates the passage needed to turn the entire bag right side out after sewing the outer seams. If the zipper is left completely closed, all raw edges will remain trapped on the inside with no way to access the pull tab.
How do I get crisp box corners on my lined bag?
Accurate measuring of the 1.5 in x 1.5 in (3.8 cm x 3.8 cm) corner cutouts is essential for symmetrical corners. When flattening the corners, nest the side and bottom seams directly over one another and press the finished corners with a steam iron after turning the bag right side out.
Your Completed Lined Zipper Pouch
You have now assembled a sturdy, fully lined bag complete with a clean zipper installation and a wide, self-standing base. Measuring approximately 9 in x 6 in x 3 in (23 cm x 15 cm x 7.5 cm), this versatile pouch is ready to organize your everyday essentials or serve as a practical handmade gift. For your next project using this zipper pouch tutorial, try pairing contrasting lining prints with your exterior fabrics to give each handmade bag its own unique personality.