In this post
- At a Glance
- Why This Lined Tote Bag Works
- Materials and Tools Needed
- Choosing the Right Fabric for Your Tote
- Cutting Chart and Preparation
- Step-by-Step Lined Tote Bag Tutorial
- Finishing and Pressing for a Professional Look
- Variations and Customizing
- Troubleshooting Common Tote Bag Issues
- Care and Washing Instructions
- Frequently Asked Questions
- Your Finished Lined Everyday Tote
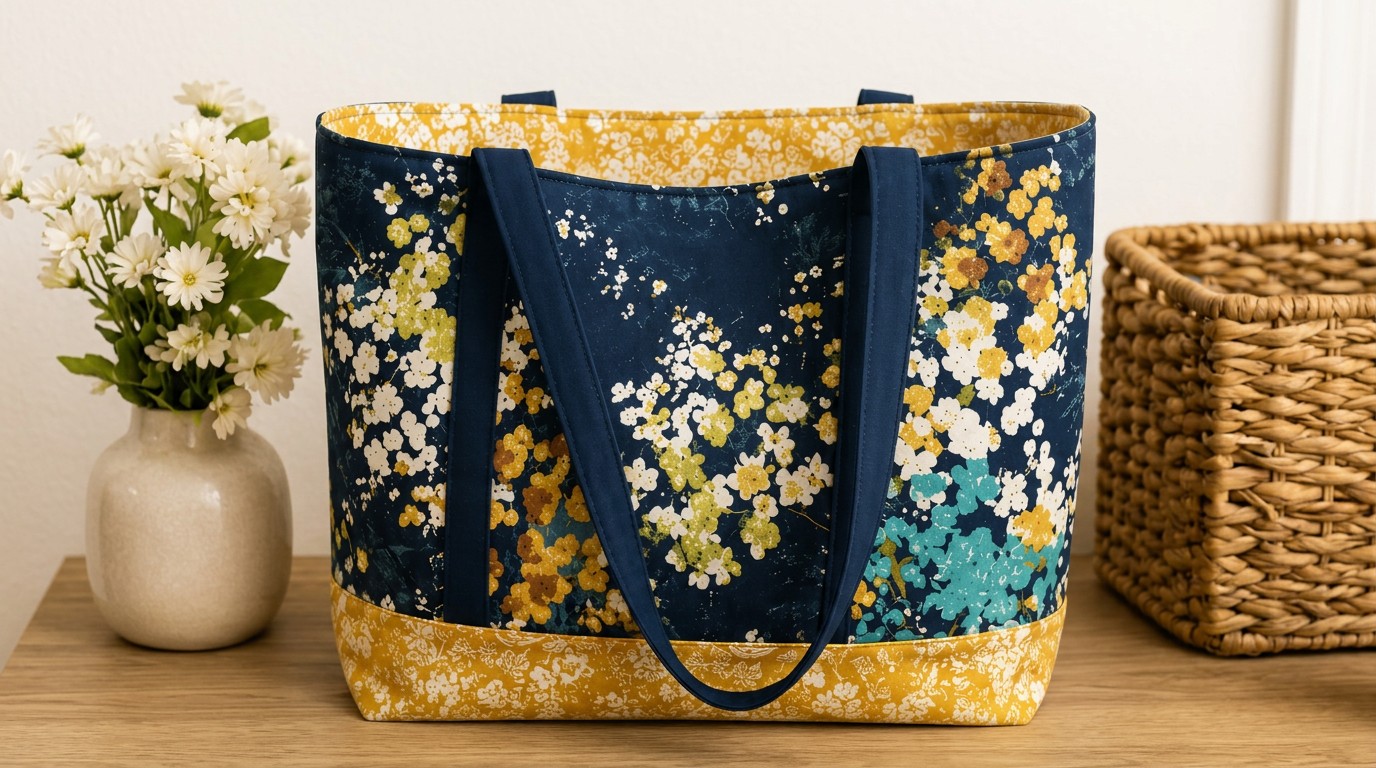
Learning how to sew a practical bag is one of the most useful skills you can develop at your machine. This lined tote bag tutorial walks you through creating a durable, fully lined everyday carryall with a contrasting bottom accent band and sturdy fabric straps. Unlined totes often stretch out of shape and leave raw seam allowances exposed inside, but adding an interior lining produces clean, hidden seams that hold up to repeated use. Designed for a confident beginner, this project teaches fundamental techniques including fusing interfacing, assembling pieced panels, boxing flat bottoms, and topstitching clean edges. In 2 to 3 hours, you will turn flat yardage into a structured, functional tote measuring 16 inches wide, 14 inches high, and 4 inches deep (40.6 cm x 35.6 cm x 10.2 cm).
At a Glance
Before preparing your work area, review the key project parameters to ensure your workspace and materials match the project demands.
| Skill Level | Time to Complete | Finished Dimensions | Main Fabric | Key Techniques |
|---|---|---|---|---|
| Confident beginner | 2-3 hours | 16 in wide x 14 in high x 4 in deep (40.6 cm x 35.6 cm x 10.2 cm) | Medium weight quilting cotton | Applying interfacing, piecing panels, boxed corners, topstitching |
Why This Lined Tote Bag Works
Every design element in this tote balances ease of construction with long-term utility. Simple unlined canvas bags rely on overlocked or serged seams that can fray over time under heavy loads. By enclosing every raw edge between an exterior shell and an inner lining, this method strengthens the perimeter seams and creates a clean interior surface that will not snag on contents.
Structure comes directly from fusing woven interfacing to the exterior panels rather than relying on heavy, hard-to-sew stiffeners. The interfacing stabilizes medium weight quilting cotton so it holds an upright rectangular shape without collapsing, yet your domestic sewing machine easily stitches through multiple layers without skipped stitches or motor strain. The contrasting bottom panel breaks up large prints visually while doubling fabric density across the highest-wear area of the bag.
Materials and Tools Needed
Having the correct fabric yardage and needle size on hand prevents mid-project interruptions and ensures consistent stitch tension across all seams.
- Main exterior fabric: 1 yard (0.9 m) medium weight quilting cotton (dark navy floral print)
- Contrasting bottom and lining fabric: 1/2 yard (0.45 m) medium weight quilting cotton (gold floral print)
- Fusible interfacing: 1 yard (0.9 m) lightweight to midweight woven fusible interfacing (such as Pellon SF101)
- Sewing machine: Standard domestic machine with straight stitch capability
- Needle: Universal sewing needle size 80/12
- Thread: 100% all-purpose polyester sewing thread in coordinating colors
- Cutting tools: Fabric shears or rotary cutter and cutting mat
- Measuring tools: Clear sewing ruler and measuring tape
- Marking and holding tools: Sewing pins or wonder clips, fabric marking pen or tailor’s chalk
- Pressing tools: Steam iron and ironing board
Choosing the Right Fabric for Your Tote
The ideal base for this tote is medium weight quilting cotton (roughly 4.5 to 5.5 ounces per square yard). Quilting cotton presses crisply, does not stretch off-grain during assembly, and feeds evenly under a standard presser foot. For maximum durability across the base, lightweight cotton canvas or duck cloth can also be substituted for the contrasting bottom panel.
Avoid lightweight fabrics such as rayon, silk, or voile, as they do not possess the body needed to support their own weight and will stretch unevenly along the seams. Conversely, avoid heavy upholstery vinyl or ultra-thick canvas for the lining; thick linings create excessive bulk at the boxed corners and the top perimeter where eight or more layers converge during the final topstitch.
Cutting Chart and Preparation
Careful cutting ensures that every seam matches up cleanly during construction, giving you straight, symmetrical sides.
| Piece Name | Fabric | Dimensions (Width x Height) | Quantity |
|---|---|---|---|
| Exterior Main Body | Main Fabric (Navy Floral) | 17 in x 11.5 in (43.2 cm x 29.2 cm) | 2 |
| Exterior Bottom Accent | Contrasting Fabric (Gold Floral) | 17 in x 5.5 in (43.2 cm x 14 cm) | 2 |
| Straps | Main Fabric (Navy Floral) | 4 in x 26 in (10.2 cm x 66 cm) | 2 |
| Lining Panels | Contrasting Fabric (Gold Floral) | 17 in x 15.5 in (43.2 cm x 39.4 cm) | 2 |
| Exterior Body Interfacing | Fusible Interfacing | 17 in x 11.5 in (43.2 cm x 29.2 cm) | 2 |
| Bottom Accent Interfacing | Fusible Interfacing | 17 in x 5.5 in (43.2 cm x 14 cm) | 2 |
| Strap Interfacing | Fusible Interfacing | 2 in x 26 in (5.1 cm x 66 cm) | 2 |
Pre-wash and press your cotton fabrics to eliminate shrinkage before measuring and cutting. Lay each piece on your cutting mat with the grainline running parallel to the long sides.
Position the adhesive (textured) side of the fusible interfacing against the wrong side of each matching exterior fabric piece and strap piece. Using a hot iron with light steam, press down firmly in sections for 10 to 15 seconds without sliding the iron across the surface. Allow the fused pieces to cool completely on a flat surface so the adhesive cures securely before stitching.
Pro tip: Always lift and press the iron directly downward rather than sliding it across the interfacing. Sliding can stretch the cotton off-grain and cause rippling or adhesive bubbles along the finished panel surface.
Step-by-Step Lined Tote Bag Tutorial
Set your sewing machine to a standard straight stitch length of 2.5 mm. Use a consistent 1/2 inch (1.3 cm) seam allowance for all seams unless a different measurement is explicitly noted.
Piecing the Exterior Body and Bottom Panel
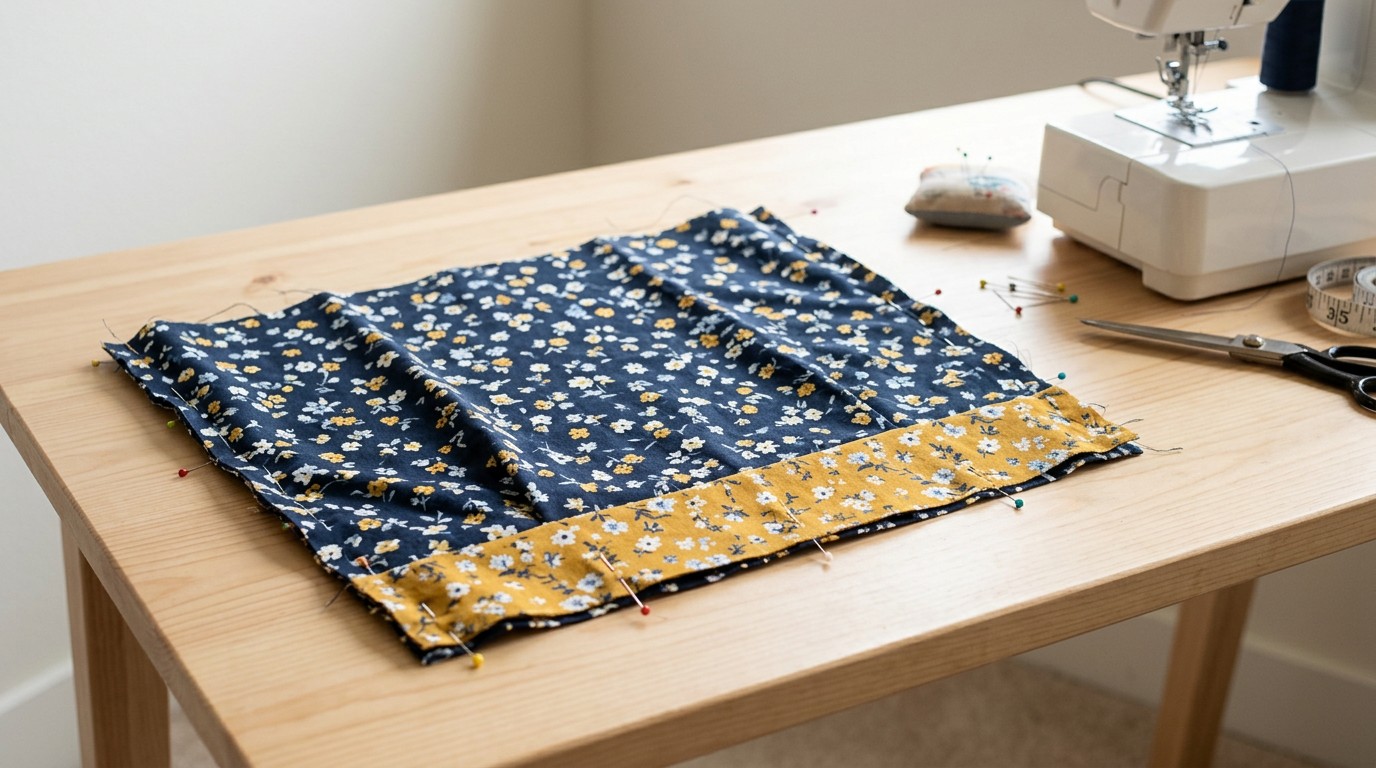
- Join the exterior panels: Place one Exterior Main Body panel right sides together with one Exterior Bottom Accent panel along the 17-inch edge. Pin or clip in place, then stitch across using a 1/2 inch (1.3 cm) seam allowance, backstitching at the beginning and end. Repeat this process for the second exterior set.
- Press the seam open: Lay the pieced exterior panels right side down on your pressing mat. Use the tip of your iron to press the seam allowances flat and completely open to minimize bulk. Flip the piece right side up and press again for a crisp join.
- Cut corner notches for boxed corners: On the bottom edge of both assembled exterior panels (the contrasting bottom edge), measure and mark a square measuring 2 inches wide by 2 inches high (5.1 cm x 5.1 cm) from each bottom outer corner. Cut out these squares cleanly through all layers using fabric shears. Repeat the exact 2-inch square cutouts on the bottom corners of both 17 in x 15.5 in lining panels.
Preparing the Straps and Exterior Assembly
- Fold and press the shoulder straps: Take one 4 in x 26 in strap piece with the interfacing fused down the center. Fold the strap in half lengthwise with wrong sides together, press a sharp center crease, and unfold. Fold both long raw outer edges inward to meet precisely at that center crease line and press. Fold the entire strip in half along the original center line, enclosing the raw edges to create a finished 1-inch-wide strap. Pin or clip the long open edge. Repeat for the second strap.
- Topstitch the straps: Adjust your stitch length to 3.0 mm. Topstitch down both long outer edges of each strap, 1/8 inch (3 mm) away from the folded edge. Press both finished straps flat.
- Attach the straps to the exterior: Lay one exterior panel right side facing up. Measure 4.5 inches (11.4 cm) inward from both outer side edges along the top raw edge. Place the strap ends at these marks, aligning the strap raw edges flush with the top raw edge of the bag. Ensure the strap is flat and not twisted. Pin securely, then baste the strap ends in place using a 1/4 inch (6 mm) seam allowance. Repeat for the second strap on the remaining exterior panel.
- Sew the exterior side and bottom seams: Reset your machine stitch length to 2.5 mm. Place the two exterior panels right sides together, matching the side edges, the bottom edge, and aligning the contrasting bottom seam lines perfectly. Pin or clip the sides and bottom, leaving the square corner cutouts open. Stitch down both sides and across the bottom edge using a 1/2 inch (1.3 cm) seam allowance, backstitching at each start and stop. Press seams open.
- Box the exterior corners: Open the bag exterior and pinch one bottom corner cutout so the side seam aligns directly over the bottom seam, right sides facing. Flatten the corner into a straight line and pin the seam flat. Stitch across the straight line using a 1/2 inch (1.3 cm) seam allowance, backstitching securely at both ends. Repeat on the opposite corner. Turn the exterior bag right side out and gently push out the corners.
Pro tip: When aligning the corner seams for boxing, nest the seam allowances by pressing one seam allowance to the left and the other to the right. This keeps the intersection flat and prevents your needle from deflecting.
Constructing the Lining and Final Assembly
- Sew the lining panels: Place the two lining pieces right sides together. Pin along both sides and across the bottom edge. Sew both sides completely using a 1/2 inch (1.3 cm) seam allowance. On the bottom edge, sew inward 2 inches (5.1 cm) from each outer side, leaving a 5-inch (12.7 cm) opening unstitched in the center for turning the bag later. Press all seams open.
- Box the lining corners: Pinch and flatten the corner cutouts on the lining just as you did on the exterior, matching the side seam to the bottom seam. Stitch across both corners using a 1/2 inch (1.3 cm) seam allowance, backstitching at each end. Leave the lining wrong side out.
- Nest the exterior inside the lining: Keep the exterior bag right side out (with straps tucked down inside) and slide it inside the wrong-side-out lining bag. The right sides of the exterior and lining must be facing each other. Match the side seams, pin them together, and align the entire top perimeter. Pin or clip around the entire top opening, making sure the straps remain tucked flat between the fabric layers.
- Stitch the top perimeter: Sew around the entire top circumference of the bag using a 1/2 inch (1.3 cm) seam allowance. Remove the sewing machine’s free arm bed if needed to fit the bag opening smoothly around the machine throat. Backstitch over the strap anchor points to provide extra reinforcement.
- Turn the bag right side out: Reach through the 5-inch opening in the bottom of the lining and gently grasp the exterior fabric. Pull the entire exterior body and straps out through the opening. Tuck the lining down inside the exterior bag body.
- Press the top rim: Roll the top seam between your fingertips so the seam sits right along the very top edge. Press the top edge thoroughly with steam, making sure the lining does not roll outward toward the exterior.
- Topstitch the top perimeter: Increase your stitch length to 3.0 mm or 3.5 mm. Topstitch completely around the top opening of the bag, 1/8 inch (3 mm) from the pressed upper edge. Add a second parallel row of topstitching 1/4 inch (6 mm) below the first row to give the straps added strength and create a decorative double stitch line.
- Close the lining opening: Pull the lining back out of the bag slightly. Fold the raw edges of the 5-inch turning gap 1/2 inch (1.3 cm) toward the inside, matching the surrounding sewn seam. Press the folded gap flat and pin it shut. Topstitch the opening closed 1/16 inch (1.5 mm) away from the folded edge using your sewing machine, or slip-stitch it closed by hand with a hand-sewing needle. Push the lining back inside the bag to complete the project.
Finishing and Pressing for a Professional Look
Pressing is what gives a sewn bag its structured, finished shape. Once your bag is assembled, insert a tailor’s ham or a rolled towel into the interior corners to press the boxed seams crisp from the inside out. Use a steady blast of steam on the exterior bottom contrast seam, pressing downward to ensure the seam line lies flat against the bag body.
Pay close attention to the top perimeter opening. Pressing this edge thoroughly before topstitching ensures the lining stays slightly inside the bag, preventing it from peeking over the exterior rim. Always use a cotton pressing cloth when ironing over thick topstitched areas to protect the fabric surface from iron shine.
Pro tip: If the multiple layers of the strap seams cause your presser foot to tilt or stall at the top edge, place a folded scrap of fabric behind the foot to level it before stitching over the thick intersection.
Variations and Customizing
Once you are comfortable with this basic construction, you can adapt the design through creative fabric choices and proportions.
- Monochrome texture blocking: Combine a solid linen or denim body with a patterned cotton bottom accent to highlight contrasting weaves.
- Contrasting accent straps: Cut the shoulder straps from the gold bottom accent fabric rather than the navy main print to frame the top opening with a bright pop of color.
- Color-blocked horizontal stripes: Cut the main body panel into two horizontal halves with different prints, joining them with a 1/2 inch (1.3 cm) seam allowance before adding the bottom panel.
- Shortened carry handles: Reduce the strap cut length from 26 inches (66 cm) down to 14 inches (35.6 cm) to transform the shoulder tote into a short hand-held market basket.
Troubleshooting Common Tote Bag Issues
If you encounter uneven seams or handling difficulties during construction, check the common causes and remedies below.
| Problem | Probable Cause | How to Fix It |
|---|---|---|
| Top seam rolls and lining shows on exterior | Top edge was not pressed and rolled properly before topstitching | Under-press the lining edge so it sits 1/16 inch below the outer fabric, then press with steam and pin before topstitching. |
| Contrasting side seams do not align across panels | Fabric shifted during sewing of the exterior side seams | Pin or clip directly through the seam intersection before sewing and lower the needle directly into the seam line to lock it. |
| Straps are twisted after final assembly | Strap was twisted when pinned and basted to the top edge | Always lay the exterior panel completely flat and smooth the strap loop toward the bottom before pinning both ends to the top. |
| Machine skips stitches over thick strap areas | Needle is dull or too light for multiple fused layers | Insert a fresh universal 80/12 needle, lengthen stitch length to 3.0-3.5 mm, and sew slowly over thick joins. |
| Tote body slouches and lacks shape | Interfacing was omitted or poorly fused to the cotton | Ensure medium weight woven fusible interfacing is thoroughly fused to all exterior panels using adequate heat and pressure. |
Care and Washing Instructions
To preserve the shape, color vibrancy, and interfacing bond of your tote bag, proper laundering is essential. Wash the bag in cool water on a gentle or delicate cycle with a mild, bleach-free detergent. Do not wash the bag alongside heavy items like denim jackets or items with open metal zippers that could catch on the stitching.
Reshape the bag with your hands while it is damp and hang it by its straps or lay it flat on a clean drying rack to air dry; avoid machine drying, as the high tumbling heat can break down the fusible interfacing glue and cause bubbling. Once fully dry, press the bag with a medium-high steam iron to restore crisp boxed corners and clean side lines.
Frequently Asked Questions
What is the best fabric to use for a lined tote bag?
Medium weight quilting cotton is the best choice for beginners because it is easy to cut, does not shift under the presser foot, and presses sharply. Cotton canvas or duck cloth can also be used for the exterior bottom panel when extra abrasion resistance is needed.
Do I really need fusible interfacing for a cotton tote bag?
Yes, fusible interfacing provides the structural integrity that keeps cotton fabric from sagging or collapsing when filled. Applying woven interfacing to the exterior body panels creates a sturdy, self-supporting bag while preserving the lightweight handling of standard cotton.
How do I keep my tote bag from sagging at the bottom?
Boxing the corners with precise 2-inch cutouts builds a structured 4-inch base that distributes weight evenly. Fusing the contrasting bottom panel with medium weight interfacing also reinforces the base, preventing downward distortion under normal carry loads.
Can I wash my handmade fabric tote bag?
You can wash this cotton tote bag safely by machine washing on a gentle cycle in cold water and air drying it flat. Pre-washing your fabrics before cutting prevents subsequent shrinkage that could cause the lining and exterior shell to pull unevenly after washing.
Your Finished Lined Everyday Tote
You have now completed a sturdy, professional-quality tote measuring 16 inches wide, 14 inches high, and 4 inches deep (40.6 cm x 35.6 cm x 10.2 cm). By piecing the contrasting bottom panel, reinforcing the exterior with interfacing, and securing the perimeter with crisp topstitching, you have constructed a functional accessory that holds its shape. When starting your next lined tote bag tutorial, experiment with varied handle lengths or bold fabric pairings to create distinct styles suited to any daily routine.