In this post
- At a Glance: Fabric Book Cover Sewing Tutorial
- Why This Project Works for Beginners
- Materials and Tools Needed
- Choosing the Right Fabric for Your Book Cover
- Cutting Chart and Preparation
- Step-by-Step Construction Instructions
- Finishing, Pressing, and Care
- Variations and Customizing Ideas
- Troubleshooting Common Sewing Issues
- Frequently Asked Questions
- Your Completed Fabric Book Cover
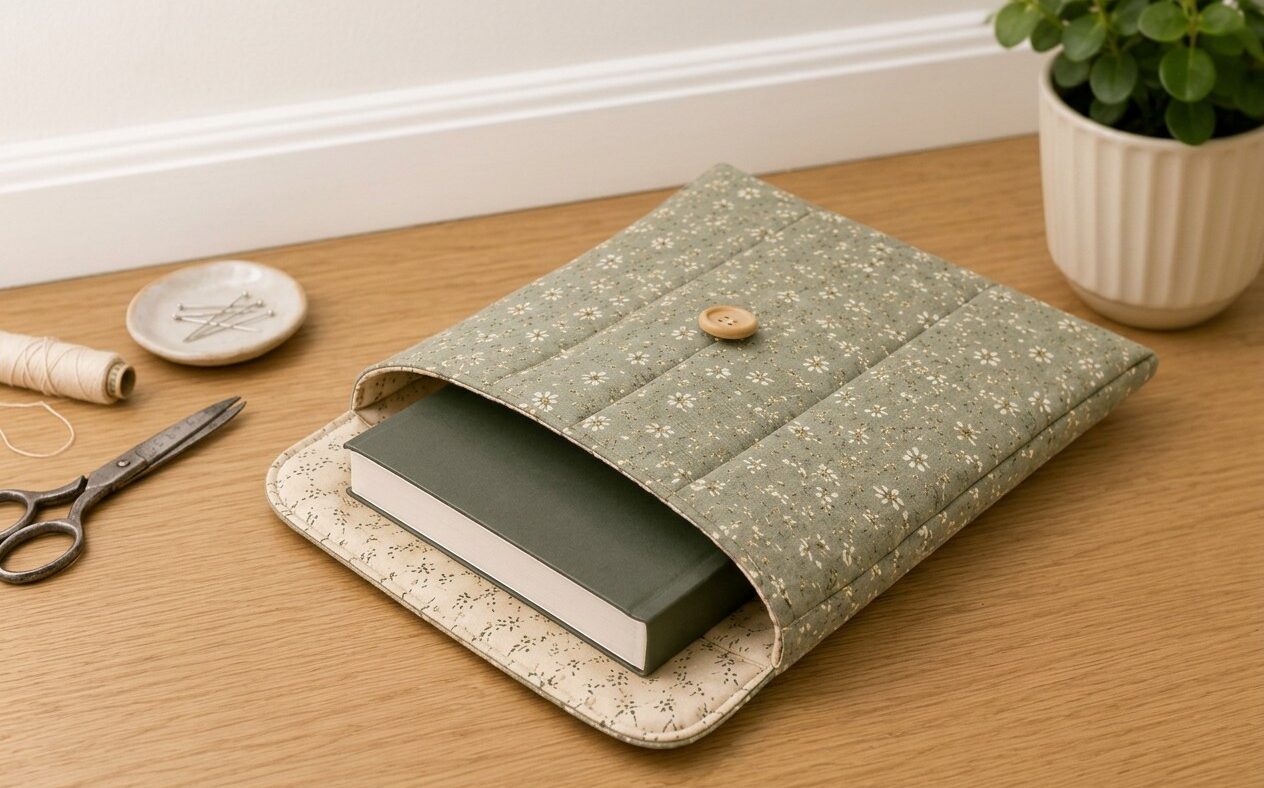
Making a custom cover keeps page edges crisp while tucked inside a tote bag, and it adds soft structure to lightweight notebooks. This project is designed specifically for beginner sewists who want to practice machine stitching on straight lines and work through layered textiles. Using quilting cotton, light batting, and a neat closure flap, you will create a reusable cover tailored to standard book dimensions. In just an hour or two, you can turn small cuts of fabric into a durable reading accessory that shields paper covers from daily handling and shelf wear.
At a Glance: Fabric Book Cover Sewing Tutorial
Having key project parameters before you set up your sewing machine keeps your workflow organized from start to finish.
| Detail | Specification |
|---|---|
| Skill Level | Beginner |
| Time to Complete | 1-1.5 hours |
| Finished Size | Standard book size, approx 9 in x 6 in (23 cm x 15 cm) |
| Main Fabric | Medium-weight quilting cotton |
| Key Techniques | Straight line quilting, attaching a button, topstitching |
| Closure Type | Front flap with wooden button |
Why This Project Works for Beginners
Working on small accessories lets you practice essential sewing fundamentals without managing yards of unruly fabric. This project introduces straight line channel quilting, which teaches you how to guide multi-layered pieces under the machine presser foot at an even pace. Because the lines run vertically along the exterior panel, you can practice keeping consistent stitch lengths using the edge of your presser foot as a reliable visual guide.
You also gain direct experience handling different thicknesses when joining outer fabrics, batting, and inner flaps. Sewing these layers together demonstrates how seam allowances behave around corners and why clipping excess fabric is vital before turning pieces right side out. Hand-sewing a sturdy four-hole wooden button at the end provides basic hand-finishing practice that transfers directly to garment making and home decor projects.
Materials and Tools Needed
Gathering the correct supplies ensures your fabric layers feed smoothly under the needle without skipped stitches or uneven tension.
- Outer fabric: 1/2 yard (0.5 m) medium-weight quilting cotton (sage green floral print)
- Lining fabric: 1/2 yard (0.5 m) contrasting quilting cotton (light cream floral print)
- Batting: 1/2 yard (0.5 m) low-loft cotton batting or fusible fleece
- Button: 1 wooden button, 3/4 in (19 mm) wide with four holes
- Sewing thread: 1 spool of all-purpose polyester or 100% cotton thread matching your outer fabric
- Sewing machine: Standard mechanical or computerized home sewing machine
- Needles: Universal sewing machine needles, size 80/12
- Iron and board: Steam-capable household iron and padded pressing surface
- Cutting tools: Sharp fabric shears or rotary cutter with cutting mat
- Fasteners: Glass head sewing pins or sewing clips
- Measuring tool: Sewing gauge or clear acrylic ruler
Choosing the Right Fabric for Your Book Cover
Selecting stable woven textiles makes pressing crisp edges and aligning straight seams straightforward for beginners. Medium-weight quilting cotton is a reliable choice for both the outer cover and inner lining because it does not stretch or slip under the presser foot. A sage green floral print on the outside paired with a light cream floral print for the inside flaps offers a clean visual contrast when the cover is opened to insert a book.
Avoid slippery synthetic fabrics such as polyester satin, lightweight rayon, or bulky canvas for this design. Satin slides easily, making accurate quilting lines difficult without excessive basting, while heavy canvas adds too much thickness at the flap seams. For padding, low-loft cotton batting or lightweight fusible fleece provides enough structure to cushion book spines without creating stiff, unyielding folds.
Pro tip: Pre-wash and press your quilting cotton before cutting. Natural cotton fibers shrink slightly during laundering, so preshrinking ensures your finished cover maintains its precise standard 9 in x 6 in (23 cm x 15 cm) fit after future wash cycles.
Cutting Chart and Preparation
Accurate cutting ensures that the inner book flaps match the quilted exterior panel perfectly during final assembly.
| Piece Name | Material | Dimensions (Imperial) | Dimensions (Metric) | Quantity |
|---|---|---|---|---|
| Outer Main Panel | Outer Fabric (Sage Floral) | 14 in x 10 in | 35.5 cm x 25.5 cm | 1 |
| Lining Main Panel | Lining Fabric (Cream Floral) | 14 in x 10 in | 35.5 cm x 25.5 cm | 1 |
| Batting Insert | Cotton Batting or Fusible Fleece | 14 in x 10 in | 35.5 cm x 25.5 cm | 1 |
| Inner Sleeve Flaps | Lining Fabric (Cream Floral) | 7 in x 10 in | 18 cm x 25.5 cm | 2 |
| Closure Flap Outer | Outer Fabric (Sage Floral) | 4 in x 3 in | 10 cm x 7.5 cm | 1 |
| Closure Flap Lining | Lining Fabric (Cream Floral) | 4 in x 3 in | 10 cm x 7.5 cm | 1 |
| Closure Flap Batting | Cotton Batting or Fusible Fleece | 4 in x 3 in | 10 cm x 7.5 cm | 1 |
Step-by-Step Construction Instructions
Work methodically through each stage to assemble the quilted panels, sleeve pockets, and closure flap.
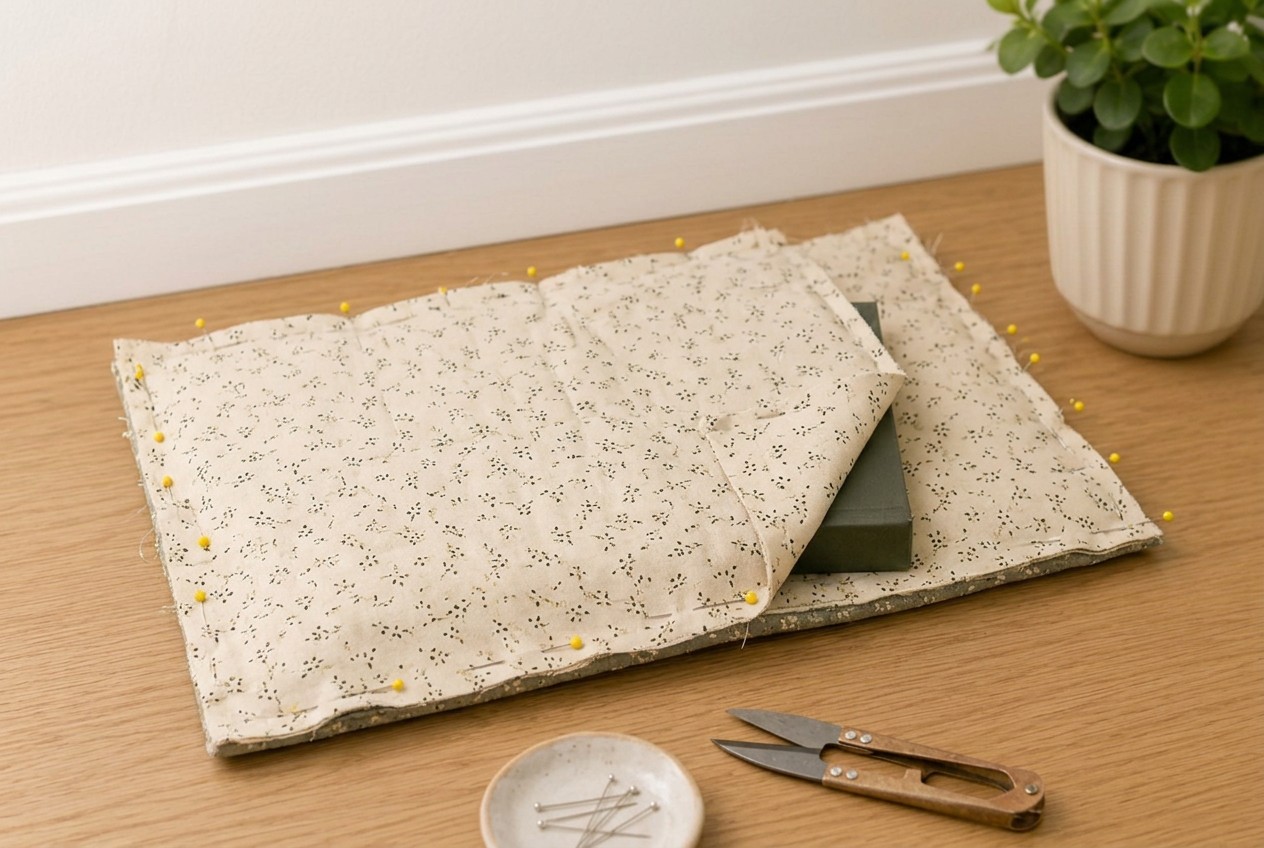
Quilting the Exterior
- Layer the outer pieces: Place the 14 in x 10 in (35.5 cm x 25.5 cm) cotton batting flat on your work surface. Lay the outer main panel on top, right side facing up. Smooth the cotton with your hands from the center outward so no bubbles or wrinkles remain. Pin the layers together every 3 inches across the surface using sewing pins.
- Mark the stitching lines: Using a sewing gauge and removable fabric marking chalk, draw vertical guidelines spaced 1 inch (2.5 cm) apart across the width of the outer panel.
- Stitch vertical channels: Set your sewing machine to a straight stitch with a stitch length of 3.0 mm. Thread the machine with matching thread and install a fresh universal 80/12 needle. Sew down the center marked line from top edge to bottom edge, backstitching at each end. Sew the remaining vertical lines, working outward in alternating directions from the center to keep the fabric flat. Press the quilted panel with steam to settle the stitches.
Pro tip: Stitching in alternating directions (one line top-to-bottom, the next line bottom-to-top) prevents the top fabric from shifting progressively toward one side of the batting.
Preparing the Inner Flaps
- Fold the sleeve pieces: Take the two 7 in x 10 in (18 cm x 25.5 cm) inner sleeve flap pieces cut from your lining fabric. Fold each piece in half lengthwise with wrong sides together, matching the 10-inch edges. You now have two folded pieces measuring 3.5 in x 10 in (9 cm x 25.5 cm).
- Press the fold lines: Press the folded edges firmly with a hot iron using steam to create a sharp, flat crease. This creased edge becomes the inner opening where the book cover slides inside.
- Topstitch the folded edges: Set your machine stitch length to 3.0 mm. Sew a line of edge stitching 1/8 inch (3 mm) away from the folded edge on both flap pieces. Leave the remaining three raw edges unstitched.
Attaching the Button Closure
- Assemble the closure flap: Layer the 4 in x 3 in (10 cm x 7.5 cm) flap batting on your table, place the flap outer piece on top right side up, and place the flap lining piece over that with right sides facing each other. Pin around three edges, leaving one 3-inch short edge open.
- Stitch the flap perimeter: Using a 1/2 inch (1.3 cm) seam allowance and a 2.5 mm stitch length, sew around the three pinned edges. Clip the two corners diagonally, staying 1/16 inch away from the stitch line to reduce bulk.
- Turn and topstitch the flap: Turn the flap right side out through the open end. Push corners out gently using a wooden point turner. Press flat. Topstitch 1/8 inch (3 mm) around the three finished sides. Sew a 1-inch buttonhole centered 1/2 inch from the finished rounded end of the tab, then cut the slit open carefully.
- Secure the flap to the back: Center the raw edge of the closure flap against the right-side short edge of the quilted main panel, matching raw edges. Baste in place using a 1/4 inch (6 mm) seam allowance.
- Hand-sew the wooden button: Position the 3/4 in (19 mm) wooden button on the front of the quilted outer panel, aligned with where the flap will wrap around to close. Thread a hand-sewing needle with a double strand of all-purpose thread. Pass the needle through the outer fabric and batting layers, creating a thread shank under the button by looping thread several times around the base before knotting securely on the wrong side.
Pro tip: Place a toothpick or matchstick across the top of your wooden button while sewing it down. Removing the toothpick before wrapping the thread around the base creates the exact clearance needed for the fabric flap to button smoothly without pulling.
Assembling and Turning
- Position the inner sleeve flaps: Lay the quilted outer panel flat on your table, right side facing up. Place one folded sleeve flap on the left edge, aligning raw outer edges. Place the second sleeve flap on the right edge, aligning raw outer edges. The finished folded edges of the flaps will face toward the center of the panel. Pin along all outer edges.
- Layer the lining panel: Place the 14 in x 10 in (35.5 cm x 25.5 cm) lining panel directly over the assembled layers with its right side facing down. The sleeve flaps and closure tab are now sandwiched between the quilted outer piece and the lining piece.
- Pin and sew the perimeter: Pin securely around all four sides. Using a 1/2 inch (1.3 cm) seam allowance, stitch around the outer perimeter. Leave a 3-inch (7.5 cm) opening along the center bottom edge for turning, backstitching firmly at each side of the opening.
- Trim and notch corners: Trim the seam allowances down to 1/4 inch (6 mm) along all sides, but leave the full 1/2 inch seam allowance intact at the turning gap. Clip all four corners diagonally to remove bulk.
- Turn the cover right side out: Reach through the bottom opening and pull the entire project right side out. Carefully poke out each corner so the edges form neat 90-degree angles.
Topstitching and Finishing
- Press outer edges: Tuck the raw edges of the 3-inch turning gap inside by 1/2 inch so they sit flush with the sewn seam. Press the entire perimeter flat with your iron, paying special attention to the corners and the turned opening.
- Topstitch the entire perimeter: Set your machine stitch length to 3.5 mm. Beginning near one corner, topstitch 1/8 inch (3 mm) around the entire perimeter of the book cover. This stitch line closes the bottom opening securely and prevents the interior lining from rolling outward during use.
- Final press: Apply steam over the front and back panels to set the topstitching and crisp the folded book pockets.
Finishing, Pressing, and Care
Taking time to press with steam ensures the cotton fibers settle around your quilting lines and creates crisp corner folds. Always set your iron to the appropriate cotton setting and press firmly from both sides, avoiding sliding the iron back and forth, which can stretch freshly sewn seams. Keep the hot iron soleplate clear of the wooden button to avoid scorching the wood finish.
When the cover needs cleaning, hand wash it in cool water with mild liquid detergent or machine wash on a gentle cycle in a mesh laundry bag. Lay the cover flat on a clean towel to air dry. Once completely dry, press the cotton panels with a warm steam iron to restore crispness to the channel quilting and pocket flaps.
Variations and Customizing Ideas
Once you are comfortable with this basic construction method, you can adapt the techniques to make a variety of coordinated reading and desk accessories.
- Quilted Fabric Book Cover: Customize the base pattern with horizontal or diagonal cross-hatch quilting lines instead of vertical channels.
- Patchwork Pencil Pouch: Use leftover scraps of your sage and cream floral prints to construct a lined pouch for pens, using the same seam allowances.
- Fabric Bookmark: Stitch two matching 2 in x 6 in (5 cm x 15 cm) strips of cotton over fleece batting with a topstitched perimeter to match your cover.
- Mini Zipper Pouch for Supplies: Sew a compact storage pouch using remaining lining fabric to store sticky flags, highlighters, and small stationery items.
- Reusable Snack Bag: Practice straight seams by making a folded cotton pouch sized to hold reading snacks alongside your book.
Troubleshooting Common Sewing Issues
Working through layered fabrics and batting can occasionally cause feeding or tension problems on standard domestic machines.
| Problem | Probable Cause | Solution |
|---|---|---|
| Puckered quilting lines | Thread tension is too tight or layers shifted during sewing | Lower upper thread tension slightly, use more pins, and stitch in alternating directions across panels. |
| Bulky, rounded corners after turning | Excess batting and seam allowance trapped inside corner points | Trim corners diagonally 1/16 inch away from the seam before turning, and use a point turner to shape. |
| Machine skips stitches over flap seams | Needle is dull or too fine for multiple thick cotton layers | Replace standard needle with a fresh universal size 80/12 or 90/14 needle to pierce thick intersections cleanly. |
| Lining peeks out along the outer edge | Outer edge was not rolled and pressed flat before topstitching | Press the seam with an iron so the outer fabric rolls 1/16 inch toward the inside before topstitching. |
Frequently Asked Questions
What size book does this fabric book cover fit?
The inner sleeve flaps hold books with spine thicknesses up to 1.25 inches (3 cm) securely without stretching.
Can I use fusible fleece instead of cotton batting?
Yes, low-loft fusible fleece works as a direct replacement for 1/2 yard of cotton batting. Fuse it to the wrong side of your outer main panel using a hot iron and steam before sewing your vertical channel quilting lines.
How do I adjust the pattern for a thicker book?
Measure your open book from edge to edge across the spine and add 1.5 inches (3.8 cm) to find your cutting width. Keep the cutting height 1 inch (2.5 cm) taller than your book to maintain the standard 1/2 inch (1.3 cm) seam allowances throughout assembly.
What type of sewing needle should I use for quilting cotton?
A standard universal sewing needle in size 80/12 is suitable for stitching medium-weight quilting cotton through batting layers. If you notice skipped stitches when sewing through the combined flap seams, switch to a fresh 90/14 universal needle.
Your Completed Fabric Book Cover
By following this fabric book cover sewing tutorial, you have created a protective, quilted sleeve with a secure wooden button closure sized for standard books. Taking the time to press each seam and trim corner bulk ensures your finished project stays crisp through years of reading. As one last practical tip, check your book spine depth before finalizing button placement so the closure flap wraps smoothly across both thin paperbacks and thicker hardcovers.