In this post
- At a Glance
- Why This Zipper Pouch Tutorial Works for Beginners
- Materials and Tools Needed
- Choosing the Right Fabric for Your Pouch
- Cutting Chart and Preparation
- Step-by-Step Zipper Pouch Construction
- Finishing and Pressing for a Professional Look
- Variations and Customizing Your Pouch
- Troubleshooting Common Sewing Issues
- Care and Washing Instructions
- Frequently Asked Questions
- Your Completed Zipper Pouch Project
Sewing a clean, fully lined bag is one of the most rewarding skills you can master on your sewing machine. If you have ever felt intimidated by inserting zippers, this beginner-friendly zipper pouch tutorial breaks the entire process down into manageable steps. You will learn how to sandwich a zipper between exterior and lining fabrics, create crisp corners, and enclose every raw edge for a polished, durable finish. In less than an hour, you will produce a flat rectangular bag measuring approximately 9 in x 6 in (23 cm x 15 cm) that works reliably for notions, pencils, or cosmetics.
At a Glance
Before threading your machine, review the essential specifications for this project to ensure you have the proper time and materials prepared.
| Skill Level | Beginner |
|---|---|
| Time to Complete | 45-60 minutes |
| Finished Size | Approx. 9 in x 6 in (23 cm x 15 cm) |
| Main Fabric | Medium weight quilting cotton or linen blend |
| Key Technique | Sandwiched zipper insertion with fully enclosed seams |
Why This Zipper Pouch Tutorial Works for Beginners
Straight-line sewing projects often leave exposed interior seams that fray over time or require an overlocker to finish neatly. This method solves that issue by using an integrated lining technique where all raw edges remain permanently hidden inside the fabric layers. You sew the exterior panels, lining panels, and zipper in continuous steps that eliminate tedious hand-finishing along the perimeter seams.
Working with a flat rectangular shape allows you to practice needle alignment, seam allowance consistency, and zipper foot handling without managing complex curves or bulky corners. The process teaches you how to control fabric tension against the zipper tape so your finished pouch lies smooth and flat. Once you master the simple sandwich technique featured here, you can adapt the same method to sew bags of virtually any rectangular dimension.
Materials and Tools Needed
Proper tools and correctly prepared materials keep your stitching straight and prevent your machine from jamming around the zipper teeth.
- 1/4 yard (0.25 m) exterior fabric: Medium weight quilting cotton or linen blend.
- 1/4 yard (0.25 m) lining fabric: Lightweight to medium weight quilting cotton.
- 1/4 yard (0.25 m) fusible interfacing: Light to medium weight interfacing for structure.
- 1 zipper: Metal or nylon coil zipper, at least 8 in (20 cm) long.
- Sewing machine: Standard domestic machine in good working order.
- Universal sewing needle: Size 80/12 (sharp enough for woven cottons and interfacing).
- Zipper foot: Standard narrow zipper foot attachment for your machine model.
- Fabric shears: Sharp sewing scissors or a rotary cutter with an acrylic ruler.
- Iron and ironing board: Essential for fusing interfacing and setting crisp seams.
- Sewing pins or sewing clips: To hold fabric sandwiches securely before stitching.
Choosing the Right Fabric for Your Pouch
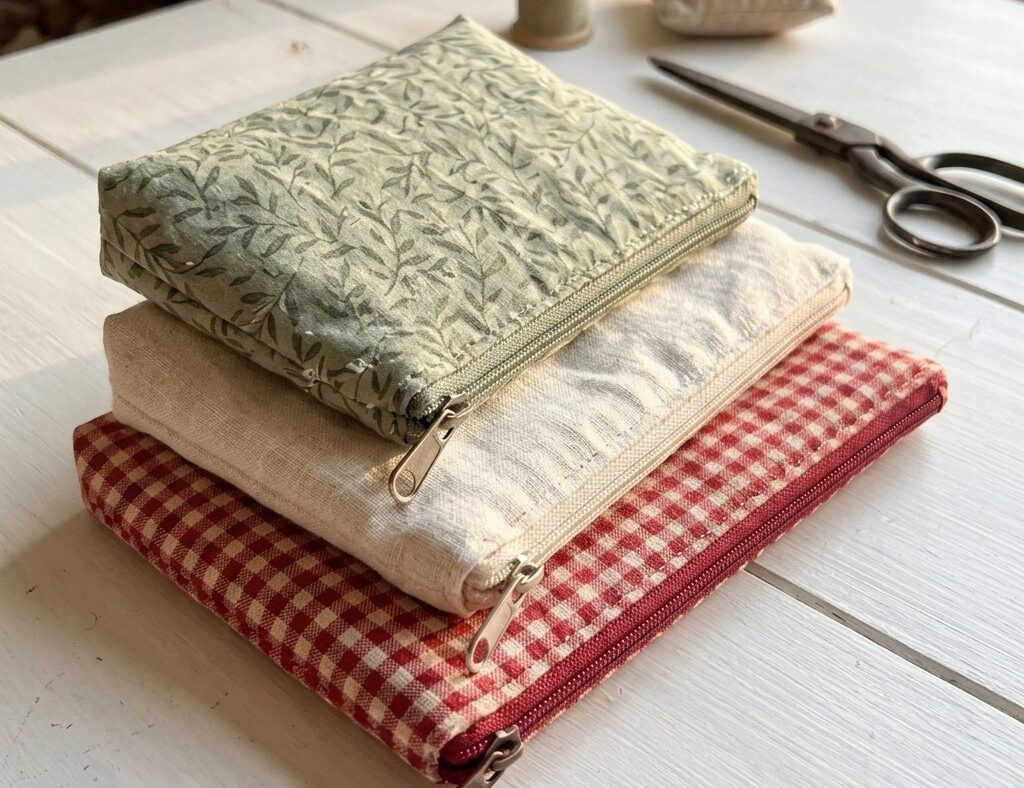
Medium weight quilting cottons and linen blends offer stability, ease of handling, and durability for small bags. Plain weaves feed evenly through the machine feed dogs without stretching out of shape as you stitch along the zipper tape. A classic red and white gingham, a botanical leaf print on sage green cotton, or a neutral cream linen-look fabric all press beautifully and highlight clean topstitching.
Fusible interfacing is a critical component that transforms soft craft fabric into a structured, functional pouch. Applying interfacing to the wrong side of your exterior fabric gives the pouch enough body to hold its rectangular shape when empty and protects the seams from pulling apart under strain. Lightweight woven or non-woven interfacing adds body without creating excessive bulk at the corners, keeping your seam allowances flat and easy to sew.
Cutting Chart and Preparation
Precise cutting guarantees that your exterior and lining panels match up perfectly along the zipper tape during assembly.
| Piece | Material | Quantity | Dimensions |
|---|---|---|---|
| Exterior Panels | Exterior Fabric | 2 | 9.75 in x 6.75 in (25 cm x 17 cm) |
| Lining Panels | Lining Fabric | 2 | 9.75 in x 6.75 in (25 cm x 17 cm) |
| Interfacing Panels | Fusible Interfacing | 2 | 9.75 in x 6.75 in (25 cm x 17 cm) |
Pre-wash and press your cotton or linen fabrics before cutting to prevent uneven shrinkage later. Cut all pieces along the straight grain of the fabric. Place the adhesive (bumpy or shiny) side of each interfacing rectangle against the wrong side of each exterior fabric rectangle. Using a dry iron on medium-high heat, press straight down for 10 to 15 seconds per section without sliding the iron, fusing the interfacing firmly across the entire surface.
Pro tip: Always use an iron pressing cloth or a scrap of cotton when fusing interfacing to prevent any adhesive residue from transferring onto your iron’s soleplate.
Step-by-Step Zipper Pouch Construction
With all pieces interfaced and cut to size, you can construct the pouch using your standard presser foot and zipper foot.
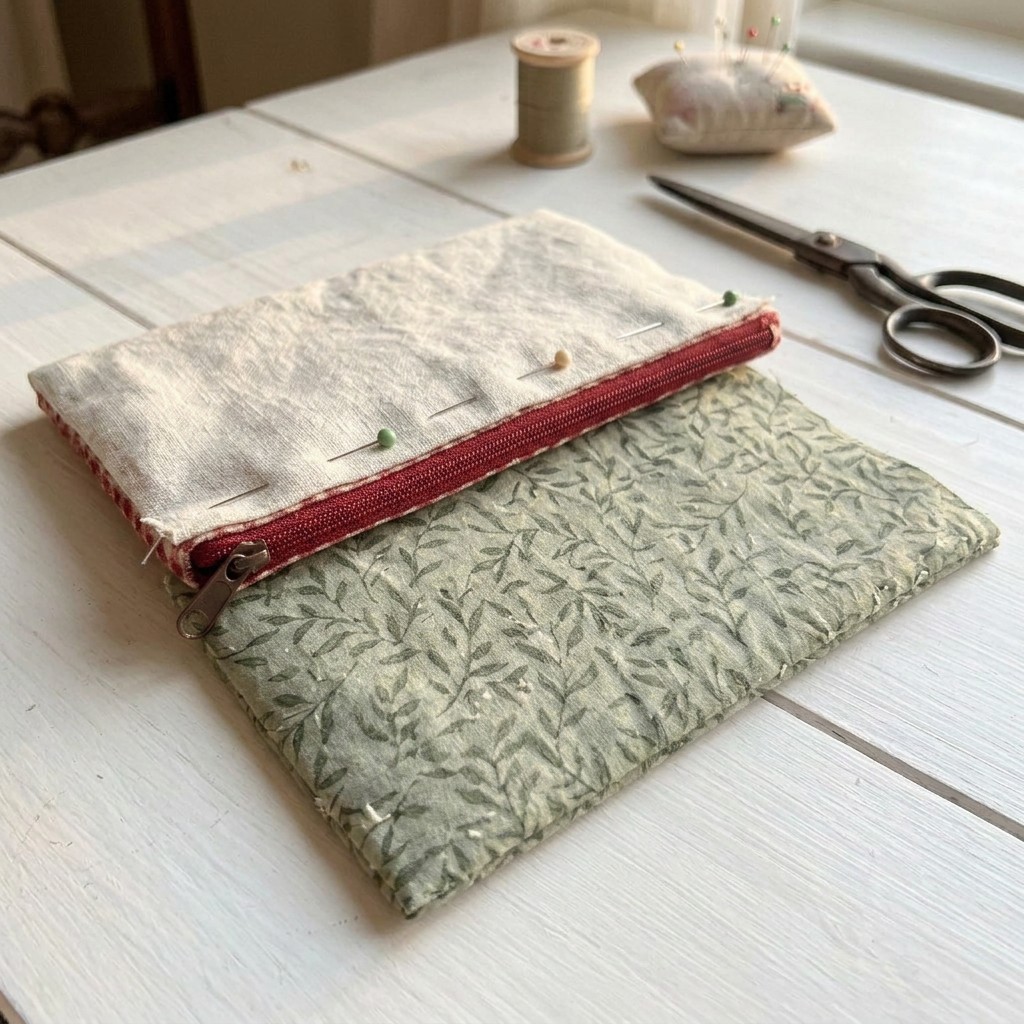
Attaching the First Side of the Zipper
- Layer the first fabric sandwich: Lay one interfaced exterior panel right side facing up on your workspace. Place the zipper face down along the top edge of the fabric, aligning the zipper tape edge with the raw edge of the fabric. Lay one lining panel face down on top, aligning all three top edges. Pin or clip the layers together securely.
- Stitch the first edge: Attach your machine’s zipper foot and set your stitch length to 2.5 mm. Sew through all three layers along the top edge using a 3/8 inch (1 cm) seam allowance. When you approach the zipper pull, drop the needle into the fabric, raise the presser foot, slide the pull past the foot, lower the foot, and continue sewing to the end.
- Press the fabric layers open: Flip both the exterior and lining fabrics away from the zipper teeth so the wrong sides face each other. Press the fabric flat with a hot iron, pulling gently away from the zipper teeth to ensure the fabric does not roll over the teeth.
- Topstitch the first side: Switch to a standard presser foot or keep the zipper foot attached, and lengthen your stitch to 3.0 mm. Topstitch 1/8 inch (3 mm) away from the folded fabric edge parallel to the zipper to secure the lining and prevent it from catching in the zipper teeth during daily use.
Pro tip: Adjusting your stitch length to 3.0 mm for topstitching creates clean, professional-looking thread definitions across the top edge of your pouch.
Attaching the Second Side of the Zipper
- Layer the second side: Lay the remaining interfaced exterior panel right side up. Place the unattached edge of the zipper face down along the top edge of this panel. Place the second lining panel face down on top of the zipper tape, aligning the top raw edges. Pin or clip through all layers.
- Sew the second seam: Using your zipper foot and a 2.5 mm stitch length, sew along the top edge using a 3/8 inch (1 cm) seam allowance. Slide the zipper pull out of the way mid-seam just as you did on the first side.
- Press and topstitch the second side: Fold the exterior and lining panels away from the zipper, press thoroughly with your iron, and topstitch 1/8 inch (3 mm) from the fold along the zipper tape.
Sewing and Turning the Pouch
- Open the zipper: Unzip the zipper at least halfway. This step is critical; if the zipper remains closed, you will not be able to turn the pouch right side out later.
- Arrange the panels: Pull the two exterior panels together with right sides facing, and pull the two lining panels together with right sides facing. The zipper teeth must fold toward the lining side of the project. Pin around the entire outer rectangle, matching the exterior bottom edges, the lining bottom edges, and the side seams where the zipper tape meets.
- Sew the outer perimeter: Using a standard presser foot, sew around the entire perimeter using a 3/8 inch (1 cm) seam allowance, pivoting at each 90-degree corner. Start at the bottom edge of the lining, sew around the perimeter, and stop along the lining bottom, leaving a 3-4 inch (8-10 cm) opening in the center of the lining edge for turning. Backstitch securely at the start and end of this opening.
- Trim the corners: Clip across all four fabric corners at a 45-degree angle, taking care not to cut through your stitches. Trimming reduces bulk so your finished corners push out cleanly.
- Turn the pouch right side out: Reach through the opening in the lining, grasp the exterior fabric, and gently pull the entire pouch through the opening. Reach inside to push out each corner using a point turner or a blunt wooden chopstick.
- Close the lining opening: Fold the raw edges of the 3-4 inch lining opening inward by 3/8 inch (1 cm) so they align with the sewn seam. Press the fold flat. Edgestitch the opening closed 1/16 inch (1.5 mm) from the edge on your sewing machine, or sew it closed using a hand slipstitch for an invisible finish.
Finishing and Pressing for a Professional Look
Push the completed lining down into the exterior pouch body, smoothing it flat against the bottom corners. Work your fingers into the top corners next to the zipper ends to ensure the zipper tape folds inward neatly. A thorough final pressing is what separates homemade crafts from polished accessories.
Set your iron to the appropriate heat setting for your fabric (medium-high for cotton and linen) and use steam to press the pouch flat on both sides. Press firmly along the bottom and side seams to establish sharp, crisp edges. Let the fabric cool completely on your ironing board before opening and closing the zipper, which sets the structure permanently into place.
Variations and Customizing Your Pouch
Once you are comfortable with the basic construction, you can adapt the design to create distinct looks using simple fabric and thread combinations.
- High-Contrast Linings: Pair a neutral linen-look exterior with a vibrant printed cotton lining for an eye-catching surprise when you unzip the pouch.
- Contrasting Metal Zippers: Use an antique brass or bright gold metal zipper on dark botanical cotton to create a modern, high-end aesthetic.
- Decorative Topstitching: Use a heavyweight topstitching thread (size 30 or 40) in a contrasting color along the zipper tape to highlight clean stitch lines.
- Color-Blocked Panels: Cut the exterior front and back panels from two coordinating solid fabrics to give your pouch a modern two-tone appearance.
Troubleshooting Common Sewing Issues
If your pouch shows uneven lines or distorted seams, check this troubleshooting guide to identify and correct the underlying cause.
| Problem | Likely Cause | Fix |
|---|---|---|
| Wavy or puckered fabric along the zipper | Fabric stretched while sewing against the zipper tape | Use more pins or clips to hold layers evenly; avoid pulling the fabric as it feeds under the presser foot. |
| Needle hits zipper pull and creates crooked stitches | Sewing directly past the bulky slider mechanism | Stop with needle down in the fabric, raise presser foot, and slide the zipper pull behind the foot before resuming. |
| Blunt, rounded corners after turning | Excess seam allowance fabric trapped inside corner points | Clip corner seam allowances at a 45-degree angle before turning, and use a blunt point turner to push out fabric gently. |
| Uneven side seams where zipper ends meet | Panels shifted out of alignment during perimeter pinning | Baste the zipper ends and seam junctions together with a couple of hand stitches before sewing the full perimeter. |
Care and Washing Instructions
Handmade cotton and linen zipper pouches hold up well to regular use when washed with gentle methods. Spot cleaning with a damp cloth and mild liquid soap is best for minor smudges and preserves the crispness of the interfacing. For a deeper clean, hand wash the pouch in cool water with a mild detergent, or place it inside a mesh laundry bag on a gentle machine cycle.
Reshape the pouch while it is still damp and lay it flat to air dry; avoid tumble drying, as high dryer heat can shrink cotton linings and warp nylon zipper coils. Once the pouch is dry, press it with a warm steam iron to restore crisp edges and eliminate surface wrinkles, taking care not to place the hot iron directly over metal or nylon zipper teeth.
Frequently Asked Questions
What size zipper do I need for this pouch?
You need a zipper that is at least 8 in (20 cm) long. If your zipper is slightly longer, you can easily let the excess length hang past the edge of the fabric panels and trim it flush with your seam allowance after stitching.
Can I make this zipper pouch without a zipper foot?
While a zipper foot makes it significantly easier to sew close to the zipper teeth without deflecting the needle, you can use a standard presser foot if you adjust your needle position all the way to the left or right to clear the teeth.
Why do I need to leave the zipper open before sewing the sides?
You must leave the zipper at least halfway open because the pouch is sewn completely closed around the entire outer perimeter. If the zipper is fully closed, you will have no opening to turn the pouch right side out from the lining.
How do I prevent my fabric from puckering along the zipper?
Prevent puckering by fusing interfacing to your exterior panels, using plenty of sewing clips, and allowing the machine feed dogs to pull the fabric naturally without tugging or stretching the zipper tape as you stitch.
Your Completed Zipper Pouch Project
You have successfully constructed a clean, durable flat zipper pouch with fully lined interior seams and crisp topstitching. This beginner zipper pouch tutorial establishes the foundation for accurate zipper insertion, proper interfacing use, and neat seam finishing across all your future sewing projects. For your next pouch, try experimenting with bold fabric prints and coordinating zipper colors to expand your everyday accessory collection.