In this post
- At a Glance: Fabric Book Cover Tutorial Essentials
- Why You Will Love This Beginner Sewing Project
- Materials and Tools Needed
- Choosing the Right Fabric for Your Book Cover
- Complete Step-by-Step Instructions and Pattern
- Variations and Customizing
- Troubleshooting Common Sewing Issues
- Care and Washing Instructions
- Frequently Asked Questions
- Enjoy Your Handmade Book Cover
Protecting your favorite notebooks and novels from daily wear does not require complex techniques or expensive supplies. This fabric book cover tutorial walks you through sewing a durable, reusable slipcover designed to fit a standard A5 notebook or paperback book. Even if you are completely new to sewing, you can complete this practical accessory in about 1 hour using basic straight seams and lightweight woven fabrics.
A handmade cover shields paper edges from getting bent in your tote bag while letting you personalize plain journals. You will practice fundamental construction skills, including applying fusible interfacing to add structure, sewing interior sleeve flaps, and topstitching crisp perimeter edges. The finished dimensions are width 13.5 in, length 9 in, making it a weekend project that yields practical results.
At a Glance: Fabric Book Cover Tutorial Essentials
Before cutting into your yardage, understanding the project scope helps you plan your workspace and sewing time effectively.
| Project Parameter | Specification |
|---|---|
| Skill Level | Beginner |
| Estimated Time | 1 hour |
| Finished Size | 13.5 in (34.3 cm) wide by 9 in (22.9 cm) high flat |
| Book Compatibility | Standard A5 notebook or book up to 8.3 x 5.8 in (21 x 14.8 cm) with up to 0.75 in (1.9 cm) spine |
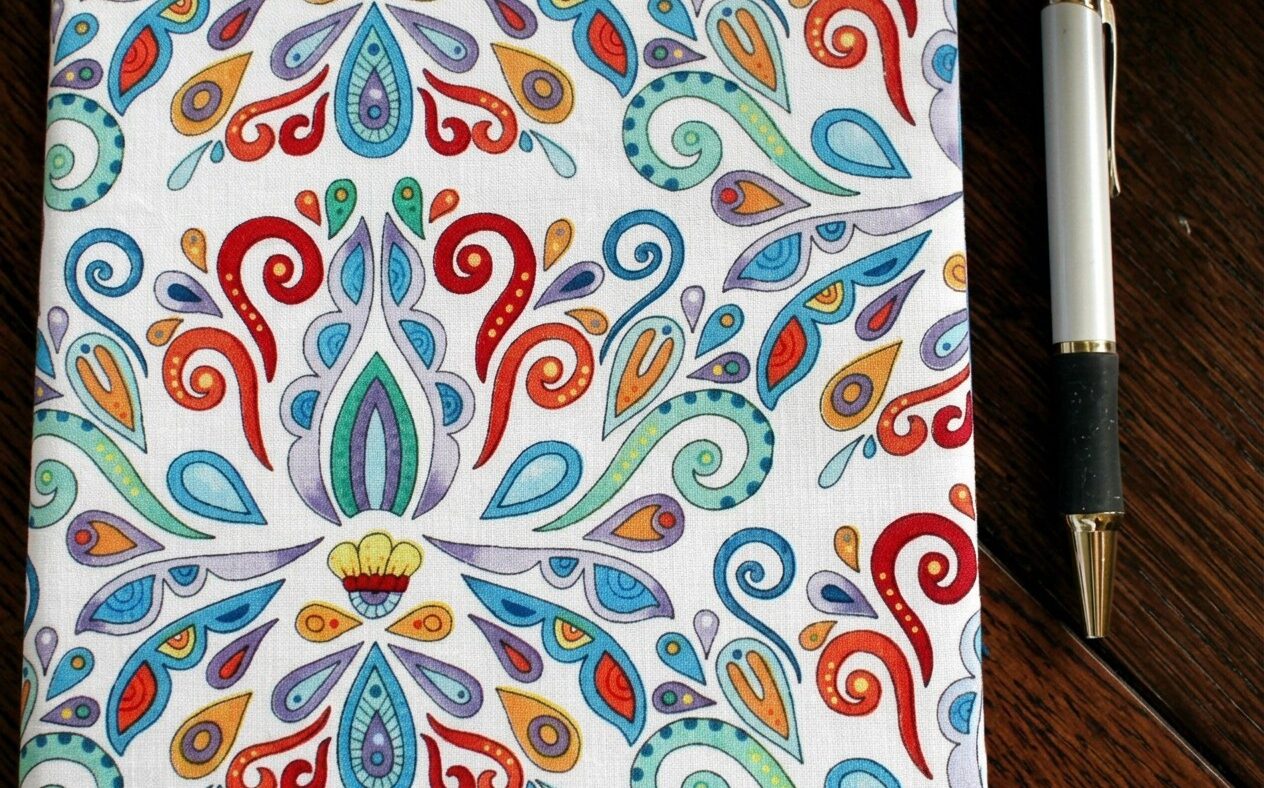
| Main Fabric | Medium-weight quilting cotton (paisley/floral print) |
| Seam Allowance | 3/8 in (1 cm) throughout |
| Key Techniques | Fusible interfacing, straight stitching, corner pivoting, edge topstitching |
Why You Will Love This Beginner Sewing Project
Sewing straight lines on rectangular pieces provides an approachable way to practice accurate seam allowances without the stress of fitting garments or navigating tight curves. Because this project uses simple geometric shapes, your cutting precision directly translates into sharp, balanced corners on the finished slipcover.
Working with interior flaps teaches you how layered construction works in accessory sewing. You will sandwich folded panels between the exterior and lining fabrics, sew around the outside edge, and turn the whole piece right side out to reveal fully enclosed, clean-finished seams. This fundamental sewing method applies directly to tote bags, placemats, and lined pouches.
Pro tip: Take your time pressing every seam as you sew. In flat accessory projects, thorough pressing creates sharper edges and flatter flaps than extra stitching alone ever could.
Materials and Tools Needed
- 1/2 yd (0.5 m) main exterior fabric (44 in / 112 cm wide, medium-weight quilting cotton with paisley/floral print)
- 1/2 yd (0.5 m) lining fabric (44 in / 112 cm wide, solid or coordinating medium-weight quilting cotton)
- 1/2 yd (0.5 m) fusible interfacing (20 in / 50 cm wide, lightweight fusible woven or non-woven interfacing)
- 100% all-purpose polyester sewing thread in coordinating color
- Sewing machine with standard presser foot
- Universal sewing machine needle size 80/12
- Steam iron and ironing board
- Rotary cutter, acrylic ruler, and cutting mat (or fabric shears)
- Sewing pins or wonder clips
- Point turner or blunt wooden chopstick
- Measuring tape
Choosing the Right Fabric for Your Book Cover
Medium-weight quilting cotton works well for both the exterior and lining of this project. It holds a crisp press, feeds smoothly through the sewing machine feed dogs without shifting, and comes in countless colors and prints. A smooth cotton featuring a colorful paisley or floral motif creates a vibrant exterior that contrasts nicely with a solid or subtle coordinating lining.
Lightweight canvas also works well for the main outer panel if you want added surface durability. However, avoid slippery synthetics like satin, stretchy knits, or heavy upholstery materials. Stretchy fabrics will warp out of shape when sliding over notebook covers, while heavy upholstery fabrics create excessive bulk in the folded flap seams, making corner turning difficult and uneven.
Pro tip: Pre-wash and dry your cotton fabric before cutting. Cotton shrinks slightly on its first wash, so preshrinking ensures your finished cover retains its exact dimensions and fit around your notebook.
Complete Step-by-Step Instructions and Pattern
Follow the precise cutting dimensions and assembly sequence below to construct your cover.
Finished size: 13.5 in (34.3 cm) wide by 9 in (22.9 cm) high flat; fits standard A5 notebook or book up to 8.3 x 5.8 in (21 x 14.8 cm) with up to 0.75 in (1.9 cm) spine thickness
Sizing
| Size | Fits Book Dimensions | Cover Open Width | Cover Height |
|---|---|---|---|
| Standard A5 | Up to 5.8 x 8.3 x 0.75 in (14.8 x 21 x 1.9 cm) | 13.5 in (34.3 cm) | 9 in (22.9 cm) |
Cutting Chart
| Piece | Cut | Fabric | Size (W x H) |
|---|---|---|---|
| Outer panel | 1 | main | 14.25 in (36.2 cm) x 9.75 in (24.8 cm) |
| Flap sleeves | 2 | main | 8 in (20.3 cm) x 9.75 in (24.8 cm) |
| Lining panel | 1 | lining | 14.25 in (36.2 cm) x 9.75 in (24.8 cm) |
| Interfacing panel | 1 | interfacing | 14.25 in (36.2 cm) x 9.75 in (24.8 cm) |
Seam allowance: 0.375 in (1.0 cm) unless a step says otherwise. All measurements include seam allowance.
Pattern Notes
- All seam allowances are 3/8 in (1 cm) unless otherwise specified.
- Pre-wash, dry, and press all cotton fabrics prior to cutting to prevent post-sewing shrinkage.
- Backstitch 3 to 4 stitches at the start and end of every seam line to secure.
- Set sewing machine stitch length to 2.5 mm for main construction seams, and 3.0 mm for topstitching.
- To customize for books of different sizes: measure book height and add 1.5 in (3.8 cm) for cut height; measure book total wrap width (front cover + spine + back cover) and add 1.25 in (3.2 cm) for cut width.
Step 1: Preparation and Interfacing
- Place the 14.25 x 9.75 in (36.2 x 24.8 cm) main exterior fabric piece wrong side up on your ironing board.
- Align the fusible interfacing piece adhesive (rough/textured) side down on top of the wrong side of the main exterior fabric piece, matching all four raw outer edges.
- Using a hot steam iron, press firmly in overlapping sections for 10 to 15 seconds per area to fuse the interfacing securely to the main fabric. Allow the fused piece to cool completely flat on the board.
Step 2: Flap Preparation and Layering
- Take both 8.0 x 9.75 in (20.3 x 24.8 cm) flap pieces and fold each one in half lengthwise with wrong sides facing together, forming two folded rectangular flaps measuring 4.0 x 9.75 in (10.2 x 24.8 cm).
- Press the folded edge of each flap sharply with steam to create a crisp, permanent crease.
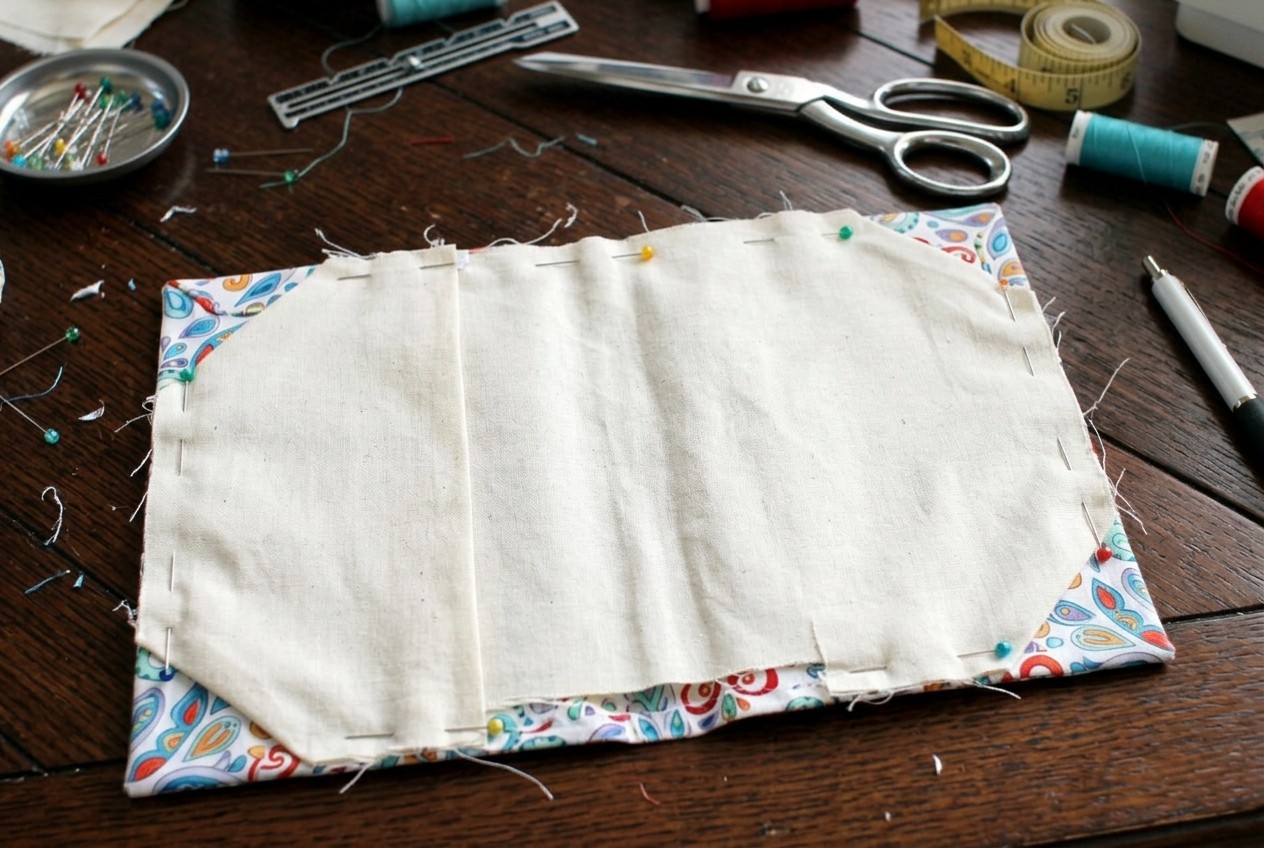
- Place the interfaced main exterior panel right side facing UP on your flat work surface.
- Place one folded flap on the far left side of the main panel, aligning the raw outer edges of the flap with the left, top, and bottom raw edges of the main panel; the pressed fold must face toward the center.
- Place the second folded flap on the far right side of the main panel, aligning raw outer edges with the right, top, and bottom edges; the pressed fold must face toward the center.
- Place the 14.25 x 9.75 in (36.2 x 24.8 cm) lining panel right side facing DOWN on top of the exterior panel and flaps, sandwiching the two folded flaps securely between the outer and lining layers.
- Pin or clip all layers together around the entire perimeter, marking a 3.5 in (9 cm) turning opening centered along the bottom edge with two double pins.
Step 3: Perimeter Seaming and Turning
- Starting at the first pin of the marked turning gap on the bottom edge, stitch around the perimeter using a 3/8 in (1 cm) seam allowance, backstitching firmly at the start.
- Sew toward the first corner, stopping exactly 3/8 in (1 cm) from the edge with the needle down in the fabric; raise the presser foot, pivot 90 degrees, lower the presser foot, and continue sewing.
- Continue sewing around all four sides, pivoting cleanly at every corner, and stop at the second pin of the turning opening. Backstitch securely, leaving the 3.5 in (9 cm) gap unstitched.
- Clip all four corners diagonally using sharp fabric shears, cutting close to the corner stitches (about 1/16 in or 1.5 mm away) without cutting through the thread to reduce corner bulk.
- Reach through the bottom turning opening between the lining and exterior fabric, grasp the far corners, and carefully turn the entire book cover right side out.
- Gently poke out each of the four outer corners using a point turner or blunt chopstick until crisp and square.
Finishing
- Tuck the raw seam allowances of the 3.5 in (9 cm) turning opening inward by 3/8 in (1 cm) so they align flush with the sewn bottom seam.
- Press the entire book cover thoroughly flat with a steam iron, rolling the seam slightly toward the lining side so the lining is not visible from the exterior.
- Pin or clip the pressed turning opening securely closed.
- Set sewing machine stitch length to 3.0 mm for a clean topstitch finish.
- Topstitch around the entire perimeter of the book cover 1/8 in (3 mm) from the outer edge, pivoting at each corner. This seals the turning gap closed and gives the cover a polished edge.
- Give the finished book cover a final press with steam on both sides.
- Insert the front and back covers of your A5 notebook or book into the interior fabric flaps and close.
Variations and Customizing
Once you are comfortable with the basic construction, you can adapt the design to fit different style preferences. You can combine contrasting prints by using one fabric for the outer panel and an entirely different pattern for the interior flap sleeves. This reveals an unexpected flash of color whenever you open your book.
While this specific pattern is calculated for standard A5 books (up to 8.3 x 5.8 in / 21 x 14.8 cm), the construction logic remains identical if you ever draft your own custom templates for oversized art journals or compact paperbacks. Keep in mind that heavy textured fabrics or specialty materials will require needle and thread adjustments, whereas crisp quilting cotton gives consistent results.
Troubleshooting Common Sewing Issues
If your project does not turn out as expected, check these common beginner issues and their straightforward solutions.
| Problem | Probable Cause | Recommended Fix |
|---|---|---|
| Bulky, rounded outer corners after turning | Excess fabric trapped inside the corner seam allowance | Clip the corner seam allowance diagonally 1/16 in (1.5 mm) from the stitching line before turning. Use a point turner to gently work the corner square. |
| Lining fabric rolls outward and shows on the exterior | Uneven pressing before topstitching | Roll the perimeter seam slightly toward the lining side while pressing with steam so the exterior fabric wraps around the edge by 1 mm. |
| Skipped stitches during perimeter topstitching | Dull needle or stitching too quickly over flap bulk | Install a fresh universal 80/12 needle. Maintain a consistent 3.0 mm stitch length and sew at a controlled pace across the layered flap edges. |
| Interfacing bubbling or peeling away from the cotton | Insufficient heat, steam, or pressing time during fusing | Re-press with a hot steam iron, pressing firmly in one spot for a full 10 to 15 seconds without sliding the iron across the surface. |
Care and Washing Instructions
Proper maintenance ensures your cotton book cover stays clean and maintains its structured shape through repeated use. Machine wash cold on gentle cycle with mild detergent; reshape and lay flat to dry, then press with warm steam iron.
Frequently Asked Questions
Can I make this book cover without fusible interfacing?
You can sew the cover without interfacing, but the finished slipcover will be soft and floppy. Fusible interfacing provides essential body and crispness, preventing the cotton from bunching when you open and close your notebook.
How do I adjust the pattern for a thicker book or journal?
This pattern is sized specifically for books up to 0.75 in (1.9 cm) spine thickness. Other book sizes are not covered by this specific pattern, as altering the dimensions requires recalculating the outer width, flap depth, and seam allowances.
What is the best stitch length for topstitching?
A stitch length of 3.0 mm works well for topstitching around the outer edge. This longer stitch sits neatly on top of the fabric layers, creating a clean line and sealing the 3.5 in (9 cm) turning opening securely.
Can I use canvas instead of quilting cotton for the exterior?
Yes, lightweight canvas works well for the main exterior panel. If you choose lightweight canvas, keep the lining and flaps in standard quilting cotton to prevent excessive bulk in the folded side seams.
Enjoy Your Handmade Book Cover
Completing this fabric book cover tutorial gives you a durable, stylish accessory that keeps your journal pages clean and protected wherever you go. Taking the extra time to press seams thoroughly and topstitch at a measured pace produces a clean, professional finish on every edge. Slide your favorite A5 notebook into the sturdy interior flaps, slip a pen into your bag, and enjoy your custom handmade creation on your next reading or writing session.