In this post
- At a Glance
- Why This Project Works and What You Will Learn
- Materials and Tools Needed
- Choosing the Right Fabric for Your Organizer Bag
- Cutting Chart and Preparation
- Step 1: Constructing the Pockets
- Step 2: Sewing the Organizer Bag Base and Handles
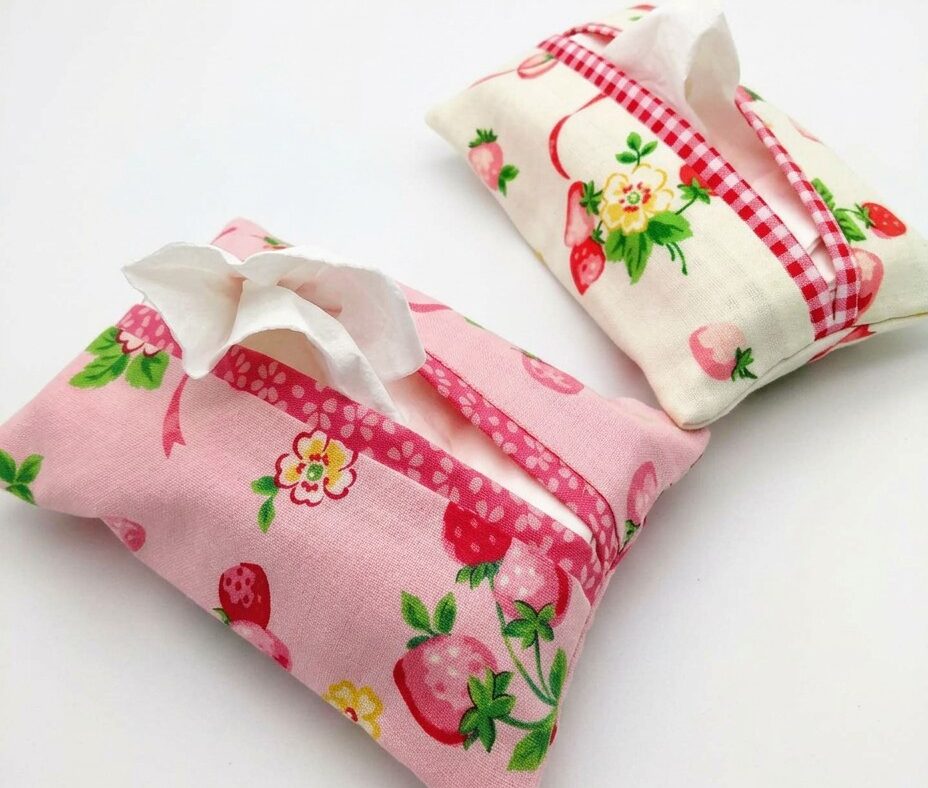
- Step 3: Creating the Fabric Tissue Pouch
- Finishing, Pressing, and Final Details
- Variations and Customizing Your Set
- Troubleshooting Common Beginner Issues
- Care and Washing Instructions
- Frequently Asked Questions
- Putting Your Finished Organizer Set to Work
Learning how to sew an organizer bag gives you full control over your daily clutter while teaching you practical foundational stitching skills. When you sew an organizer bag and a coordinating pocket tissue pouch, you create a functional, durable home storage system that holds toiletries, crafting tools, or everyday accessories. This dual-item project is designed specifically for a confident beginner who knows basic machine operations and wants to tackle straight-line topstitching, clean hems, and structured pockets. Over the course of 2-3 hours, you will master measuring, dividing compartments, and sewing clean overlapping envelope openings without complicated hardware. By pairing durable canvas with bright cotton prints, you will produce a neat, hard-working set tailored to your exact storage needs.
At a Glance
Before preparing your fabric pieces, review the project specifications to ensure you have allocated enough time and workspace for both items.
| Skill Level | Confident beginner |
|---|---|
| Time to Complete | 2-3 hours |
| Finished Size | Varies (customizable base and pockets) |
| Main Fabrics | Medium-weight cotton canvas, quilting cotton |
| Key Techniques | Topstitching, pocket dividers, envelope folds |
Why This Project Works and What You Will Learn
Everyday storage items must balance structure with accessibility. This project avoids complex closures like zippers or snaps, relying instead on clean construction methods, smart fabric choices, and precise pressing to create functional compartments. The open-top pocket layout lets you view contents at a glance, while the self-fabric straps support everyday handling.
Working through this tutorial builds essential precision habits on your sewing machine. You will practice:
- Double-folded hems on exposed pocket edges to prevent fraying.
- Parallel vertical topstitching to create customized divided pockets.
- Reinforcing pocket stress points using neat backstitching.
- Constructing an overlapping envelope opening for the tissue pouch that requires no fasteners.
Materials and Tools Needed
Using the correct combination of stable textiles and matching notions ensures your pockets hold their shape when filled with heavy items like phones or bottles.
- 1 yard (0.9 m) medium-weight cotton canvas or striped fabric: Provides the structured base panel, handles, and lower slip pockets.
- 1/2 yard (0.5 m) floral quilting cotton: Creates lightweight, colorful pocket accents and the body of the tissue pouch.
- 1/4 yard (0.25 m) red gingham fabric: Used for contrasting trims, decorative bands, and pouch accents.
- Matching all-purpose polyester thread: Offers strength and slight give under seam tension.
- Sewing machine: Set to a standard straight stitch.
- Universal sewing needles size 80/12: Pierces through multiple layers of medium canvas and cotton cleanly.
- Fabric shears: For cutting crisp, straight edges along the grainline.
- Iron and ironing board: Essential for setting sharp folds and flat seams.
- Pins or sewing clips: Keeps thick layers from shifting during topstitching.
Choosing the Right Fabric for Your Organizer Bag
A successful organizer bag depends heavily on structural stability. Medium-weight cotton canvas (around 7 to 9 oz) works best for the main body because it holds its shape against gravity without requiring stiff synthetic interfacings. Cotton duck, twill, or structured linen blends provide similar stability. Avoid lightweight apparel cottons, silks, or stretchy knits for the main panel, as they will sag, stretch, and pull away from the base when the pockets are loaded.
For the pocket overlays and the companion tissue pouch, standard quilting cotton is suitable. It is easy to cut, folds sharply when pressed with a hot iron, and adds bright visual contrast against a neutral canvas base. Wash and dry all cotton fabrics before cutting to prevent uneven shrinking later.
Cutting Chart and Preparation
Wash your fabrics in cool water, tumble dry on low, and press them flat with steam to remove all wrinkles along the grainline before measuring.
| Piece Name | Fabric | Quantity | Cut Dimensions |
|---|---|---|---|
| Main Organizer Base | Cotton Canvas | 2 | 14 in x 18 in (35.5 cm x 45.7 cm) |
| Lower Slip Pocket | Cotton Canvas or Striped | 1 | 14 in x 10 in (35.5 cm x 25.4 cm) |
| Upper Accent Pocket | Floral Quilting Cotton | 1 | 14 in x 8 in (35.5 cm x 20.3 cm) |
| Handles / Straps | Cotton Canvas | 2 | 4 in x 16 in (10.2 cm x 40.6 cm) |
| Tissue Pouch Body | Floral Quilting Cotton | 1 | 6 in x 7.5 in (15.2 cm x 19 cm) |
| Tissue Pouch Trim | Red Gingham Cotton | 2 | 1.5 in x 6 in (3.8 cm x 15.2 cm) |
Step 1: Constructing the Pockets
Preparing the pocket pieces accurately ensures that the compartments sit flat against the canvas backing and do not gap open awkwardly.
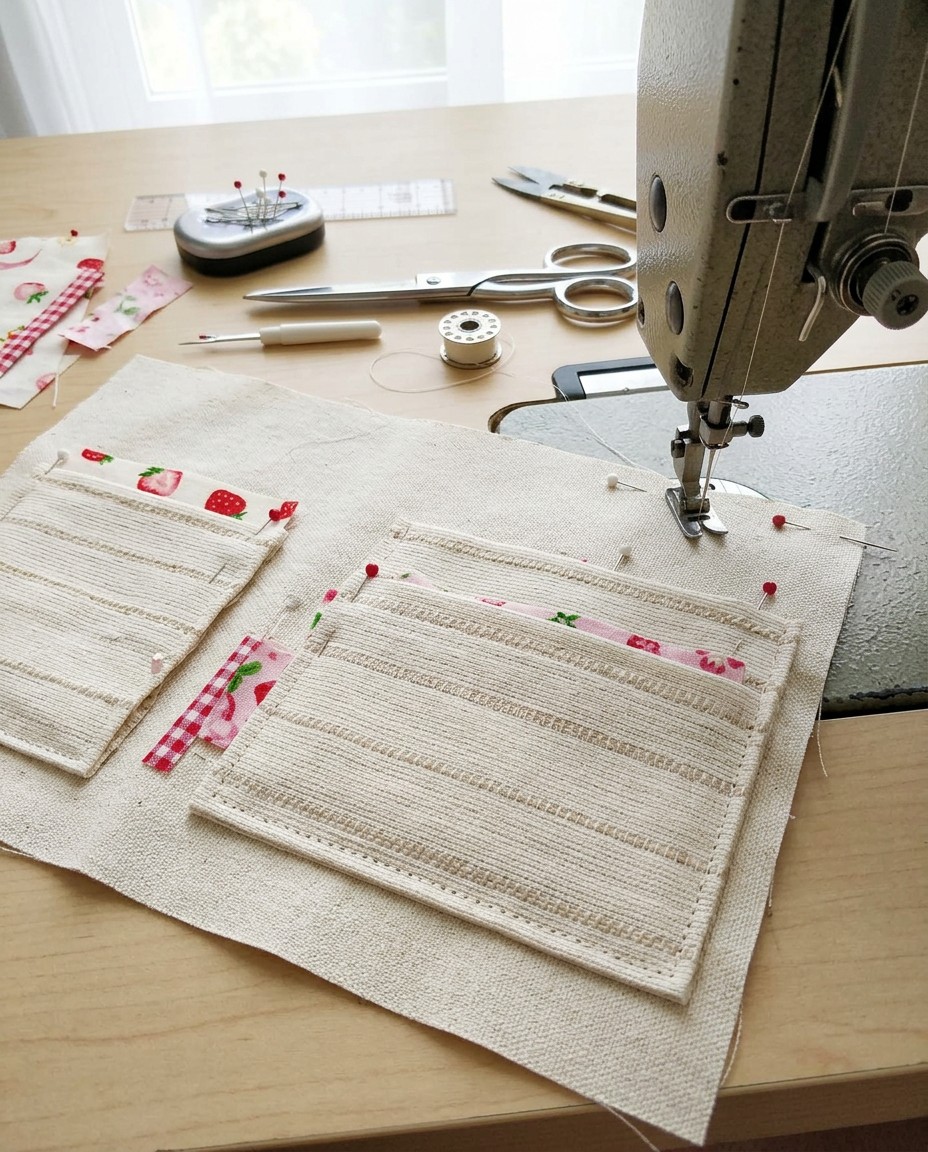
Hemming and Dividing Pockets
- Hem the top edges: Turn the top raw edge of the lower canvas pocket piece to the wrong side by 1/2 inch (1.3 cm), press with a hot iron, fold it over another 1/2 inch (1.3 cm) to encase the raw edge, and press again. Repeat this double-fold hem for the floral upper pocket piece.
- Stitch the hems: Using a 2.5 mm stitch length, edge-stitch along the lower fold of each hem, roughly 1/8 inch (3 mm) from the pressed crease.
- Layer onto the base panel: Place one main canvas base piece flat, right side facing up. Lay the lower canvas pocket along the bottom edge, aligning the side and bottom raw edges. Position the floral pocket above or overlapping as desired, pinning all raw edges securely.
- Mark the pocket dividers: Use a fabric marking pen or tailor’s chalk to draw vertical lines where you want your dividers. Common widths include 3.5 inches (8.9 cm) for phones or card cases and 1.5 inches (3.8 cm) for pens.
- Sew the divider channels: Stitch directly over the drawn vertical lines from the bottom raw edge up to the hemmed top of the pocket. Backstitch 3 to 4 stitches at the upper hem to reinforce the stress point, then pivot and stitch directly back down over your line to provide maximum reinforcement.
Pro tip: Always stitch pocket dividers from the bottom edge upward to the hem. If you sew downward, the presser foot can push excess fabric toward the bottom seam, causing unsightly bubbles.
Step 2: Sewing the Organizer Bag Base and Handles
Securing the outer boundaries of your pockets locks all raw edges in place before assembling the outer frame and handles.
Attaching Straps and Topstitching
- Baste pocket perimeters: Sew a basting line 1/4 inch (6 mm) away from the side and bottom edges through all layers to secure the pockets to the front base panel.
- Fold the handles: Take the two canvas handle strips and press each in half lengthwise, wrong sides together. Open the fold, fold each long outer edge in to meet the center crease line, and press. Fold in half again along the original center crease so raw edges are completely enclosed inside a 1-inch (2.5 cm) wide strap.
- Topstitch the straps: Topstitch 1/8 inch (3 mm) away from both long outer edges on each handle using an elongated 3.0 mm stitch length for a clean appearance.
- Position the straps: Pin the handle ends to the top edge of your front and back base panels, spaced 4 inches (10.2 cm) apart from the center, with raw edges aligned and strap loops pointing downward across the panel. Baste in place.
- Join base panels: Place the front organizer panel (with pockets and handles) and the back canvas panel right sides together. Pin the side and bottom edges. Sew along the two sides and the bottom using a 1/2 inch (1.3 cm) seam allowance, leaving the top edge open.
- Finish top opening and topstitch: Turn the top raw edge of the bag inward by 1/2 inch (1.3 cm), press, turn inward another 1/2 inch (1.3 cm), and press flat. Pin the hem, flipping the handles straight up so they extend above the bag opening. Topstitch around the entire top perimeter 1/8 inch (3 mm) from the edge, securing the handles upright with a reinforced box or double stitch line.
Pro tip: When sewing across thick canvas layers at the strap junctions, manually turn the handwheel for two or three stitches to prevent needle deflection and skipped stitches.
Step 3: Creating the Fabric Tissue Pouch
A matching tissue cover coordinates with your organizer pockets and uses up leftover cotton prints while practicing neat enclosed corners.
Envelope Openings and Seams
- Finish short ends: Take the floral tissue pouch rectangle (6 in x 7.5 in / 15.2 cm x 19 cm). Turn the two shorter 6-inch (15.2 cm) raw edges to the wrong side by 1/4 inch (6 mm), press, fold over another 1/4 inch (6 mm), and edge-stitch to create neat end hems. Alternatively, bind these ends with the red gingham strips.
- Fold the envelope shape: Lay the floral piece flat, right side facing up. Fold the two hemmed short ends inward toward the center so they overlap each other by 1/2 inch (1.3 cm) at the middle. The piece should now measure approximately 3.5 inches (8.9 cm) by 6 inches (15.2 cm), with wrong sides facing out.
- Pin and sew side seams: Pin the raw side edges securely through all folded layers. Stitch down each raw side using a 1/2 inch (1.3 cm) seam allowance. Backstitch firmly across the central overlap points to reinforce the opening against pulling.
- Clip and turn: Carefully trim the corners at a 45-degree angle without cutting into your stitching line to eliminate bulk. Turn the pouch right side out through the center slit.
- Shape the corners: Gently push out each corner using a blunt point turner or wooden chopstick, then press the pouch completely flat with steam.
Finishing, Pressing, and Final Details
Proper pressing transforms newly sewn items from homemade to professional by melding the thread into the cotton fibers. Set your iron to the cotton/linen steam setting. Press the outer seams of the organizer bag flat on both sides, ensuring the pocket bottoms are completely crisp. If seam bulk inside the bag feels stiff, press the internal seam allowances open or finish them with pinking shears to keep the interior tidy. Give the finished tissue pouch a final shot of steam, then insert a standard pocket tissue pack through the overlapping center slit.
Variations and Customizing Your Set
You can adapt the dimensions and layouts of these two items to suit specific items in your workspace or vehicle.
- Hanging car or closet organizer: Lengthen the main canvas panel by 6 inches (15.2 cm) and add three stacked pocket tiers to hold maps, water bottles, and sunglasses.
- Strawberry print pocket pouch: Swap the floral fabric for a strawberry-printed quilting cotton paired with a red gingham accent band along the envelope opening.
- Notions and tool organizer: Sew divider lines every 1 inch (2.5 cm) along the upper floral pocket to create specialized slots for fabric shears, seam rippers, and marking pens.
- Contrast fabric binding: Enclose the raw exposed edges of your pockets in red gingham bias binding before attaching them to the canvas base for extra color.
Troubleshooting Common Beginner Issues
Working through multiple layers of canvas and cotton can occasionally cause machine tension or feeding irregularities.
| Problem | Likely Cause | Fix |
|---|---|---|
| Topstitching stitches look uneven or skipped | Dull needle or wrong needle size for canvas layers | Install a fresh universal size 80/12 needle; lengthen stitch to 3.0-3.5 mm. |
| Pockets flare open and sag away from the canvas base | Pocket piece cut slightly wider than the base or not pulled taut | Smooth the pocket flat, pin from center outward, and ensure dividers are stitched straight. |
| Bulky corners on the tissue pouch look rounded when turned | Excess seam allowance trapped in the corner points | Turn pouch wrong side out, clip corner triangles closer to stitch line, and repoint gently. |
| Fabric layers shifting while sewing vertical dividers | Presser foot dragging on upper cotton layer | Use sewing clips or extra pins placed horizontally; consider lowering presser foot pressure slightly. |
Care and Washing Instructions
Both the canvas organizer and quilting cotton tissue pouch are fully washable. Machine wash in cool water on a gentle cycle using mild detergent. Avoid hot water washes, which can cause natural cotton canvas to shrink or soften excessively. Reshape the bag and pocket dividers while damp and hang to air dry. Once dry, press with a hot steam iron to restore crisp lines to the pockets and envelope folds.
Frequently Asked Questions
Can I use regular quilting cotton for the entire organizer bag?
You can, but quilting cotton lacks the necessary stiffness to support loaded pockets on its own. If you use quilting cotton for the main panels, you will need to reinforce it with medium-weight fusible interfacing to prevent the bag from collapsing.
How do I keep my pocket dividers straight while sewing?
Measure and mark your divider lines using tailor’s chalk or a water-soluble fabric pen aligned with an acrylic quilting ruler. Guide the presser foot slowly along the marked line, keeping your eyes on the guide marks rather than the needle.
What needle size should I use with cotton canvas?
A universal needle size 80/12 is suitable for combining medium-weight canvas with quilting cotton layers. If your canvas is especially heavy (over 10 oz) or you are sewing through more than four layers at the strap joins, switch to a size 90/14 jeans/denim needle.
How do I wash my handmade organizer bag without losing its shape?
Wash the organizer in cold water on a delicate cycle and lay it flat or hang it to dry rather than putting it in a hot dryer. Ironing the damp canvas with heavy steam will immediately restore its crisp, structured shape.
Putting Your Finished Organizer Set to Work
Completing this project proves that simple, well-measured construction techniques yield dependable, long-lasting storage tools. When you sew an organizer bag with structured vertical dividers and a matching tissue pouch, you turn basic cotton remnants into an efficient everyday set. Take a moment to test your pocket widths with real items, noting any custom dimensions you might want to adjust on your next version.