In this post
- At a Glance: Quilted Fabric Coasters Project Details
- Why These Quilted Fabric Coasters Make the Ultimate Scrap-Busting Project
- Materials and Tools Needed
- Choosing the Right Fabric for Absorbent Coasters
- Cutting Chart and Preparation
- Step 1: Piecing and Pressing the Patchwork Top
- Step 2: Layering, Basting, and Straight Line Quilting
- Step 3: Shaping, Trimming, and Edge Finishing
- Finishing, Pressing, and Care Instructions
- Variations and Customizing Your Coasters
- Troubleshooting Common Coaster Sewing Issues
- Frequently Asked Questions
- Start Stitching Your Coaster Set
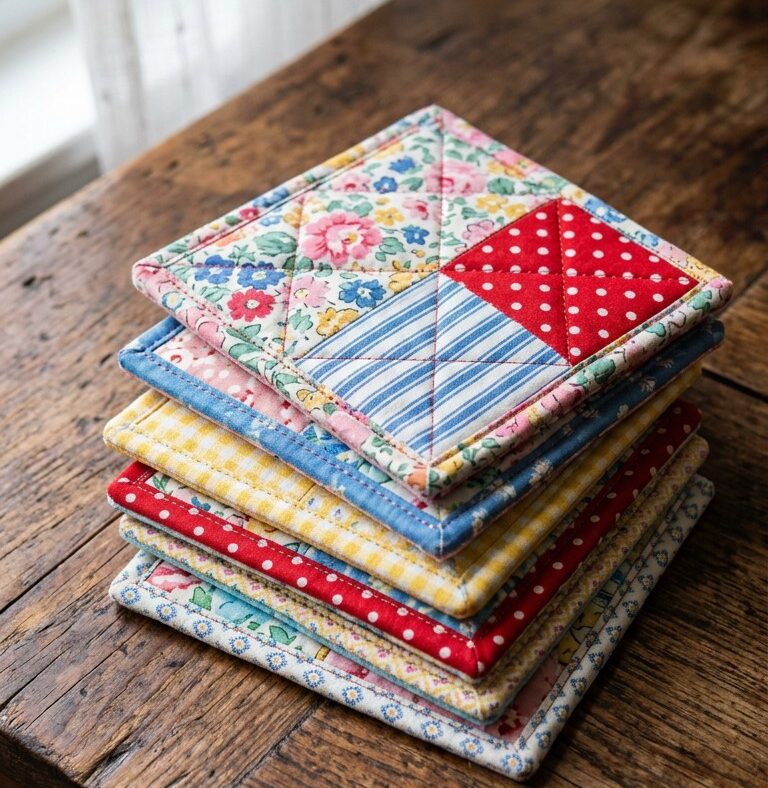
Learning how to make quilted fabric coasters is one of the most practical ways to turn small fabric offcuts into functional home decor. This beginner-friendly sewing project teaches you the core principles of patchwork piecing, layering a quilt sandwich, straight line topstitching, and shaping clean rounded corners. Each finished coaster measures approximately 4 x 4 inches (10 x 10 cm), providing a surface size suitable for everyday mugs and glassware. You can complete a full coaster in just 1 hour using basic quilting cotton scraps and a standard home sewing machine. Along the way, you will practice keeping an accurate 1/4 inch seam allowance and controlling multi-layered seams. Follow this step-by-step guide to transform your leftover prints into a coordinated set of quilted fabric coasters for your coffee table or desk.
At a Glance: Quilted Fabric Coasters Project Details
Before preparing your fabric pieces, review the essential specifications and technical requirements for this beginner project.
| Project Detail | Specification |
|---|---|
| Skill Level | Beginner |
| Time Required | 1 hour per coaster |
| Finished Size | Approx. 4 x 4 in (10 x 10 cm) |
| Main Fabric | Lightweight quilting cotton scraps |
| Key Techniques | Patchwork piecing, straight line quilting, rounded corner shaping |
| Seam Allowance | 1/4 in (6 mm) |
Why These Quilted Fabric Coasters Make the Ultimate Scrap-Busting Project
Working with small fabric patches allows you to practice essential quilting skills without the overwhelming bulk of a full-size quilt. Precision piecing on a 4 x 4 inch block requires careful seam alignment and consistent pressing, which establishes strong habits for larger sewing projects. Because the surface area is compact, you can experiment with combining polka dots, florals, stripes, and solids without buying new yardage.
These coasters also provide an accessible introduction to straight line quilting. Guiding small layers under your presser foot helps you understand how feed dogs pull multiple thicknesses of cotton and batting at once. You gain direct experience managing fabric bulk, pivoting neatly around curves, and finishing clean perimeter edges in a single afternoon.
Materials and Tools Needed
Having exact supplies pre-cut and organized at your workspace ensures smooth assembly from start to finish.
- Assorted scrap fabrics: 1/4 yard (0.25 m) of lightweight quilting cotton prints and solids
- Backing fabric: 1/4 yard (0.25 m) of coordinating quilting cotton
- Batting: 9 x 9 in (23 x 23 cm) piece of low-loft cotton quilt batting or polyester fleece
- Thread: Matching all-purpose polyester or cotton sewing thread (50 wt)
- Sewing machine: Standard domestic machine with straight stitch capability
- Needle: Universal sewing machine needle size 80/12
- Cutting tools: Rotary cutter, 45 mm self-healing cutting mat, and sharp fabric shears
- Ruler: Clear acrylic quilting ruler with precise 1/4 inch grid markings
- Pressing tools: Steam iron and a flat ironing board
- Fasteners: Fine sewing pins or plastic quilting clips
- Corner guide: Small round object (such as a thread spool or coin) for tracing curved corners
Choosing the Right Fabric for Absorbent Coasters
Selecting the proper textile structure helps your coaster protect surfaces under glasses and mug bases. Lightweight 100% quilting cotton is the industry standard for this project. Its plain-weave construction holds crisp creases when pressed and resists shifting under the presser foot.
Avoid slippery synthetic fabrics such as polyester satin, rayon, or nylon blends. Synthetic weaves tend to melt or distort under high iron temperatures. Heavyweight upholstery fabrics or thick canvas should also be avoided for this specific patchwork design, as joining small pieces creates excessive bulk in the 1/4 inch seam allowances.
Pro tip: Always pre-wash and press your cotton scraps using steam before cutting. Pre-shrinking prevents your patchwork seams from puckering unevenly the first time you wash the finished coasters.
Cutting Chart and Preparation
Accurate cutting forms the foundation of flat patchwork. Use your acrylic ruler and rotary cutter to square up your scraps into the precise dimensions listed below.
| Piece Description | Material | Quantity per Coaster | Cut Dimensions |
|---|---|---|---|
| Patchwork Squares | Assorted cotton scraps | 4 pieces | 2.5 x 2.5 in (6.4 x 6.4 cm) |
| Backing Panel | Quilting cotton | 1 piece | 4.5 x 4.5 in (11.4 x 11.4 cm) |
| Internal Batting | Cotton batting or fleece | 1 piece | 4.5 x 4.5 in (11.4 x 11.4 cm) |
Safety note: Always close the safety guard on your rotary cutter immediately after every cut, and keep fingers well clear of the acrylic ruler edge.
Step 1: Piecing and Pressing the Patchwork Top
Once your four cotton squares are cut, arrange them into a two-by-two grid to balance your colors and print scales across the block.
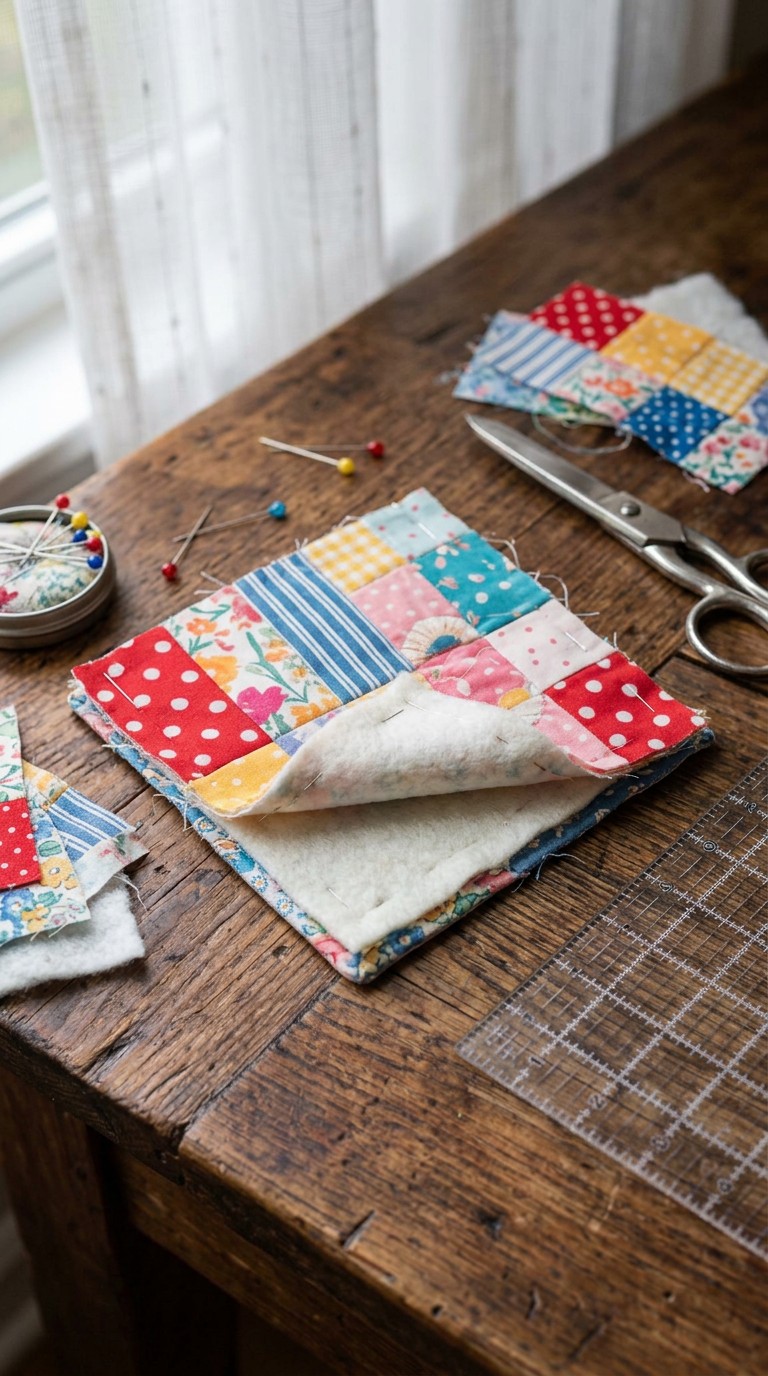
- Sew the top row: Place the two upper patchwork squares right sides together, aligning the raw edges. Install a fresh size 80/12 universal needle, set your stitch length to 2.5 mm, and sew along the right-hand edge using an exact 1/4 inch (6 mm) seam allowance. Backstitch for two stitches at the start and end to secure.
- Sew the bottom row: Repeat this process for the two lower squares, joining them right sides together with a 1/4 inch seam allowance.
- Press seam allowances: Place the sewn units on your ironing board. Set your iron to the cotton setting with steam. Press the seam allowance of the top row to the left, and press the seam allowance of the bottom row to the right. Alternating the seam directions allows the center seams to nest tightly together.
- Join the rows: Place the top row and bottom row right sides together. Align the raw edges, matching the center seam intersection. Because you pressed the seams in opposing directions, the center folds will lock into place against each other. Pin directly through the seam junction.
- Stitch the center seam: Sew across the pinned edge using a 1/4 inch seam allowance. Remove pins before the needle reaches them to avoid bending your needle.
- Final block press: Open the pieced block and press the center seam flat from the right side. Your pieced top should measure 4.5 x 4.5 inches (11.4 x 11.4 cm).
Pro tip: Press the center intersection on the wrong side with a swirl motion to open the tiny center seam junction. This distributes the four converging fabric layers flat, eliminating a hard lump in the middle of your coaster.
Step 2: Layering, Basting, and Straight Line Quilting
With your patchwork top pieced and pressed flat, assemble the three layers that create the cushioned, insulated body of the coaster.
- Build the quilt sandwich: Lay your 4.5 x 4.5 inch backing fabric right side down on your work table. Place the 4.5 x 4.5 inch piece of cotton quilt batting directly on top, smoothing out any wrinkles. Finally, place your pieced patchwork top centered over the batting, right side facing up.
- Baste the layers: Secure the three layers using four sewing pins placed through the center of each patchwork square, or use plastic quilting clips along the edges to prevent shifting.
- Set up machine for quilting: Adjust your stitch length to 3.0 mm. A slightly longer stitch length creates clean, distinct topstitching lines across thick layers without causing the cotton to drag or bunch under the presser foot.
- Stitch the quilting lines: Sew straight parallel quilting lines across the surface of the coaster. Stitch 1/8 inch (3 mm) away from the center seam lines, or use the edge of your standard presser foot as a spacing guide. Sew steadily across the block from edge to edge, keeping your fabric flat with both hands.
Step 3: Shaping, Trimming, and Edge Finishing
After completing your straight line topstitching, trim the quilted sandwich to its final size and finish the perimeter with softly rounded corners.
- Square the block: Use your acrylic ruler and rotary cutter to trim away any excess batting or backing extending beyond the patchwork top. The quilted block should measure exactly 4.5 x 4.5 inches (11.4 x 11.4 cm).
- Mark rounded corners: Place a small circular template (such as a 1.5-inch thread spool base) at each of the four corners on the wrong side of the coaster. Trace the curved arc with a water-soluble fabric pen or tailors chalk.
- Trim curved edges: Carefully cut along your drawn corner lines with sharp fabric scissors to create smooth, identical curves on all four corners.
- Sew right sides together: Place your backing fabric piece and pieced quilted top right sides together (if not already permanently layered) or apply cotton bias binding around the raw outer edge. For an enclosed turn-and-topstitch finish, sew around the perimeter with a 1/4 inch seam allowance, following the rounded corners and leaving a 2-inch (5 cm) turning gap along one straight side.
- Clip and turn: Notch small V-shaped clips along the seam allowance of each curved corner, cutting close to but not through the stitch line. Turn the coaster right side out through the opening. Use a wooden point turner to gently press out the rounded edges.
- Perimeter topstitch: Press the raw edges of the opening 1/4 inch to the inside so they sit flush with the sewn edge. Topstitch around the entire outer perimeter 1/8 inch (3 mm) from the edge, which seals the turning gap closed and gives the coaster its final structured finish.
Pro tip: Lower your machine speed when stitching around the rounded corners. Hand-walk the balance wheel for two or three stitches if needed to maintain an exact 1/4 inch distance from the curved raw edge.
Finishing, Pressing, and Care Instructions
A thorough steam press locks your topstitching into the cotton fibers and flattens the multi-layer seams. Set your iron to medium-high heat with steam, place a pressing cloth over the right side of the coaster, and press firmly for five to eight seconds. Avoid sliding the iron back and forth, as horizontal friction can stretch curved edges out of square.
To clean your cotton quilted coasters, machine wash them in cold water on a gentle cycle using mild detergent. Lay them flat on a dry towel to air dry. If the edges cup slightly after washing, reshape them while damp and press with a hot steam iron to restore crisp, flat lines.
Variations and Customizing Your Coasters
Once you master the basic four-patch construction, you can adapt the design to match different interior styles or gift themes.
- Curved bias binding: Instead of turning the coaster inside out, finish the raw edges with 1/2-inch double-fold bias tape. Bias tape stretches smoothly around curved corners, adding a defined frame to your patchwork prints.
- Diagonal crosshatch quilting: Mark a 45-degree grid across your pieced top using removable chalk. Stitch intersecting diagonal lines spaced 1/2 inch apart for a denser, textured feel.
- Monochrome print mixing: Use four different prints within the same color family (such as navy gingham, navy stripe, navy floral, and solid denim) for a modern, cohesive look.
- Seasonal sets: Combine holiday prints or warm autumnal tones to build a themed set of four or six matching coasters.
Troubleshooting Common Coaster Sewing Issues
Use this reference table to resolve common construction challenges when piecing and quilting small cotton blocks.
| Symptom | Probable Cause | Corrective Action |
|---|---|---|
| Seams do not align at the center cross | Seam allowances shifted or were pressed in the same direction | Press opposing rows in opposite directions so seam folds nest together; pin securely before sewing. |
| Puckering along straight quilting lines | Stitch length is too short or layers shifted without basting | Increase stitch length to 3.0 mm and secure the sandwich with pins or clips spaced 1 inch apart. |
| Distorted or bumpy rounded corners | Excess bulk inside the seam allowance after turning | Cut small notches into the seam allowance around the curve before turning right side out. |
| Coaster will not lay flat | Uneven tension or pulling fabric while stitching | Let the feed dogs guide the fabric naturally without pulling; press with heavy steam after sewing. |
Frequently Asked Questions
Can I use fleece instead of cotton quilt batting for these coasters?
Yes, low-loft polyester fleece is a functional alternative to cotton batting. It provides adequate cushioning and insulation for table surfaces without adding excessive bulk to your seams. Keep your iron on a medium setting when pressing fleece to prevent synthetic fibers from flattening or melting.
What is the best stitch length for straight line quilting on coasters?
A stitch length of 3.0 mm works well for straight line quilting through cotton and batting layers. Standard 2.5 mm piecing stitches can cause small multi-layer sandwiches to drag or bunch under the presser foot. The slightly longer stitch feeds smoothly and produces clean, visible topstitching lines.
How do I get perfectly rounded corners on my fabric coasters?
Trace a rigid circular guide, such as a spool of thread or a wide bottle cap, onto all four corners using a removable marking pen. Sew slowly along the marked line, reduce machine speed on the curve, and notch small V-shaped clips along the seam allowance before turning the coaster right side out.
Are these quilted fabric coasters washable?
Because they are made from 100% quilting cotton and standard batting, these coasters are fully machine washable. Wash them in cold water on a delicate cycle, reshape them by hand while damp, and lay them flat to air dry. Press with a warm steam iron to restore crisp outer edges.
Start Stitching Your Coaster Set
You now have the technical steps and measurements needed to construct functional, multi-layered drink mats from your scrap bin. Practicing accurate 1/4 inch seam allowances, careful seam nesting, and steady topstitching will build your confidence for larger quilting projects down the road. Remember to keep your iron hot and press each seam completely before joining the next layer. Cut your four cotton squares, assemble your quilt sandwich, and enjoy making your own custom set of quilted fabric coasters today.