In this post
- At a Glance
- Why This Denim Storage Box Works
- Materials and Tools You Will Need
- Choosing the Right Fabric for Structure
- Cutting Chart and Preparation
- Step-by-Step Construction Guide
- Finishing and Pressing
- Variations and Customizing
- Troubleshooting Common Denim Sewing Issues
- Care and Washing Instructions
- Frequently Asked Questions
- Organize Your Space with Reclaimed Denim
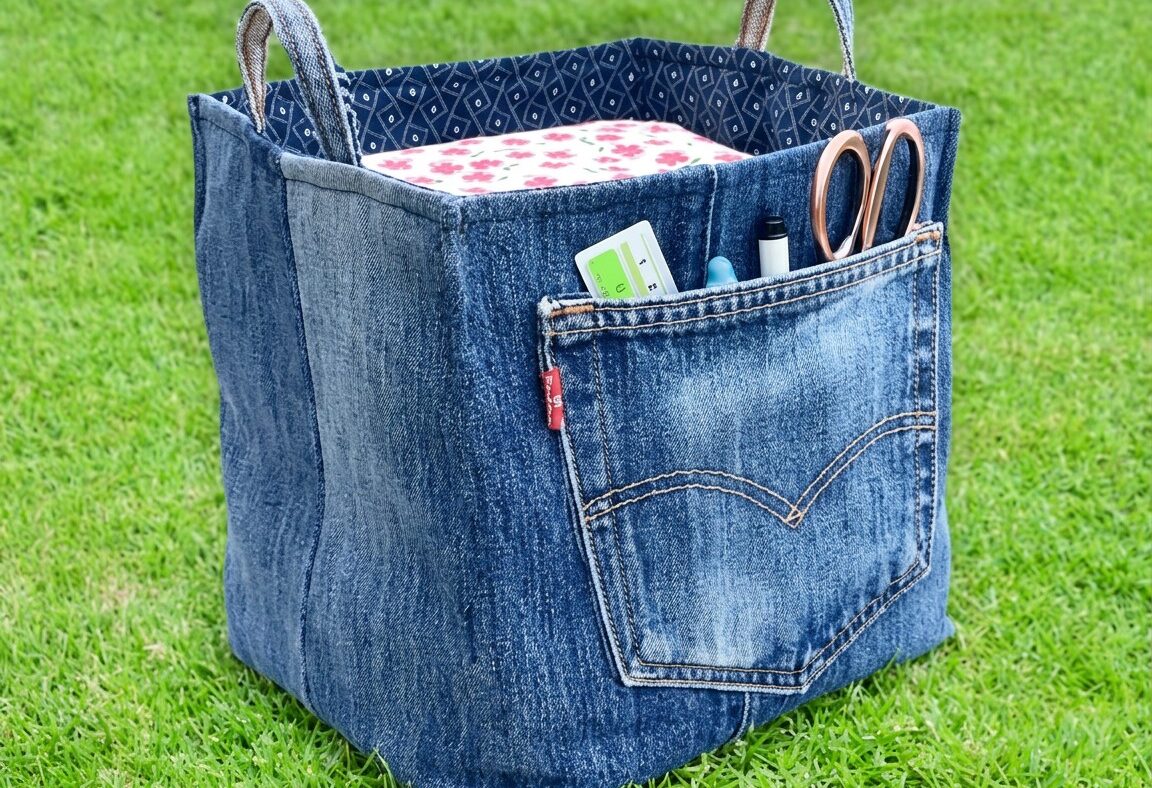
Transforming worn-out pants into sturdy home organizers keeps textiles out of landfills while giving you durable, custom storage. In this tutorial, you will learn how to sew a structured denim storage box that measures approximately 12 in x 12 in x 12 in (30 cm x 30 cm x 30 cm). This cubic organizer fits standard cube shelving units, features an original exterior pocket to hold small tools, and includes strong side handles for easy pulling. Designed specifically for a confident beginner, the project teaches fundamental bag-making techniques like fusing heavy interfacing, handling multiple denim layers, and cleanly boxing three-dimensional corners. You will turn old jeans into a practical storage solution in just an afternoon of sewing.
At a Glance
Before preparing your fabric, check the essential specifications for this organizer project.
| Skill Level | Time Needed | Finished Dimensions | Main Fabrics | Key Techniques |
|---|---|---|---|---|
| Confident beginner | 2-3 hours | 12 in x 12 in x 12 in (30 cm x 30 cm x 30 cm) | Recycled denim, quilting cotton lining | Upcycling, fusing heavy interfacing, boxing corners, topstitching |
Why This Denim Storage Box Works
Old blue jeans provide an ideal raw material for utility storage because tightly woven twill resists abrasion and holds up under weight. Repurposing old garments lets you highlight distinct fading, authentic felled seams, and functional back pockets that add character to the finished bin.
Denim alone lacks the firmness needed to stand upright as an empty 12-inch cube. Pairing the reclaimed cotton with heavyweight fusible interfacing gives the walls rigidity so the bin will not collapse or sag over time. This method teaches beginners how to manage heavy-duty materials, balance tension on thick seams, and construct crisp corners using a standard home sewing machine.
Materials and Tools You Will Need
Gather your supplies and tools together on a clean cutting surface before starting the project.
- 3-4 pairs of old blue jeans (heavyweight cotton, non-stretch preferred)
- 1 yard (0.9 m) quilting cotton for lining (dark patterned or light printed fabric)
- 1 yard (0.9 m) heavyweight fusible interfacing
- Denim sewing thread (for heavy structural seams and topstitching)
- All-purpose sewing thread (for the lining and regular seams)
- Sewing machine
- Denim jeans sewing machine needle (size 90/14 or 100/16)
- Iron and ironing board
- Fabric shears or rotary cutter and mat
- Sewing pins or quilting clips
- Measuring tape and clear quilting ruler
Choosing the Right Fabric for Structure
The best jeans for this storage box are classic 100% cotton denim without elastane or spandex. Stretch denim tends to distort under the heat of an iron and will warp when you fuse the interfacing. Medium-to-dark washes hide dust well, and you can harvest original back pockets from the jeans to create functional exterior compartments on your organizer.
For the lining, choose a tightly woven quilting cotton. A high-contrast or light-colored print makes it easier to locate items stored deep inside the 12-inch box, while a dark print adds a neat, tailored look. The heavyweight fusible interfacing is essential; it bonds directly to the wrong side of the denim pieces to provide the firm body necessary for self-standing walls.
Cutting Chart and Preparation
Begin by deconstructing your 3-4 pairs of jeans. Cut along the inseams and outseams using sharp fabric shears to open the legs into flat denim sheets. Carefully cut around one back patch pocket, leaving a 1/2-inch border of denim around the original pocket stitching, or use a seam ripper to harvest the pocket intact.
| Piece Name | Fabric | Quantity | Cut Dimensions |
|---|---|---|---|
| Exterior Front & Back Panels | Recycled Denim | 2 | 19 in wide x 19 in high (48.3 cm x 48.3 cm) |
| Exterior Side Panels | Recycled Denim | 2 | 19 in wide x 19 in high (48.3 cm x 48.3 cm) |
| Exterior Heavy Interfacing | Heavyweight Fusible Interfacing | 4 | 18 in wide x 18 in high (45.7 cm x 45.7 cm) |
| Lining Front & Back Panels | Quilting Cotton | 2 | 19 in wide x 19 in high (48.3 cm x 48.3 cm) |
| Lining Side Panels | Quilting Cotton | 2 | 19 in wide x 19 in high (48.3 cm x 48.3 cm) |
| Side Handle Strips | Recycled Denim | 2 | 4 in wide x 10 in long (10.2 cm x 25.4 cm) |
| Harvested Jeans Pocket | Recycled Denim | 1 | Original pocket piece (approx. 6 in x 6 in) |
Pro tip: Cutting the interfacing 1/2 inch smaller than the denim panels around all four edges keeps bulk out of your 1/2-inch seam allowances, making side seams much easier to sew on a home machine.
Step-by-Step Construction Guide
Work methodically through each stage of construction to assemble the denim organizer.
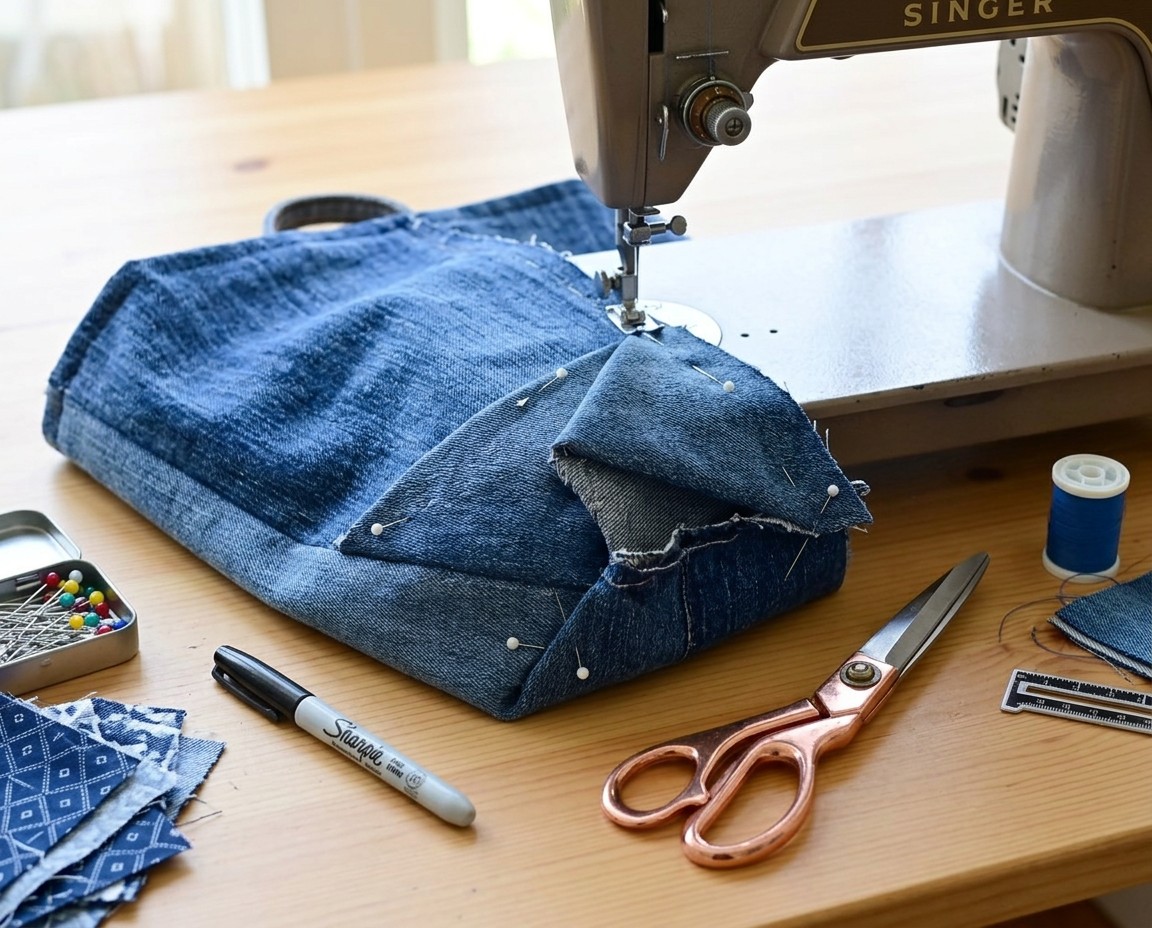
Fusing Interfacing and Adding Pockets
- Fuse the interfacing panels. Place one exterior denim panel wrong side up on your ironing board. Center one 18 in x 18 in piece of heavyweight fusible interfacing over the denim, leaving a 1/2-inch border of exposed denim on all sides. Using high heat and firm, steady downward pressure with steam, press the interfacing to bond it completely. Repeat for the remaining three exterior denim panels.
- Position the harvested back pocket. Lay one interfaced denim panel right side up on your table to serve as the front panel. Place the harvested jeans pocket centered horizontally, approximately 4 inches (10 cm) below the top edge. Pin or clip the pocket securely in place.
- Topstitch the exterior pocket. Install a size 90/14 or 100/16 denim needle and denim thread in your machine. Set the stitch length to 3.0 mm. Topstitch along the sides and bottom edge of the pocket, 1/8 inch (3 mm) from the edge, backstitching at the start and finish near the pocket opening to reinforce high-stress points.
Sewing the Exterior and Boxing Corners
- Join the exterior side panels. Place the front exterior panel and one side exterior panel right sides together, aligning the vertical raw edges. Using a 1/2-inch (1.3 cm) seam allowance and a 2.5 mm stitch length, sew the side seam from top to bottom, backstitching at both ends. Attach the remaining side panel and the back exterior panel in the same way, creating a continuous loop of four joined panels. Press all side seams open.
- Sew the bottom base seam. Flatten the joined tube by matching the side seams so the front and back panels lie flat against each other. Sew across the bottom raw edge with a 1/2-inch (1.3 cm) seam allowance to close the bottom of the box. Press the bottom seam open.
- Mark the boxed corners. At one bottom corner, pull the front and back fabrics apart and flatten the corner into a triangle, aligning the bottom seam directly over the side seam. Measure in along the seam line from the triangular point to where the base measures 12 inches (30 cm) across (or 6 inches / 15 cm from the point to the seam). Draw a straight stitch line perpendicular to the seam.
- Stitch and trim the corners. Sew along the marked line, backstitching firmly at both ends. Trim away the excess corner triangle, leaving a 1/2-inch (1.3 cm) seam allowance. Repeat on the opposite bottom corner to complete the flat, 12 in x 12 in base of the exterior bin.
Pro tip: When aligning the bottom and side seams at the boxed corner, insert a pin directly through the center of both seam lines to verify they match perfectly before sewing the corner flat.
Constructing Handles and Lining
- Sew the denim handles. Take one 4 in x 10 in denim handle strip and fold it in half lengthwise, wrong sides together, pressing a center crease. Open the strip and fold both long outer edges inward to meet the center crease. Fold the strip in half again along the original center crease to conceal all raw edges, creating a 1-inch-wide four-layer strip. Topstitch 1/8 inch (3 mm) from both long edges using a 3.0 mm stitch length. Repeat for the second handle.
- Baste handles to the exterior. Fold each handle strip into a U-shaped loop. Position one handle on each side panel along the top raw edge, centering the loop with the raw handle ends aligned flush with the raw denim edge (spaced 4 inches apart). Baste in place 1/4 inch (6 mm) from the edge.
- Assemble the lining cube. Sew the four 19 in x 19 in quilting cotton lining panels together along the side edges using all-purpose thread, a 2.5 mm stitch length, and a 1/2-inch (1.3 cm) seam allowance. Sew the bottom seam closed, but leave a 6-inch (15 cm) opening in the center of the bottom seam for turning the box later. Box the bottom corners of the lining using the exact same measurements used on the denim exterior.
Assembling and Finishing the Box
- Join exterior and lining. Turn the denim exterior right side out with the handles pointing downward. Keep the cotton lining wrong side out. Insert the denim exterior inside the lining so that their right sides are touching and the top raw edges align. Match all four side seams and clip or pin the entire top perimeter.
- Sew the top opening. Sew around the entire top opening using a 1/2-inch (1.3 cm) seam allowance. Go slowly across the areas where the handles and side seams intersect to prevent the needle from deflecting over the dense layers.
- Turn and close the lining. Reach through the 6-inch opening left in the lining bottom and pull the denim exterior through until the entire box is right side out. Fold the raw edges of the lining opening 1/2 inch inward, press the fold, and edge-stitch the opening closed by machine or with a hand slipstitch.
Finishing and Pressing
Push the completed lining down into the denim exterior. Use a point turner or a blunt wooden chopstick to push the bottom boxed corners firmly outward so the base sits completely flat on your work surface.
Roll the top joined seam between your fingers so the denim exterior rolls slightly to the inside, preventing the cotton lining from peeking over the top rim. Press the top edge flat with a hot steam iron. Topstitch 1/4 inch (6 mm) below the top edge all the way around the rim using denim thread and a 3.5 mm stitch length. This final topstitching secures the lining in place and adds a crisp, store-bought look to the top opening.
Variations and Customizing
Once you are comfortable with the basic box construction, you can adapt the design to fit different organizing needs:
- Multi-pocket exterior: Attach original back pockets to two or three sides of the exterior before assembling the side seams to store small crafting tools, scissors, or remotes.
- Contrasting denim patchwork: Piece together alternating light and dark denim scraps to create 19 in x 19 in panels before applying the interfacing.
- Contrasting inner base: Use a durable canvas or heavy twill on the bottom base of the lining for extra resilience when storing heavy objects.
- Reinforced top handles: Extend the handle placement downward and stitch the handles onto the exterior walls with an X-box stitch pattern for carrying heavier loads.
Troubleshooting Common Denim Sewing Issues
Sewing through dense layers of recycled twill can present minor mechanical challenges. Use this reference to solve issues quickly.
| Problem | Likely Cause | Solution |
|---|---|---|
| Skipped stitches on thick side seams | Needle is too fine or dull to pierce dense twill | Switch to a fresh size 100/16 denim needle with a sharp, reinforced point. |
| Thread nesting under the fabric plate | Top thread slipped out of the take-up lever | Rethread the machine completely with the presser foot raised to ensure proper tension disk seating. |
| Presser foot gets stuck climbing thick seams | Uneven height creates downward angle on presser foot | Place a folded denim scrap (hump jumper) behind the foot to level it before stitching over the ridge. |
| Puckering along the lining top edge | Lining stretched while sewing against rigid denim | Sew with the denim side facing up against the foot and reduce presser foot pressure slightly. |
Care and Washing Instructions
To preserve the shape and structural firmness provided by the heavyweight fusible interfacing, spot cleaning is the best method for maintaining your denim organizer. Wipe the outer denim and lining with a damp cloth and mild liquid detergent, then allow the box to air dry completely.
If the box requires deeper cleaning, hand wash it in cool water without wringing or twisting the walls. Reshape the 12-inch cube while the fabric is damp, pushing the boxed corners outward, and let it dry flat on a clean towel. A quick steam pressing on the top edge and corners will restore its crisp lines.
Frequently Asked Questions
Can I make this denim storage box without a heavy-duty sewing machine?
Yes, a standard home sewing machine can easily complete this project if you use a size 90/14 or 100/16 denim needle and sew at a moderate speed over bulky seam intersections. Trimming the interfacing out of the seam allowances keeps the layer thickness manageable for standard machine feed dogs.
What size denim needle should I use for thick seams?
A size 90/14 denim needle works well for medium denim and standard seams, but a size 100/16 needle is best when stitching over the folded handles and boxed corner intersections. Denim needles have a reinforced shaft and a slender, sharp point designed to penetrate tough twill weaves without deflecting.
How do I wash old jeans before using them for sewing projects?
Wash your reclaimed jeans in hot water with regular detergent and dry them thoroughly on high heat before cutting your pattern pieces. This pre-shrinks the denim fully, softens rigid seams, and washes away any residual dirt or oils so your fusible interfacing bonds securely.
Can I adjust the dimensions to make a smaller or larger box?
You can adjust the cut dimensions by changing the starting panel squares and recalculating the corner cutout depth. To maintain a cube shape, ensure the starting panel width and height equal your desired finished height plus half the base width, adding your standard seam allowances to all edges.
Organize Your Space with Reclaimed Denim
Creating your own denim storage box turns discarded garments into durable, attractive home storage while sharpening your bag-making skills. The sturdy handles, functional exterior tool pocket, and crisp boxed corners make this cube organizer both practical and long-lasting. For your next build, try sorting your salvaged denim by shade to sew a color-blocked exterior that fits your home decor perfectly.