In this post
- At a Glance
- Why This Market Tote Bag Tutorial Works for Beginners
- Materials and Tools Needed
- Choosing the Right Fabric for Structure
- Cutting Chart and Preparation
- Step 1: Piecing and Exterior Pocket Construction
- Step 2: Preparing Straps and Assembling the Exterior
- Step 3: Lining Construction and Bag Assembly
- Step 4: Sewing the Matching Zipper Pouches
- Finishing, Pressing, and Troubleshooting
- Frequently Asked Questions
- Enjoying Your Structured Market Tote
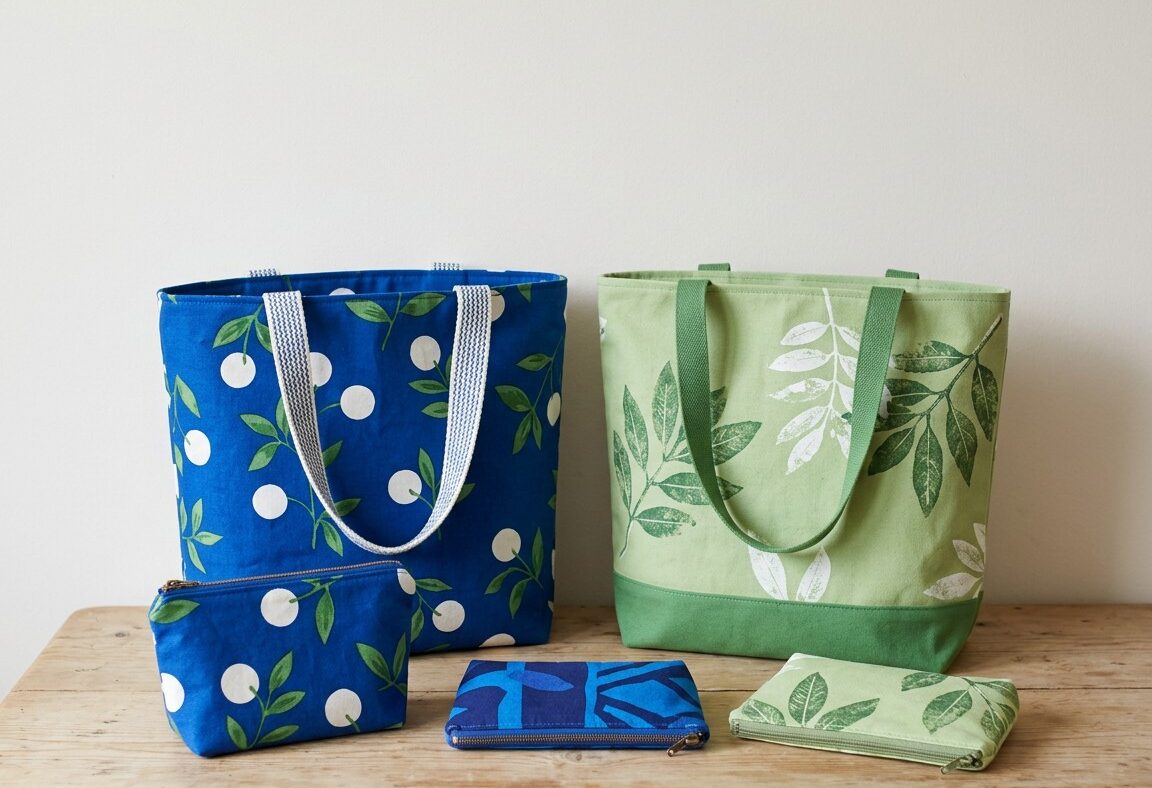
Sewing your own everyday accessories gives you full control over fabric design, pockets, and structural support. This market tote bag tutorial walks you through sewing a fully lined, structured carryall with contrasting base panels, exterior slip pockets, and durable reinforced straps, alongside three matching top-zipper pouches. Designed for a confident beginner, this project teaches essential bag-making techniques that prevent sagging bottoms, weak handles, and flimsy linings. In 3 to 4 hours, you will turn flat yardage into a 14 in wide by 12 in high by 4 in deep (35 cm x 30 cm x 10 cm) tote and three coordinated 8 in wide by 5 in high (20 cm x 13 cm) zipper pouches. Using simple straight stitching, precise pressing, and woven interfacing, you will create dependable pieces that hold their shape through daily use.
At a Glance
The core specifications for completing the market tote and matching accessory set are outlined below.
| Project Detail | Specification |
|---|---|
| Craft / Skill Level | Sewing / Confident Beginner |
| Time to Complete | 3-4 hours |
| Finished Tote Dimensions | 14 in wide x 12 in high x 4 in deep (35 cm x 30 cm x 10 cm) |
| Finished Pouch Dimensions | 8 in wide x 5 in high (20 cm x 13 cm) |
| Primary Materials | Medium-weight cotton canvas, quilting cotton lining, woven interfacing |
| Core Techniques | Panel piecing, boxed corners, zipper installation, enclosed lining assembly |
Why This Market Tote Bag Tutorial Works for Beginners
Many basic tote patterns skip interfacing, which leaves bags prone to collapsing into a heap when set down on a counter. The structure ensures the exterior slip pocket remains accessible rather than drooping open during wear.
The project also uses continuous fabric straps sewn flat down the exterior panels and boxed corners sewn into both the outer shell and the lining. Boxing the corners adds a flat 4-inch base that distributes weight across the bottom panel rather than stressing the lower seam. Because the lining is drafted to match the outer bag dimensions exactly, the interior stays snug against the outer walls without bunching at the bottom.
Materials and Tools Needed
Every element in this project uses standard sewing supplies that can be managed on a domestic home sewing machine without heavy-duty industrial equipment.
- 1 yard (0.9 m) main leaf print cotton canvas (exterior body, front pockets, pouch bodies)
- 1/2 yard (0.5 m) contrasting solid cotton fabric (bottom panels and shoulder straps)
- 1 yard (0.9 m) lightweight cotton fabric (tote and pouch linings)
- 1.5 yards (1.4 m) medium-weight woven fusible interfacing
- Three 7-8 in (18-20 cm) nylon coil zippers for the pouches
- Matching 100% all-purpose polyester sewing thread
- Sewing machine with regular presser foot and zipper foot
- Universal sewing machine needles, size 80/12
- Fabric shears or rotary cutter with cutting mat
- Sewing pins or wonder clips
- Seam gauge or acrylic ruler
- Steam iron and ironing board
Choosing the Right Fabric for Structure
The longevity of a market tote depends on fabric weight and fiber stability. Medium-weight cotton canvas (around 7 to 9 oz) paired with a leaf print creates a balance between durability and ease of stitching. If you use standard quilting cotton for the main exterior instead of canvas, fuse a medium-weight woven interfacing to both the outer prints and the solid contrast sections to build equivalent body.
For the lining, smooth lightweight cotton keeps the interior bright and makes finding keys or produce straightforward. Avoid stretchy knits, heavy waterproof synthetics, or loosely woven linens for this design. Heavy coatings or slick synthetics can gum up an 80/12 universal needle and cause skipped stitches around multi-layered strap junctions.
Cutting Chart and Preparation
Pre-wash and press your 100% cotton fabrics with steam before cutting to eliminate future shrinkage. Rotary cutters and an acrylic ruler give the squarest edges for matching panels accurately.
| Piece Name | Fabric Type | Quantity | Cut Dimensions |
|---|---|---|---|
| Main Upper Exterior Panel | Main Leaf Print Canvas | 2 | 15 in wide x 10 in high (38 cm x 25.5 cm) |
| Contrasting Bottom Panel | Solid Contrast Fabric | 2 | 15 in wide x 5.5 in high (38 cm x 14 cm) |
| Exterior Slip Pocket | Main Leaf Print Canvas | 1 | 9 in wide x 14 in high (23 cm x 35.5 cm) |
| Shoulder Straps | Solid Contrast Fabric | 2 | 4 in wide x 28 in long (10 cm x 71 cm) |
| Tote Lining Panels | Lightweight Cotton Lining | 2 | 15 in wide x 14.5 in high (38 cm x 37 cm) |
| Pouch Exterior Panels | Main Leaf Print Canvas | 6 (2 per pouch) | 9 in wide x 6 in high (23 cm x 15 cm) |
| Pouch Lining Panels | Lightweight Cotton Lining | 6 (2 per pouch) | 9 in wide x 6 in high (23 cm x 15 cm) |
| Tote Interfacing | Medium-weight Fusible | 2 | 14.5 in wide x 14 in high (37 cm x 35.5 cm) |
| Pouch Interfacing | Medium-weight Fusible | 6 | 8.5 in wide x 5.5 in high (21.5 cm x 14 cm) |
Pro tip: Cut your fusible interfacing 1/4 inch smaller than your fabric panels on all sides. This prevents adhesive glue from transferring onto your iron and keeps bulky seam allowances flatter during assembly.
Step 1: Piecing and Exterior Pocket Construction
With all pieces cut squarely, apply the fusible interfacing to the wrong side of the exterior pieces using a hot, dry iron pressed firmly for 10 to 12 seconds per section.
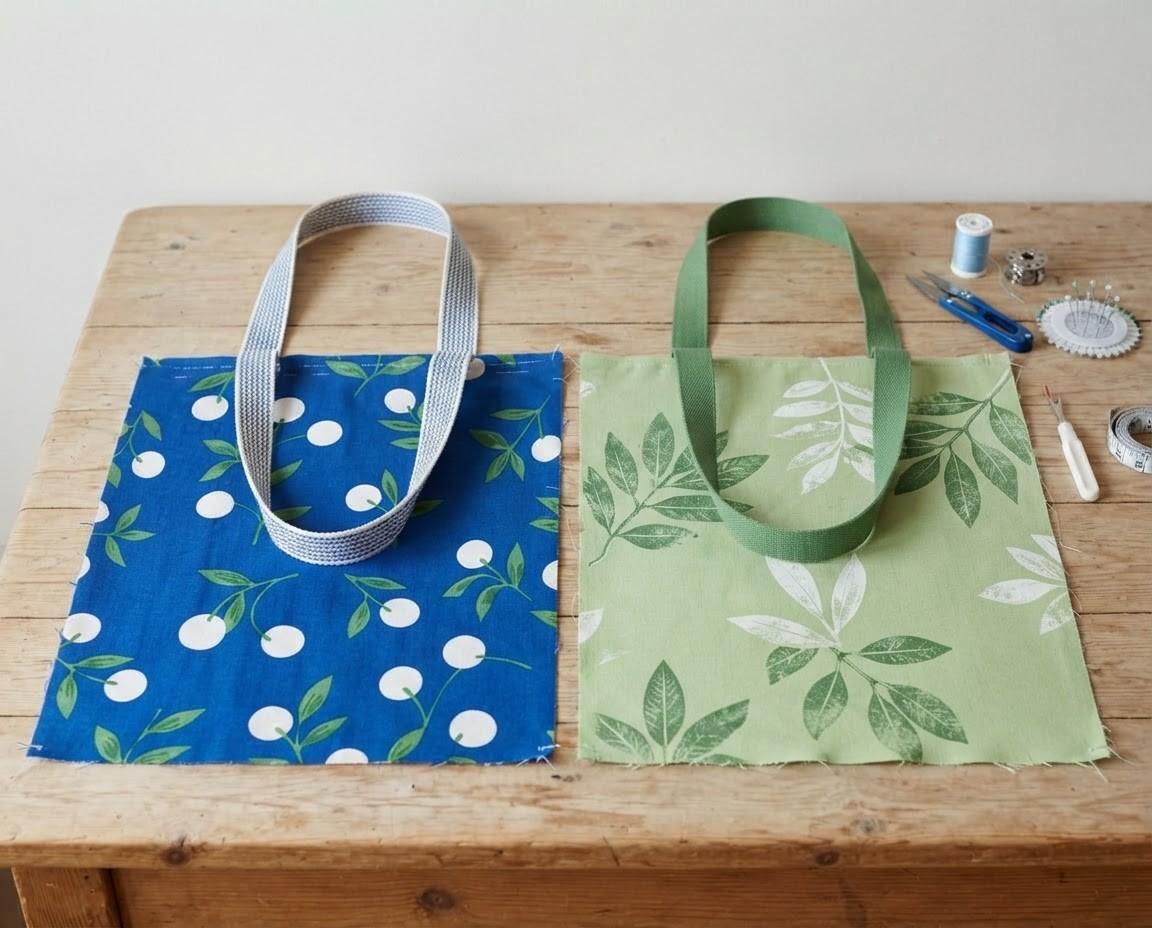
- Join the exterior panels: Place one main upper exterior panel and one contrasting bottom panel right sides together along the 15-inch edge. Stitch with a 1/2 inch (1.3 cm) seam allowance using a 2.5 mm stitch length. Repeat for the second set, and press the seam allowances open on both pieces.
- Fold the exterior slip pocket: Take the 9 in x 14 in exterior pocket piece and fold it in half with right sides together, bringing the short 9-inch ends flush to make a 9 in x 7 in rectangle. Stitch across the top raw edge using a 1/2 inch seam allowance, leaving a 2-inch gap in the center for turning.
- Turn and press the pocket: Clip the two top corners at a 45-degree angle without cutting into your stitches. Turn the pocket right side out through the opening, push out the corners using a point turner, and press flat, tucking the raw edges inward 1/2 inch.
- Topstitch the pocket opening: Topstitch along the folded top edge 1/8 inch (3 mm) from the crease with a 3.0 mm stitch length. This will be the finished top edge of the slip pocket.
- Position the pocket on the tote front: Center the pocket piece horizontally on the right side of the front pieced panel, placing the raw bottom edge of the pocket 1 inch below the seam between the leaf print and the solid contrast panel. Pin securely.
- Baste the pocket: Stitch down the sides and across the bottom of the pocket 1/8 inch (3 mm) from the outer edge, leaving the top edge open. The side and bottom stitching secures the pocket and seals the turning gap automatically.
Step 2: Preparing Straps and Assembling the Exterior
The shoulder straps carry the entire weight of your contents, requiring straight, reinforced stitching along their length.
- Press the strap folds: Take one 4 in x 28 in strap piece and press it in half lengthwise, wrong sides together, to create a center crease. Open the strip, fold each long raw edge inward to meet the center crease line, and press. Fold the strip in half again along the original center line to create a four-layer strap measuring 1 inch wide by 28 inches long. Repeat for the second strap.
- Topstitch the straps: Set your machine stitch length to 3.0 mm. Stitch down both long outer edges of each strap 1/8 inch (3 mm) from the fold. Run a second row of stitching 1/4 inch (6 mm) inward from both edges to add strength and create a clean, uniform finish.
- Baste straps to panels: Lay the front and back exterior panels right side up. Position the ends of one strap onto the top raw edge of the front panel, 3.5 inches inward from each side edge. Ensure the strap is not twisted and the raw ends extend 1/4 inch past the top raw edge of the panel. Pin and baste in place using a 1/4 inch (6 mm) seam allowance. Repeat on the back exterior panel with the remaining strap.
- Stitch the outer bag body: Place the front and back exterior panels right sides together, matching the side edges, bottom edges, and the contrast seam lines. Pin thoroughly. Using a 1/2 inch (1.3 cm) seam allowance and a 2.5 mm stitch length, stitch down the left side, across the bottom, and up the right side. Leave the top collar open. Press the side and bottom seams open.
- Box the exterior corners: At one bottom corner, pull the front and back fabrics apart and flatten the corner into a triangle so the side seam aligns directly over the bottom seam line. Measure perpendicular to the seam point until the line measures 4 inches (10 cm) across (2 inches on each side of the center seam). Draw a straight line with chalk or a fabric pen. Stitch across this marked line, backstitching firmly at each end. Trim the excess triangular point away, leaving a 1/2 inch seam allowance. Repeat for the opposite corner.
Pro tip: Nest your seam allowances at the corner junction by pressing one seam allowance to the left and the opposing one to the right. This keeps the intersection flat and prevents needle deflection when sewing through the boxed line.
Step 3: Lining Construction and Bag Assembly
Assembling the lining properly ensures the inside of your tote bag lies smooth and flat against the interfaced canvas exterior.
- Sew the lining shell: Place the two tote lining panels right sides together. Stitch the side seams using a 1/2 inch (1.3 cm) seam allowance. Stitch the bottom edge starting 1/2 inch from each corner, but stop after 3 inches on each side, leaving a large 5-inch (13 cm) turning gap open in the center of the bottom seam.
- Box the lining corners: Open the corners of the lining just as you did with the exterior shell. Align the side seam over the bottom seam, mark a 4-inch (10 cm) line across the point, stitch across the mark, and trim the corner down to 1/2 inch. Press all lining seams open.
- Nest the exterior and lining: Turn the exterior canvas bag right side out with the straps pointing downward against the body. Keep the lining bag wrong side out. Insert the exterior bag inside the lining bag so their right sides are touching. Match the side seams and align the top raw edges. Pin the layers around the entire collar, tucking the hanging handles securely down between the two layers.
- Stitch the collar: Sew around the top perimeter using a 1/2 inch (1.3 cm) seam allowance. Take your time over the strap junctions and side seams where fabric bulk increases.
- Turn the bag right side out: Reach through the 5-inch opening in the bottom of the lining and gently pull the entire canvas exterior, along with the straps, out through the gap.
- Close the lining gap: Press the raw edges of the 5-inch turning gap inward 1/2 inch so they align with the sewn bottom seam. Edge-stitch the opening closed 1/16 inch from the folded edge using your machine, or slip-stitch it by hand.
- Topstitch the collar: Push the lining down inside the canvas exterior. Roll the top seam line between your fingers so the seam sits precisely at the top edge, and press thoroughly with steam. Topstitch around the upper collar 1/8 inch (3 mm) from the folded edge, followed by a second row 1/4 inch below the first. This secures the lining in place and reinforces the strap joints.
Step 4: Sewing the Matching Zipper Pouches
Each of the three matching pouches measures 8 in wide by 5 in high (20 cm x 13 cm) finished and keeps smaller items neatly organized inside your tote.
- Fuse pouch interfacing: Center and press one piece of pouch interfacing onto the wrong side of all six canvas pouch pieces.
- Attach the zipper to the first side: Lay one pouch exterior piece right side up. Place the zipper face down along the top 9-inch edge, aligning the zipper tape with the fabric edge. Place one pouch lining piece right side down on top, sandwiching the zipper between the fabrics. Pin or clip along the top edge. Install a zipper foot and stitch 1/4 inch (6 mm) from the edge. Press both fabrics away from the zipper teeth and topstitch 1/8 inch from the seam line.
- Attach the zipper to the second side: Lay the remaining exterior piece right side up. Place the unfinished side of the zipper tape face down along the top raw edge. Lay the remaining lining piece right side down over the zipper. Stitch the layers using a 1/4 inch seam allowance. Press both pieces away from the zipper and topstitch 1/8 inch along the fold.
- Open the zipper: Important step: Unzip the zipper halfway. Leaving it closed will prevent you from turning the pouch right side out later.
- Sew pouch perimeter: Open the panels so the two exterior pieces are right sides together and the two lining pieces are right sides together. Push the zipper coil toward the lining side. Pin around all four edges. Stitch around the entire perimeter with a 1/2 inch (1.3 cm) seam allowance, leaving a 3-inch gap open in the bottom edge of the lining.
- Box pouch corners: Cut a 1-inch (2.5 cm) square out of all four bottom corners (two exterior, two lining), measuring from the cut fabric edges. Pull the front and back fabrics apart at each cut corner, align the side and bottom seams, and stitch across the raw edge with a 1/2 inch seam allowance.
- Turn and finish: Pull the pouch right side out through the lining gap. Push the corners out with a point turner. Fold the lining gap raw edges inward 1/2 inch and edge-stitch closed. Push the lining inside the pouch and press the outer canvas flat. Repeat these steps for the two remaining pouches.
Finishing, Pressing, and Troubleshooting
A final press gives both your market tote and matching pouches a clean, store-bought finish. Use a pressing cloth over printed canvas to protect against iron shine, and apply burst steam to set the boxed corners squarely.
| Symptom | Root Cause | Practical Correction |
|---|---|---|
| Puckered seams along the tote collar | Tension is too tight or layers fed unevenly through the foot | Reduce upper thread tension slightly, lengthen stitch to 3.0 mm, and pin every 1 inch around the collar. |
| Uneven boxed corners that tilt the bag | Seams were not centered when flattening the corner points | Align the side seam directly over the bottom seam and pin the seam intersection before drawing your stitch line. |
| Zipper ends caught in pouch side seams | Zipper teeth were pointed outward toward the seam allowance | Pinch the zipper teeth slightly downward toward the lining side before stitching down the side edges. |
| Stitching jams or skips at strap joins | Needle is too light for multiple canvas layers | Switch to a fresh size 80/12 universal needle and turn the handwheel through thick sections. |
Frequently Asked Questions
Can I make the shoulder straps longer for a heavier coat?
You can lengthen the cut strap pieces from 28 inches up to 34 or 36 inches (86 to 91 cm) to accommodate winter outerwear. The attachment spacing remains 3.5 inches inward from the side seams to ensure balanced weight distribution.
What is the best way to apply fusible interfacing without bubbling?
Press the iron down vertically without sliding it across the fabric surface. Hold steady downward pressure for 10 to 12 seconds per section using a medium-hot, dry heat setting, then allow the pieces to cool completely before handling.
How do I clean my cotton canvas market tote bag?
Spot-clean dirt with a soft brush and mild soapy water, then air-dry the bag flat to protect the inner interfacing bond. If machine washing is necessary, wash on a gentle cycle in cold water and iron while slightly damp.
Can I substitute canvas with quilting cotton for the entire exterior?
Quilting cotton works well if you apply medium-weight woven interfacing to every exterior panel, including the base and strap strips. This replaces the structural integrity of canvas and prevents the bag walls from collapsing when filled.
Enjoying Your Structured Market Tote
Following this market tote bag tutorial gives you a reliable, structured bag and three matching zipper pouches ready for market produce, crafting supplies, or weekend errands. By applying woven interfacing to the canvas, sewing reinforced four-layer straps, and cleanly boxing the base corners, your set will hold its shape through regular use. Make sure to press every seam open during assembly to keep your edges crisp and flat.