In this post
- At a Glance: Ironing Board Organizer Sewing Pattern
- Why This Beginner Caddy Project Works
- Materials and Tools Needed
- Choosing the Right Fabric for Your Caddy
- Cutting Chart and Fabric Preparation
- Step-by-Step Construction Guide
- Finishing and Pressing Your Organizer
- Variations and Customizing
- Troubleshooting Common Sewing Issues
- Care and Washing Instructions
- Frequently Asked Questions
- Make Your Sewing Space Work for You
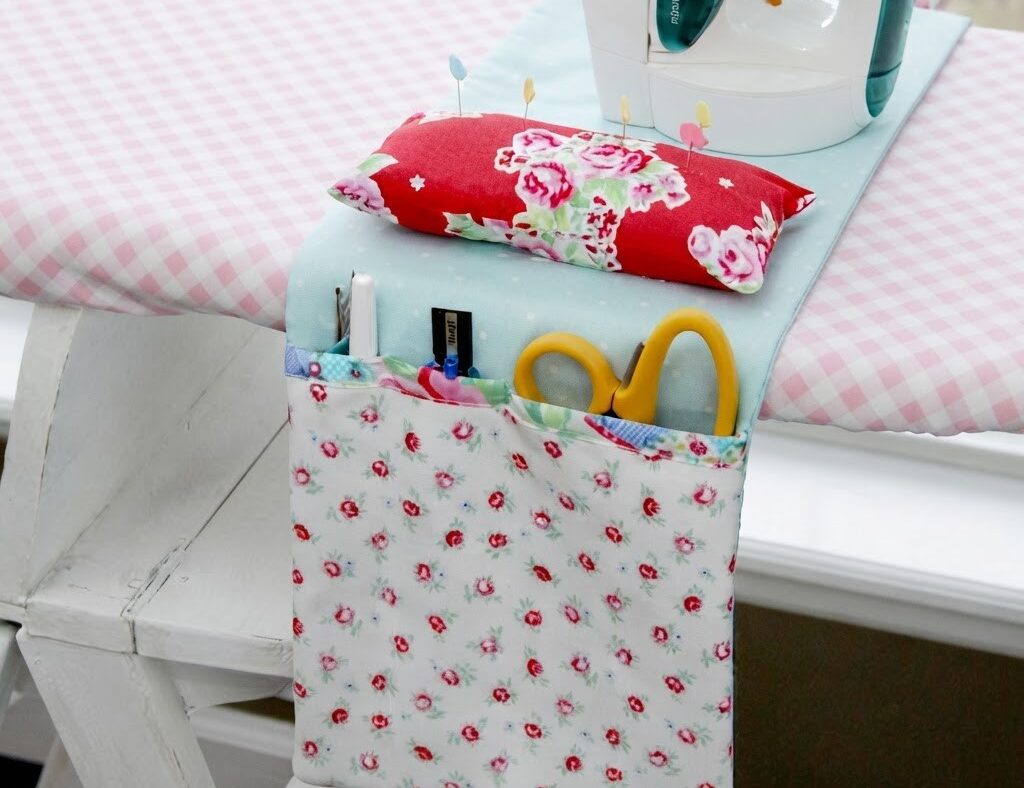
A tidy pressing station makes every sewing session smoother and faster. If you find yourself constantly searching for your snips, seam ripper, or stray pins, this simple ironing board organizer sewing pattern provides the practical solution you need. Designed specifically for beginners, this project teaches you how to sew clean rectangular panels, secure sturdy pocket dividers, and construct a matching standalone pincushion. In less than an afternoon, you will turn basic cotton yardage into a tailored caddy that keeps your essential pressing tools right where your hands naturally reach.
At a Glance: Ironing Board Organizer Sewing Pattern
Before preparing your fabric, check the basic requirements and final measurements for this project to ensure your workspace and materials match.
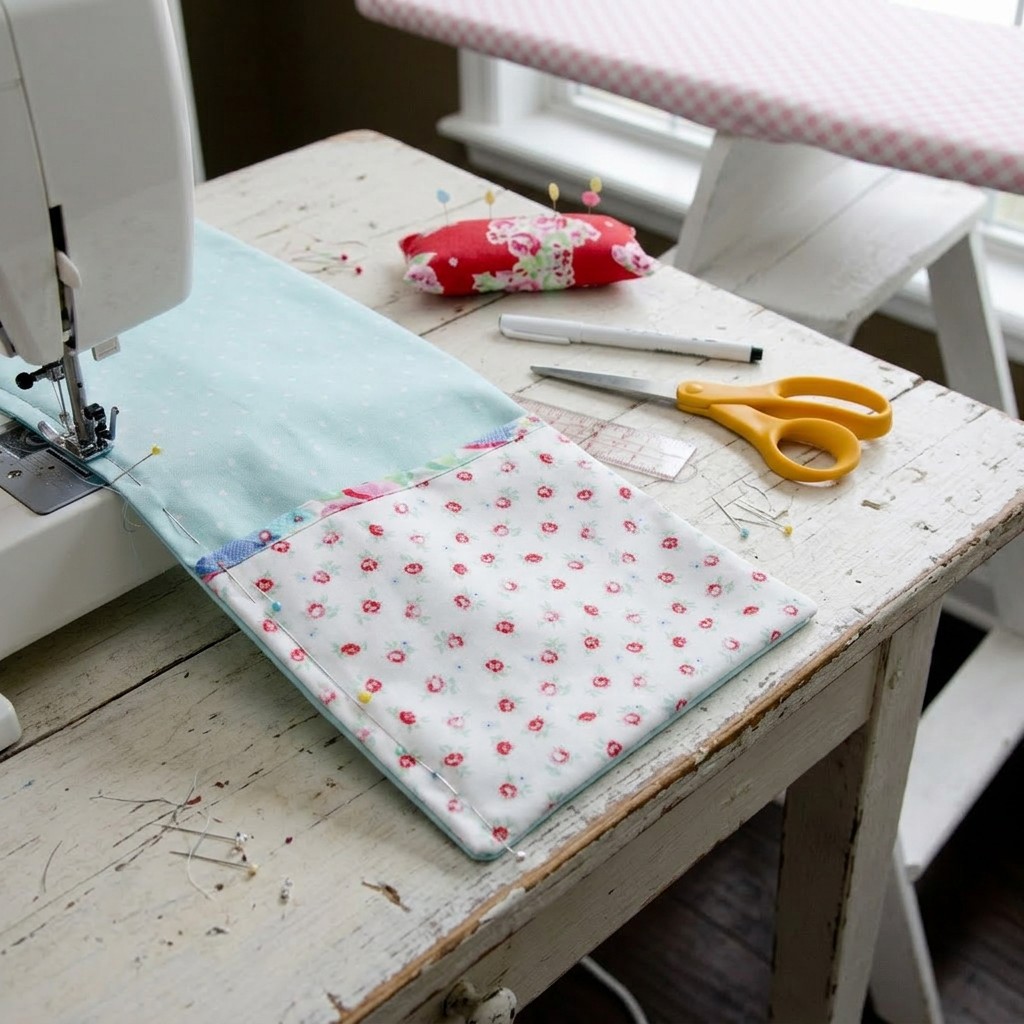
| Skill Level | Beginner |
|---|---|
| Time Commitment | 1.5 to 2 hours |
| Finished Runner Size | Approx. 12 in wide x 36 in long (30 cm x 91 cm) |
| Primary Fabrics | Medium weight quilting cotton |
| Seam Allowance | 1/4 inch (0.6 cm) throughout |
| Key Techniques | Straight seaming, patch pocket attachment, topstitching, slip-stitching |
Why This Beginner Caddy Project Works
Every element of this design reinforces foundational sewing skills without adding unnecessary complexity. You will practice cutting straight edges on the grainline, sewing consistent 1/4 inch (0.6 cm) seam allowances, and pressing crisp hem folds. These core techniques form the basis of almost every garment, bag, and home decor project you will sew in the future.
Attaching the patch pocket panel introduces you to topstitching along marked lines to form compartmentalized pockets. This allows you to practice needle alignment and backstitching to reinforce stress points where scissors and tools sit. Finishing the runner requires stitching right sides together and turning the piece right side out, giving you experience in turning neat 90-degree corners and closing openings by hand with an invisible slip stitch.
Materials and Tools Needed
Gathering all your supplies beforehand ensures a smooth, uninterrupted sewing process from cutting to final pressing.
- Main fabric: 1 yard (0.9 m) light blue polka dot medium weight quilting cotton (for main body outer and lining)
- Accent fabric: 1/2 yard (0.5 m) red floral medium weight quilting cotton (for pocket panel and matching pincushion)
- Thread: 1 spool of matching 100% polyester all-purpose sewing thread
- Stuffing: Polyester fiberfill stuffing for the pincushion
- Sewing machine: Fitted with a standard presser foot
- Needle: Universal sewing machine needle size 80/12
- Iron and pressing surface: Steam iron and ironing board
- Cutting tools: Fabric shears or rotary cutter with cutting mat
- Marking and measuring: Measuring tape, clear sewing ruler, and fabric marking chalk or water-soluble pen
- Pins: Glass-head or standard sewing pins
Choosing the Right Fabric for Your Caddy
Medium weight quilting cotton works well for this caddy because it is stable, easy to press, and feeds evenly through the machine. Its tight, plain weave prevents stretching while you sew long straight seams, which helps keep the 36-inch (91 cm) runner flat and smooth against your ironing board.
Avoid slippery synthetics, stretchy knits, or overly delicate fabrics like rayon, as they shift during topstitching and do not hold crisp pressed edges. Heavy materials like stiff upholstery vinyl can create excess bulk at the seam intersections. Stick to 100% cotton prints or solids that can withstand regular contact with a warm iron during pressing sessions.
Pro tip: Pre-wash and dry your quilting cotton before cutting. Cotton shrinks slightly during its first wash, so preshrinking guarantees your finished organizer stays flat and true to size later.
Cutting Chart and Fabric Preparation
Press your yardage flat to remove any creases from the bolt before measuring. Using your ruler and fabric shears, cut the following rectangular pieces along the straight grain of the fabric.
| Piece Name | Fabric | Quantity | Cut Dimensions |
|---|---|---|---|
| Main Runner Outer | Light blue polka dot cotton | 1 | 12 1/2 in x 36 1/2 in (31.8 cm x 92.7 cm) |
| Main Runner Lining | Light blue polka dot cotton | 1 | 12 1/2 in x 36 1/2 in (31.8 cm x 92.7 cm) |
| Pocket Panel | Red floral cotton | 1 | 12 1/2 in x 8 in (31.8 cm x 20.3 cm) |
| Pincushion Top & Bottom | Red floral cotton | 2 | 4 1/2 in x 6 1/2 in (11.4 cm x 16.5 cm) |
The cut dimensions above include the 1/4 inch (0.6 cm) seam allowance on all sides. Keep your cut pieces laid out flat near your workstation so they do not wrinkle before assembly.
Step-by-Step Construction Guide
Work methodically through each stage, pressing each seam as you go to ensure crisp lines and accurate alignment.
Preparing the Pocket Panel
- Fold the top hem: Lay the red floral pocket panel wrong side up on your ironing board. Fold the top 12 1/2-inch edge down by 1/4 inch (0.6 cm) toward the wrong side and press with a hot iron. Fold that same edge down again by another 1/4 inch (0.6 cm) to encase the raw edge, pinning it in place.
- Stitch the top hem: Set your machine stitch length to 2.5 mm. Sew across the folded top edge roughly 1/8 inch (0.3 cm) from the inner fold, backstitching 2 to 3 stitches at the start and end to secure the thread.
- Press side and bottom folds: Turn the pocket panel wrong side up again. Fold the left side, right side, and bottom raw edges inward toward the wrong side by 1/4 inch (0.6 cm) and press firmly with the iron.
Pro tip: Use a hot iron with a burst of steam when pressing pocket hems. A sharp, flat crease prevents the fabric from creeping or unfolding as you sew it to the base panel.
Attaching Pockets to the Base
- Position the pocket panel: Place the light blue polka dot main runner outer piece right side up on your work table. Lay the prepared red floral pocket panel right side up on top of one narrow end of the runner, aligning the pressed bottom and side folds 1/2 inch (1.3 cm) inward from the raw outer edges of the main base piece. Pin securely along the sides and bottom edge.
- Topstitch the outer pocket perimeter: Set your machine stitch length to 3.0 mm for neat topstitching. Sew down the left side, across the bottom, and up the right side of the pocket panel, stitching 1/8 inch (0.3 cm) from the pressed folds. Keep the top hemmed edge open.
- Mark pocket dividers: Use a clear ruler and fabric chalk to draw two vertical lines dividing the pocket panel into three equal sections. Each pocket section will measure approximately 4 inches (10 cm) wide.
- Sew the dividing lines: Sew directly along the marked chalk lines from the bottom edge up to the top hem. Backstitch securely at the top hem edge where scissors and tools exert pulling force when placed inside.
Assembling the Main Runner
- Layer outer and lining panels: Lay the main runner outer piece (with the attached pocket panel) right side up on your workspace. Place the main runner lining piece right side down directly over it, aligning all four edges so the fabrics are right sides together. Pin around all four outer edges.
- Stitch the perimeter: Starting along one long side, sew around all four edges using a strict 1/4 inch (0.6 cm) seam allowance and a 2.5 mm stitch length. Leave a 4-inch (10 cm) opening unsewn along one of the long edges for turning. Backstitch at the start and finish of the opening.
- Trim the corners: Use fabric shears to clip diagonally across all four corners, cutting close to the seam line without snipping through the stitches. This removes excess fabric bulk so the corners turn out sharp and square.
- Turn the runner right side out: Reach through the 4-inch opening and gently pull the entire runner right side out. Use a blunt tool, such as a point turner or the eraser end of a pencil, to push the four corners fully outward.
- Press and close the opening: Fold the raw edges of the 4-inch opening inward by 1/4 inch (0.6 cm) so they align flush with the sewn seam. Press the entire runner flat with the iron. Thread a hand sewing needle and use an invisible slip stitch (ladder stitch) to close the opening.
Crafting the Matching Pincushion
- Pin pincushion pieces: Place the two 4 1/2 in x 6 1/2 in (11.4 cm x 16.5 cm) red floral rectangles right sides together, aligning all raw edges. Pin around the perimeter.
- Sew around the perimeter: Stitch around all four sides using a 1/4 inch (0.6 cm) seam allowance, leaving a 2-inch (5 cm) gap open along one long edge. Backstitch at both sides of the gap.
- Trim corners and turn: Clip the four corners diagonally outside the stitch line. Turn the pincushion cover right side out through the opening and gently push out the corners.
- Stuff firmly: Push small tufts of polyester fiberfill into the opening, distributing the stuffing into the corners first. Continue filling until the cushion is firm and holds a plump rectangular shape.
- Hand sew the opening closed: Fold the raw edges of the 2-inch opening inward by 1/4 inch (0.6 cm). Pin the folded edges closed and use a ladder stitch with double thread to close the seam securely.
Pro tip: Stuff your pincushion with small pinches of fiberfill rather than large clumps. Smaller amounts fill the corners evenly and eliminate lumpy hollow spots on the surface.
Finishing and Pressing Your Organizer
Once all sewing is finished, set your steam iron to the cotton setting. Lay the main runner flat on your pressing board and press both the outer and lining sides, pressing the perimeter seams flat and crisp. Pay special attention to the corners and the pocket dividers so the compartments lie flush against the base.
Drape the long end of the 12 in x 36 in (30 cm x 91 cm) runner over the working surface of your ironing board so the floral pocket panel hangs naturally over the side edge. Place your filled pincushion directly on top of the runner on the board surface. The weight of the fabric runner resting across the board provides stability while keeping your tools accessible.
Variations and Customizing
You can adapt this foundational design to suit different pressing setups and storage preferences without changing the straightforward assembly method.
- Customized pocket widths: Adjust the placement of your vertical topstitching lines to create one wide compartment for a pressing cloth alongside two narrower slots for marking pens and scissors.
- Double-ended storage: Cut a second red floral pocket panel and attach it to the opposite end of the main runner to add hanging pockets on both sides of your ironing board.
- Contrasting fabric accents: Use solid cotton prints or contrasting stripes for the pocket panel to match the specific color palette of your sewing room decor.
Troubleshooting Common Sewing Issues
If you encounter uneven seams or puckering while constructing your organizer, check this table for quick diagnostic steps.
| Problem | Likely Cause | Correction |
|---|---|---|
| Puckering along vertical pocket dividers | Thread tension too tight or stitch length too short | Increase stitch length to 3.0 mm and loosen top tension slightly; smooth fabric flat while guiding. |
| Bulky or rounded corners after turning | Excess seam allowance fabric bunched inside corner | Turn wrong side out, clip excess corner fabric closer to the stitches, and gently poke corners out again. |
| Runner edges wavy or distorted | Fabric stretched while sewing long straight seams | Use pins every 2 inches along long sides; let machine feed dogs pull fabric naturally without pulling. |
| Pincushion stuffing feels lumpy | Fiberfill inserted in oversized clumps | Remove stuffing, pull fiberfill apart into small fluffy pieces, and repack firmly from corners inward. |
Care and Washing Instructions
Because your organizer is made from 100% medium weight quilting cotton, you can easily maintain its clean appearance. Machine wash the main runner in cold water on a gentle cycle with mild detergent. Hang the runner to air dry or tumble dry on low heat, then press it with a hot steam iron to restore crisp edges and smooth pocket dividers.
For the fiberfill-stuffed pincushion, spot clean the exterior with a damp cloth and mild soap rather than submerging it in water. Air dry thoroughly before inserting pins back into the fabric.
Frequently Asked Questions
How does the ironing board organizer stay in place without elastic or velcro?
The 36-inch (91 cm) length of the runner extends across the top surface of the ironing board, using the natural friction of the cotton weave and the weight of tools to stay anchored. Placing your matching pincushion or a pressing ham on top of the runner surface adds extra stability.
Can I use medium weight canvas instead of quilting cotton?
Quilting cotton medium weight is specified for this project to maintain the correct construction and weight.
How do I wash my ironing board caddy if it gets dirty?
Wash the unpadded fabric runner in cold water on a gentle cycle, then line dry and press with a steam iron to remove wrinkles. Clean the stuffed pincushion by wiping the surface with a damp, soapy cloth so the internal fiberfill remains dry and fluffy.
Can I add more pockets to the organizer panel?
You can stitch additional vertical divider lines across the 12 1/2-inch pocket panel to create four or five smaller slots for seam gauges and pencils. Measure your specific tools beforehand to make sure each divided section is wide enough for easy insertion and removal.
Make Your Sewing Space Work for You
Constructing this practical organizer eliminates clutter from your pressing area while giving you confidence in essential seaming, pocket placement, and hand finishing. Take a moment to position your finished caddy on your board, load the divided pockets with your favourite shears and seam ripper, and keep your pins right at hand. Master this versatile ironing board organizer sewing pattern to build functional organization into your creative space for many projects to come.