In this post
- Welcome to Your Sewing Tools and Notions Guide
- What Are Sewing Tools and Notions?
- Examine the Features of a Sewing Machine Bobbin
- Identify the Dimples and Indentation on Sewing Thimbles
- Review Measurement Lines and Notches on the Presser Foot
- Understand the Function of the Seam Ripper
- Choosing and Using All-Purpose Thread
- Pro Tips for Organizing Your Sewing Kit
- Common Beginner Mistakes with Sewing Gear
- Practice Project Idea to Test Your Knowledge
- Frequently Asked Questions
- Mastering Your Essential Sewing Kit
Starting out in sewing can feel overwhelming when faced with dozens of specialized accessories. Learning to identify basic sewing tools and notions is the fastest way to build confidence before you run your first stitch. In this beginner guide, you will examine the exact functions of everyday sewing room staples, from bobbins and presser feet to thimbles and thread. Understanding your gear takes only about 10 minutes, yet it saves hours of frustration, skipped stitches, and tangled threads later. By learning how these core items interact with your sewing machine and fabrics, you establish the foundation required for neat seams, steady tension, and accurate construction.
Welcome to Your Sewing Tools and Notions Guide
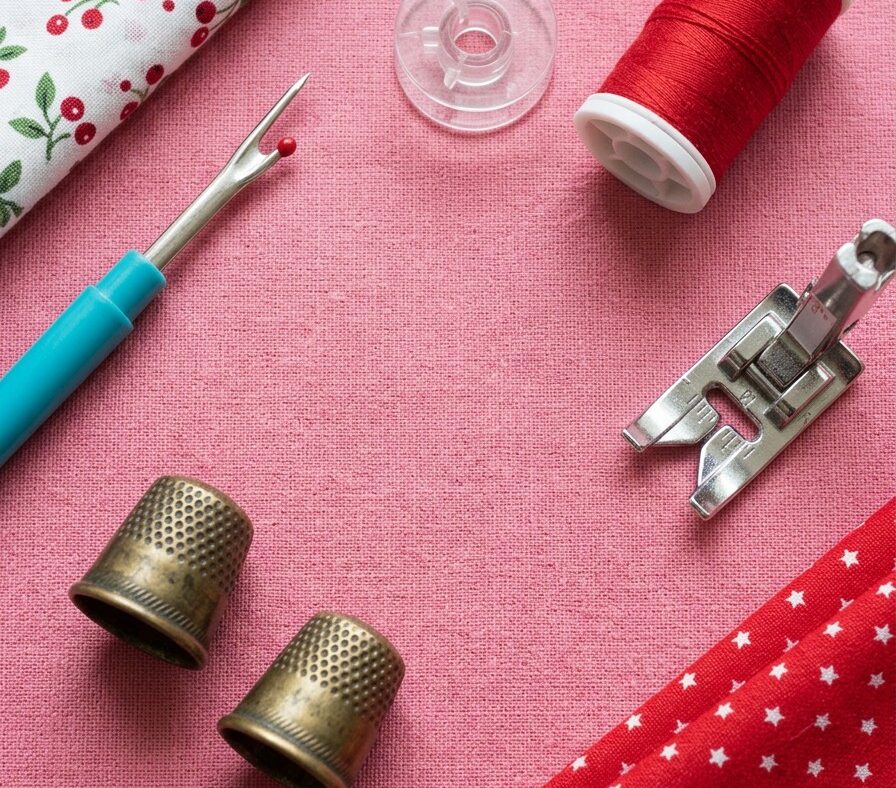
Setting up your workspace begins with taking stock of the core items sitting right in front of you. A classic beginner setup includes everyday staples arranged across your work mat: a clear plastic bobbin, two metallic thimbles with dimpled surfaces, a standard sewing machine presser foot featuring built-in measurement markings, a sharp blue-handled seam ripper, and a spool of all-purpose red thread. Each component carries a dedicated purpose designed to guide fabric, balance tension, or protect your hands.
When you take a close look at these items against your fabric scraps, you can see how each tool interacts with the thread and the needle. Red directional arrows on instructional guides often point to tiny, overlooked details like groove alignments on a foot or the specific height of a bobbin flange. Becoming familiar with these physical traits helps you diagnose stitching issues before they ruin a project.
What Are Sewing Tools and Notions?
Understanding the vocabulary of sewing prevents confusion whenever you read pattern instructions or shopping lists. In sewing terminology, equipment refers to the heavy-duty machinery you use, primarily your sewing machine, iron, or cutting mat. Tools are non-consumable, manual instruments that help you cut, measure, or hold fabric, such as your metal thimble, presser foot, or seam ripper.
Notions, on the other hand, are the small items and consumable supplies that become part of the finished project or are consumed during the process. This includes your spools of all-purpose thread, clear plastic bobbins, buttons, zippers, and elastic. Keeping this distinction clear allows you to organize your kit efficiently and shop with precision when preparing for a new technique.
Examine the Features of a Sewing Machine Bobbin
Clear plastic bobbins serve as the lower thread supply for lockstitch sewing machines. When your machine stitches, the top needle thread loops around the bobbin thread underneath the needle plate, locking the stitch securely in the center of your fabric layers. A standard clear plastic bobbin allows you to monitor your remaining thread level at a glance, so you never run out mid-seam.
Always inspect your plastic bobbins for subtle signs of wear before winding thread onto them. Small burrs, micro-cracks on the rim, or slight warping can cause the bobbin to wobble inside the bobbin case. That wobble leads to uneven tension, thread bunching underneath the fabric (known as birds-nesting), and sudden thread breaks.
Pro tip: Never mix bobbins from different machine brands, even if they look identical. A fraction of a millimeter difference in height (such as Class 15 versus Class 66) disrupts lower thread delivery entirely.
Identify the Dimples and Indentation on Sewing Thimbles
While bobbins support machine construction, metallic thimbles protect your hands during hand sewing, basting, and securing loose ends. The metallic thimbles visible in your kit feature small, textured indentations covering the dome and sides. These dimples are engineered to catch the blunt eye-end of a hand sewing needle, preventing it from slipping sideways when you push through dense layers.
To use a metal thimble correctly, place it over the middle finger of your dominant sewing hand. As you guide the needle through the fabric with your thumb and index finger, use the dimpled surface on the side or top of your middle finger to push the needle smoothly through the fibers. This shield prevents soreness and puncture injuries when working with woven cottons or heavy seams.
Review Measurement Lines and Notches on the Presser Foot
Shifting focus back to the machine, the sewing machine presser foot holds your fabric flat against the feed dogs while providing precise visual alignment guides. Standard utility presser feet feature etched measurement lines, toe notches, and specific outer edge distances that act as built-in seam gauges as you guide the fabric past the needle.
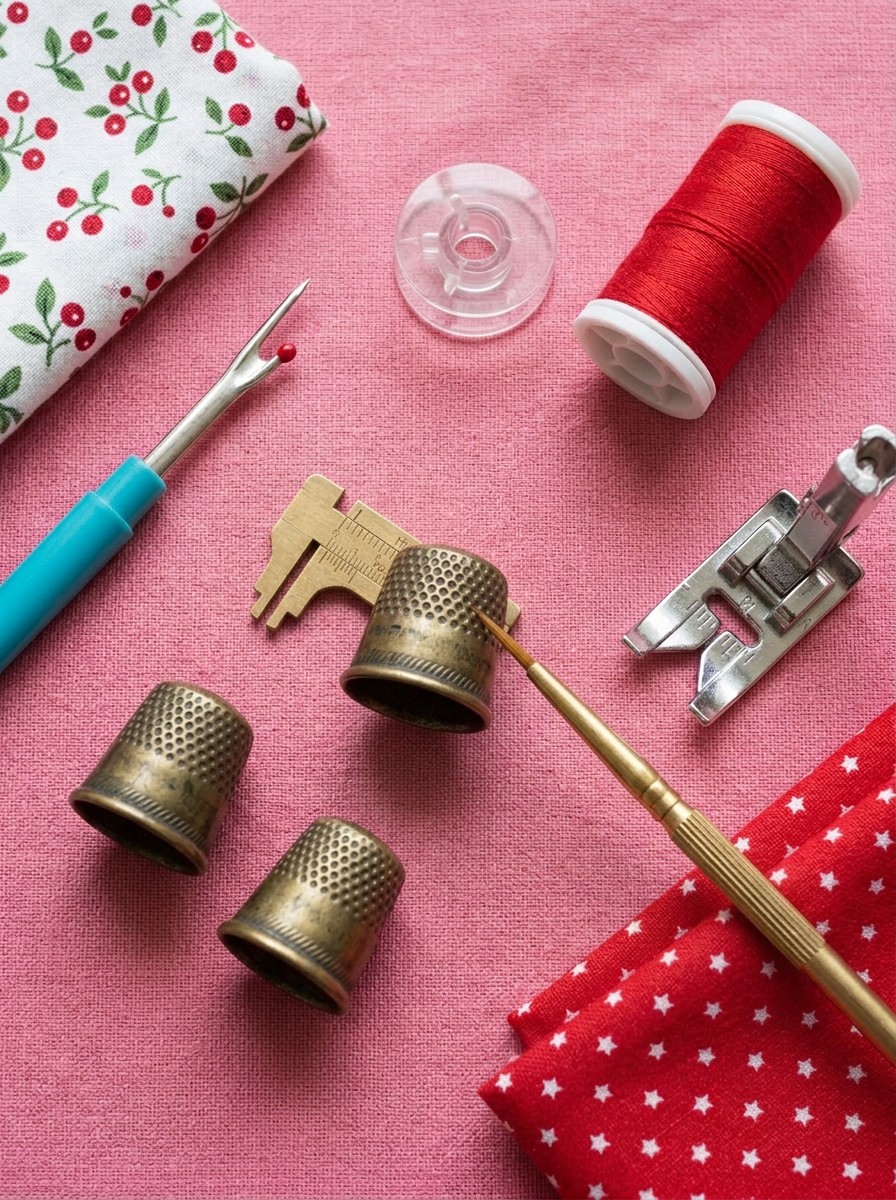
On most standard feet, the distance from the center needle position to the outer right edge measures exactly 1/4 inch (6 mm), which serves as a standard reference for narrow seams and quilting. The horizontal toe notches mark the exact point where the needle enters the fabric, helping you execute accurate 90-degree corner pivots. When turning a sharp corner, stop with the needle down when your fabric edge aligns with the front horizontal notch, raise the presser foot lifter, pivot the fabric, and lower the foot to continue.
Pro tip: Test your presser foot edge on a scrap piece of woven cotton using a 2.5 mm stitch length to verify your machine needle’s default drop position relative to the foot markings.
Understand the Function of the Seam Ripper
Even with clear presser foot guides, stitch removal is a normal part of learning and perfecting construction. The blue-handled seam ripper features a fine, pointed tip, a sharp inner curved blade, and a safety ball on the shorter prong. This tool allows you to slice through misplaced stitches without slicing into the surrounding fabric fibers.
To remove a continuous straight seam efficiently, insert the pointed tip under every fourth or fifth stitch on one side of the seam to cut the thread. Once those stitches are severed, flip the fabric over and pull the continuous thread strand from the opposite side. The red safety ball should always glide against the fabric interior when sliding the blade down long, open basting seams to prevent accidental fabric cuts.
Choosing and Using All-Purpose Thread
Working alongside your seam ripper and bobbin is your primary spool of thread. A standard spool of all-purpose polyester thread, such as the red thread in your basic kit, offers a balance of strength, smoothness, and slight elasticity. Polyester thread resists fraying, handles high machine speeds without snapping, and works seamlessly on both natural cottons and synthetic blends.
When threading your machine, match the weight and fiber of your top thread to your bobbin thread for balanced tension. For standard medium-weight wovens, pair all-purpose polyester thread with a Universal 80/12 machine needle set to a 2.5 mm stitch length. Avoid using cheap, lint-heavy thread, as excess lint accumulates in the bobbin race and causes irregular tension.
Pro Tips for Organizing Your Sewing Kit
Keeping your notions categorized prevents damaged tools and saves valuable prep time during every project. Use these practical habits to keep your tools in prime condition:
- Store bobbins in dedicated silicone rings or channel boxes: Loose bobbins in a drawer unravel quickly and create tangles that ruin thread tension.
- Keep protective caps on seam rippers: Covering the blade protects the sharp point from dulling and prevents accidental cuts when reaching into your notions box.
- Organize presser feet by function: Keep standard feet, zipper feet, and buttonhole feet in labeled compartment trays to avoid using the wrong foot profile for basic seams.
- Pair bobbins with their parent thread spools: Use rubber bobbin clips to attach wound bobbins directly to the matching thread spool for instant color matching.
- Maintain your thimbles in dry storage: Store metallic thimbles away from damp spots to avoid surface tarnishing and maintain smooth dimple ridges.
Common Beginner Mistakes with Sewing Gear
Using the wrong accessories or misinterpreting tool markings can lead to stitch errors that mimic machine malfunctions. Use this quick troubleshooting reference to identify and correct common gear errors:
| Gear Issue | Visual Symptom | Corrective Action |
|---|---|---|
| Mismatched Bobbin Type | Bobbin rattling, looping lower thread, thread breaks | Use only the exact bobbin style (e.g., Class 15 clear plastic) specified in your sewing machine manual. |
| Dull Seam Ripper Point | Fabric snagging, pulled yarns, ragged cuts | Replace your seam ripper if the pointed tip feels rough or catches on fine woven fabric fibers. |
| Ignoring Presser Foot Notches | Uneven corner turns, wandering seam allowances | Align raw fabric edges with the presser foot edge and use the horizontal toe notch for corner pivots. |
| Improper Thimble Fit | Thimble slipping off finger, restricted circulation | Select a metal thimble that rests securely on your middle finger without pinching the nail bed. |
Practice Project Idea to Test Your Knowledge
Apply your understanding of these core tools with a quick 10-minute setup and stitching exercise. Take two square scraps of medium-weight woven cotton fabric measuring approximately 5 x 5 inches (12.7 x 12.7 cm). Check your clear plastic bobbin for smooth edges, wind a small amount of your red all-purpose thread, and insert it into the lower bobbin case following your machine’s directional arrows.
Layer the two fabric scraps with right sides together. Align the raw right edges with the outer right border of your standard presser foot to establish a clean 1/4 inch (6 mm) seam allowance. Stitch along the edge using a standard 2.5 mm stitch length, backstitching for 3 stitches at the start and end. Practice using your blue-handled seam ripper to cleanly remove three stitches in the middle, then re-stitch the section to master precise alignment and tension control.
Frequently Asked Questions
What is the difference between sewing tools and notions?
Sewing tools are non-consumable, manual instruments used to measure, cut, or manipulate fabric, such as presser feet, thimbles, and seam rippers. Notions are the small consumable items and supplies incorporated into the sewing process or finished item, including thread, bobbins, buttons, and zippers.
Why does my sewing machine need a specific clear plastic bobbin?
Sewing machines are engineered to work with specific bobbin dimensions, heights, and curvatures. Using an incorrect bobbin style or a warped plastic bobbin causes improper rotation in the shuttle race, leading to tension knots, skipped stitches, and potential machine timing damage.
How do I use the measurement lines on my sewing machine presser foot?
The edges and etched lines on a presser foot indicate exact distances from the needle drop point. Aligning your raw fabric edge with the outer right edge typically yields a 1/4 inch (6 mm) seam, while the front horizontal notches mark your needle pivot points for turning clean 90-degree corners.
What is the proper way to wear a metal sewing thimble?
Place the metal thimble on the middle finger of your dominant hand, ensuring it fits snugly without pinching. Use the dimpled indentations on the tip or side of the thimble to push the dull eye-end of the hand sewing needle through the fabric layers safely.
Mastering Your Essential Sewing Kit
Taking the time to understand the specific role of every tool builds accuracy into every seam you construct. When your clear plastic bobbin is wound smoothly, your presser foot guides your seam allowance, and your metal thimble protects your fingers, your sewing sessions run smoothly. Keep your sewing tools and notions clean, organized, and properly matched to your machine, and you will achieve clean, balanced stitches across all your upcoming beginner sewing projects.