In this post
- At a Glance: Your Lined Drawstring Bag Project
- Why This Lined Drawstring Bag Tutorial Works for Beginners
- Materials and Tools Needed
- Choosing the Right Fabric for Your Bag
- Cutting Chart and Preparation
- Step 1: Sewing the Exterior and Lining Bags
- Step 2: Assembling and Attaching the Lining
- Step 3: Creating the Casing and Threading the Ribbon
- Finishing, Pressing, and Styling
- Variations and Customizing Your Bag
- Troubleshooting Common Beginner Issues
- Care and Washing Instructions
- Frequently Asked Questions
- Your Completed Cotton Drawstring Pouch
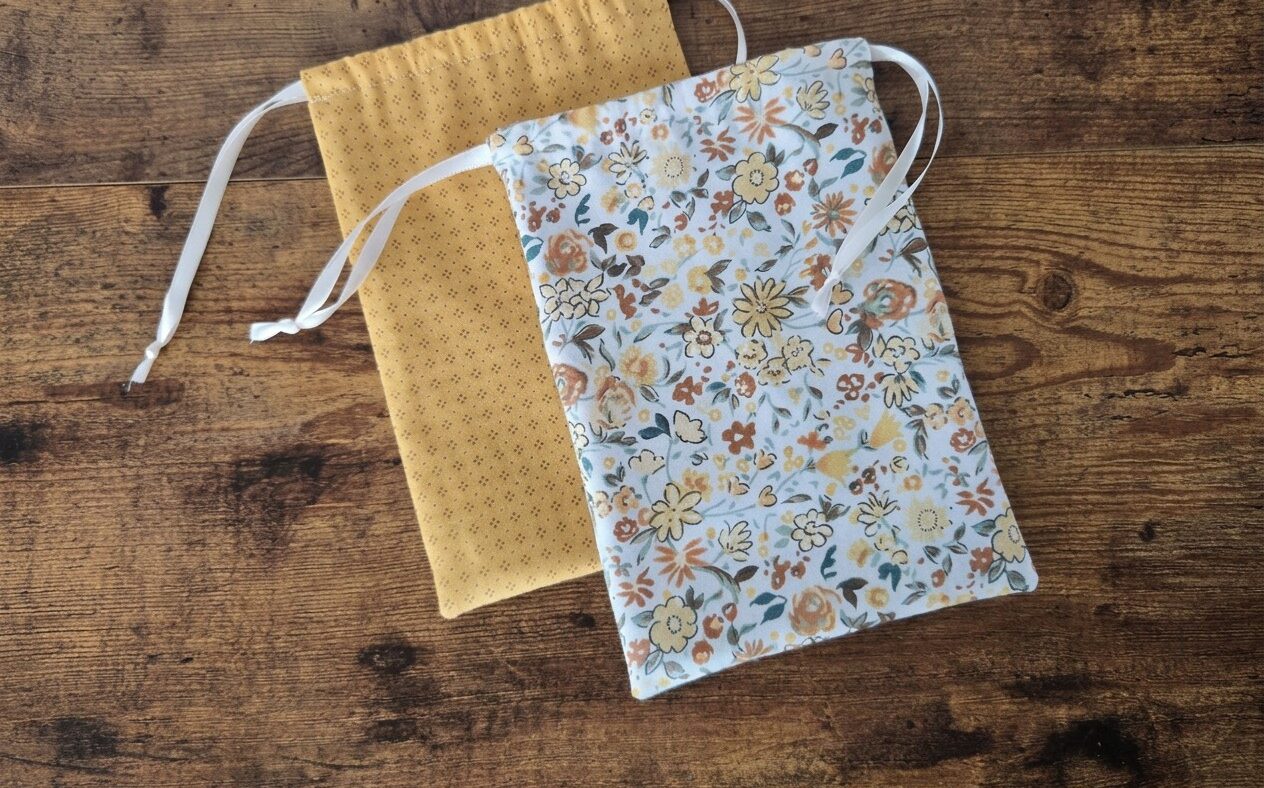
Learning how to stitch clean, functional accessories is a great milestone for any beginner maker, and this lined drawstring bag tutorial delivers immediate results in just 1 hour. If you want a quick project that teaches fundamental construction methods without overwhelming steps, this small pouch is a practical starting point. You will create a fully lined bag measuring approximately 6 in x 8 in (15 cm x 20 cm), finished with crisp topstitching and enclosed raw edges. The design uses lightweight or medium-weight quilting cotton paired with smooth white satin ribbon for the drawstring closure. Along the way, you will practice sewing straight seams, leaving turning gaps, stitching parallel channels, and pressing fabric for a crisp finish. Grab your fabric shears, set up your machine, and prepare to turn basic fabric cuts into a practical storage pouch.
At a Glance: Your Lined Drawstring Bag Project
Before cutting into your fabric, review the core specifications for this project to understand the required time, dimensions, and materials.
| Project Detail | Specification |
|---|---|
| Skill Level | Beginner |
| Time to Complete | 1 hour |
| Finished Size | Approx. 6 in x 8 in (15 cm x 20 cm) |
| Main Fabric | Lightweight or medium-weight quilting cotton |
| Key Techniques | Straight stitching, turning gaps, enclosed seams, casing channels, topstitching |
Why This Lined Drawstring Bag Tutorial Works for Beginners
Every core technique in this lined drawstring bag tutorial builds foundational sewing skills that apply to larger, more complex items later on. Instead of exposing raw fabric edges on the inside that fray over time, this method encloses every seam completely between the exterior and the lining. You achieve a clean interior without needing a serger or overlocker machine.
The construction keeps structural elements straightforward. By skipping complicated closures like zippers and avoiding three-dimensional boxed corners, you can focus purely on controlling your seam allowance and sewing straight stitch lines. The integrated drawstring casing uses parallel lines of topstitching sewn directly through both layers of fabric, teaching you how to guide fabric evenly under the presser foot while maintaining consistent spacing.
Materials and Tools Needed
Having the correct supplies ready beside your workspace ensures smooth assembly without interruptions.
- 1/4 yard (0.25 m) exterior fabric: Lightweight or medium-weight quilting cotton in your choice of print or solid.
- 1/4 yard (0.25 m) lining fabric: Coordinating lightweight quilting cotton.
- 1 yard (1 m) white satin ribbon: Approximately 3/8-inch (1 cm) wide, or lightweight cord for the drawstring.
- Matching polyester thread: Standard all-purpose sewing thread that complements both fabrics.
- Sewing machine: Standard domestic machine set to a straight stitch (stitch length 2.5 mm).
- Universal sewing needle size 80/12: The standard needle size for stable, woven cotton fabrics.
- Iron and ironing board: Essential for pressing open seams and crisping edges.
- Fabric shears: Sharp scissors dedicated to cutting woven fabrics cleanly.
- Safety pin or bodkin: Used to thread the satin ribbon smoothly through the casing channels.
- Pins or sewing clips: To hold the fabric layers securely in place during stitching.
Choosing the Right Fabric for Your Bag
Woven cotton provides the stability needed for crisp lines and neat casings. Lightweight to medium-weight quilting cottons are the easiest textiles to manipulate under the presser foot because they feed evenly without stretching or slipping out of alignment. They also respond well to steam pressing, which makes setting sharp creases along the top rim and side seams simple.
Avoid heavy canvas, denim, or thick upholstery fabrics for this specific pattern size. Bulky textiles create excessive resistance when you pull the ribbon to cinch the opening shut, preventing the bag from closing completely. Similarly, avoid slippery silks, satins, or stretchy knits for the main body panels, as these materials distort during cutting and can shift out of place when sewing straight 1/2 inch (1.3 cm) seams.
Cutting Chart and Preparation
Accurate fabric cuts lead directly to square, even seams during assembly. Pre-wash and dry your cotton fabric to preshrink the fibers, then press out any packing wrinkles using a warm steam iron before placing your ruler and shears on the grainline.
| Piece Name | Material | Quantity | Cut Dimensions |
|---|---|---|---|
| Exterior Bag Panels | Exterior quilting cotton | 2 | 7 in x 9.5 in (18 cm x 24 cm) |
| Lining Bag Panels | Lining quilting cotton | 2 | 7 in x 9.5 in (18 cm x 24 cm) |
| Drawstring Ties | White satin ribbon | 2 | 18 in (46 cm) length each |
Pro tip: Always cut parallel to the straight grain of the fabric. Cutting off-grain causes the finished rectangular bag to twist awkwardly along the side seams once the drawstring is cinched.
Step 1: Sewing the Exterior and Lining Bags
With your fabric panels pressed and cut to size, you will first construct the two separate bag pouches: one exterior and one lining.
- Sew the exterior pouch: Place the two exterior fabric panels right sides together, aligning all four raw edges. Pin along the two long sides and the bottom edge. Using a 1/2 inch (1.3 cm) seam allowance and a 2.5 mm straight stitch, sew down one long side, pivot at the corner, sew across the bottom, pivot, and sew up the remaining long side. Backstitch 3 to 4 stitches at the start and finish. Leave the top narrow edge completely unsewn.
- Sew the lining pouch with a turning gap: Place the two lining fabric panels right sides together and pin the edges. Sew down the first long side with a 1/2 inch (1.3 cm) seam allowance. On the bottom edge, sew inward 1.5 inches (4 cm) from the corner and backstitch securely. Leave a 3-inch (7.5 cm) opening unsewn in the center of the bottom edge, then backstitch and sew the remaining 1.5 inches (4 cm) to the opposite corner. Pivot and sew up the second long side.
- Trim the corners: Use your fabric shears to snip the bottom seam allowance corners diagonally at a 45-degree angle on both pouches, taking care not to cut through the line of stitching. This removes excess fabric bulk so the bottom corners turn out crisp and square.
- Press all seams flat: Press both pouches with an iron to set the stitches, then press the seam allowances open over the edge of your ironing board or using a seam roll.
Step 2: Assembling and Attaching the Lining
Once the individual exterior and lining pouches are stitched, join them at the upper rim to enclose all internal raw seams.
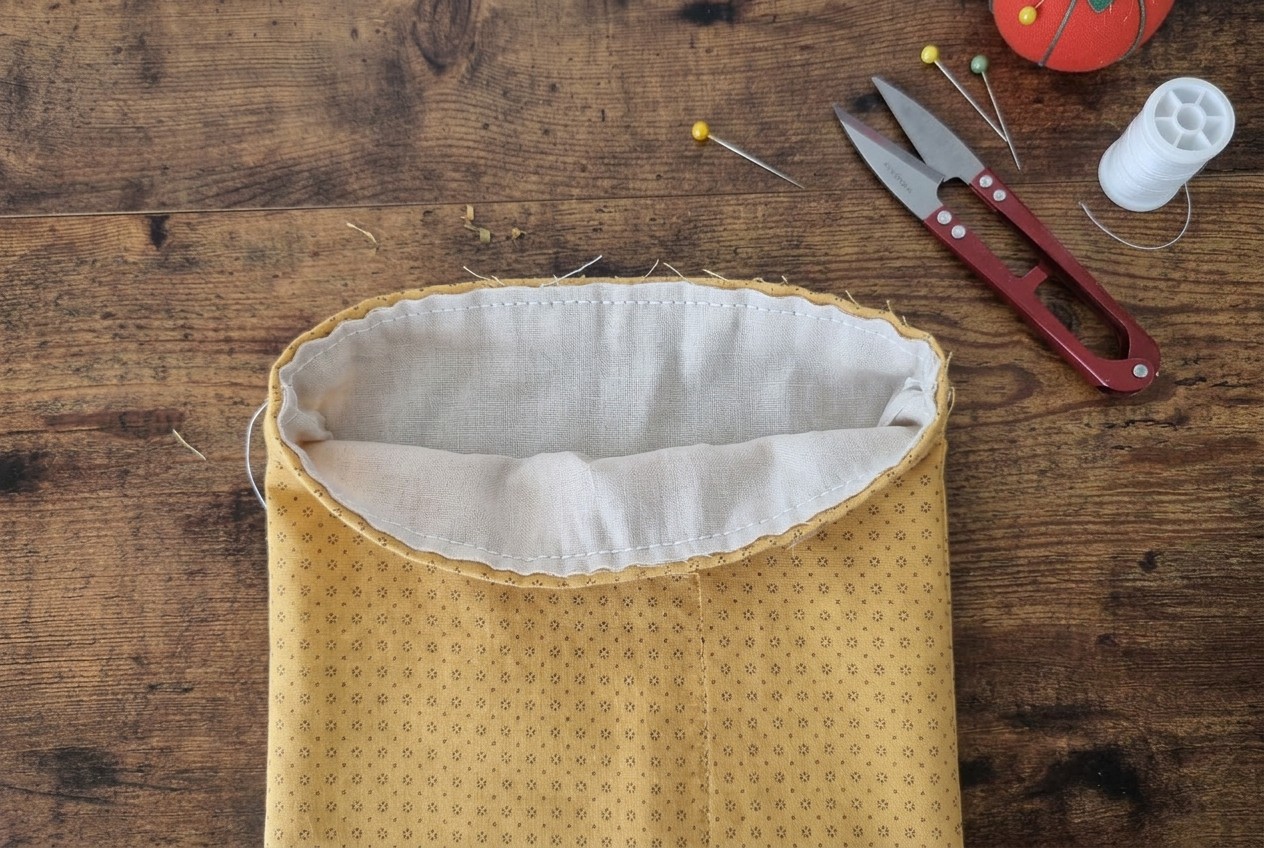
- Nest the pouches: Turn the exterior bag right side out. Keep the lining bag inside out. Slide the exterior bag inside the lining bag so that their right sides are touching directly.
- Align the side seams: Match the side seams of the exterior bag precisely with the side seams of the lining bag. Pin the seams together first, opening the seam allowances flat to reduce bulk, then pin around the remaining circumference of the top open edge.
- Stitch the top edge: Place the circular top opening under your presser foot, using the free arm of your sewing machine if available. Sew continuously around the top edge with a 1/2 inch (1.3 cm) seam allowance. Overlap your final stitches by 1/2 inch (1.3 cm) over the starting point and backstitch.
- Turn the bag right side out: Reach through the 3-inch (7.5 cm) turning gap left in the bottom of the lining pouch. Grasp the exterior fabric and gently pull the entire exterior pouch out through the gap until the full bag is right side out.
- Close the lining gap: Tuck the raw edges of the 3-inch (7.5 cm) turning gap 1/2 inch (1.3 cm) inside the lining so the folded edges align flush. Press the fold flat with an iron. Pin the fold closed and edge-stitch along the very edge (1/16 inch / 1.5 mm from the fold) across the gap on your machine, or slip stitch it closed by hand.
- Press the top rim: Push the lining bag down inside the exterior bag. Roll the top seam slightly between your fingers so the seam sits right on the top edge, or rolls 1/16 inch toward the inside lining to prevent the lining from showing on the outside. Press the top edge firmly with steam to create a sharp, flat perimeter.
Pro tip: When pressing the top edge, use a burst of steam and clamp the edge flat with your fingers or a wooden clapper for three seconds after removing the iron. This creates a razor-sharp edge that makes sewing casing lines much more accurate.
Step 3: Creating the Casing and Threading the Ribbon
The drawstring channel requires two parallel lines of topstitching around the upper portion of the bag to guide the satin ribbons smoothly.
- Mark the casing lines: Using a water-soluble fabric pen or sewing gauge, measure down from the pressed top edge. Mark a continuous horizontal line around the entire bag at 1.25 inches (3.2 cm) from the top. Mark a second horizontal line parallel to the first at 2 inches (5 cm) from the top edge. This creates a 3/4-inch (1.8 cm) casing channel.
- Stitch the casing channels: Increase your stitch length slightly to 3.0 mm for neat topstitching. Sew around the circumference of the bag directly along the first marked line (1.25 inches from top). Sew around the bag again along the second marked line (2.0 inches from top), backstitching where your stitch lines meet.
- Open the side seam casing access: Using a sharp seam ripper, carefully cut the external side seam stitches located strictly between the two parallel casing stitch lines on both the left and right sides of the bag. Only cut the exterior stitches, leaving the lining layer intact behind it, to expose entry slots on both sides.
- Thread the first ribbon: Attach a small safety pin to one end of the first 18-inch (45 cm) piece of white satin ribbon. Insert the safety pin into the right side seam opening. Guide the pin all the way around the front channel, past the left opening, through the back channel, and out through the same right opening where you started. Pull both ends even.
- Thread the second ribbon: Attach the safety pin to the second 18-inch (45 cm) piece of ribbon. Insert it into the left side seam opening. Guide it all the way around the back channel, past the right opening, through the front channel, and out through the left opening. You now have two ribbon tails exiting each side of the bag.
- Secure the ribbon ends: Tie an overhand knot near the ends of each pair of ribbon tails to keep them from slipping back inside the casing channels.
Finishing, Pressing, and Styling
A meticulous final finish elevates a simple sewing project into a clean, durable item. Carefully inspect your completed pouch for stray thread tails around the topstitching and side openings, clipping them close to the fabric with sharp embroidery scissors.
Give the entire bag a final press with your iron, taking care to avoid pressing directly over synthetic satin ribbons with excessive heat, which can melt polyester fibers. Pull both sets of ribbon knots outward simultaneously to verify that the bag gathers evenly across the top casing without binding. You can use this finished pouch to store small craft notions, jewelry, travel toiletries, or daily essentials.
Variations and Customizing Your Bag
While maintaining the simple, unpocketed construction of this pattern, you can modify decorative elements to suit different uses:
- Contrasting ribbon cords: Replace the white satin ribbon with 1/8-inch (3 mm) twisted cotton cord, jute twine, or grosgrain ribbon for a textured, rustic look.
- Print mixing: Pair a vibrant floral print exterior with a bold geometric or solid lining fabric to create visual contrast when the bag is opened.
- Fabric charms on ribbons: Thread wooden beads or small fabric yo-yos onto the ribbon ends before tying your final overhand knots.
- Directional prints: When using directional fabric patterns, ensure your prints face right-side-up on both the front and back panels before sewing the bottom seam.
Troubleshooting Common Beginner Issues
If you encounter uneven stitching or difficulties while guiding ribbon, consult these solutions to correct common construction mistakes.
| Problem | Likely Cause | Solution |
|---|---|---|
| Ribbon gets stuck halfway inside casing | Casing channel is too narrow or safety pin flipped sideways | Use a small 1-inch safety pin and ensure the casing width is at least 3/4 inch (1.9 cm) wide. |
| Top edge puckers while sewing casings | Presser foot pressure is too high or fabric layers shifted | Pin or clip thoroughly around the circumference before stitching, and reduce presser foot tension if your machine allows. |
| Lining peeks over the outside top edge | Top seam was not rolled inward toward the lining before pressing | Re-press the top edge with steam, manually rolling the exterior fabric 1/16 inch over the lining edge. |
| Casing seam lines are wavy or uneven | Inconsistent reference point when guiding fabric under the needle | Use painter’s tape on your machine bed or follow the seam guide markings to keep the bag edge aligned. |
Care and Washing Instructions
Woven cotton bags are simple to maintain with routine laundering. Machine wash the bag on a gentle cycle in cold water with similar colors, or hand wash it in a small basin to protect the ribbon ties. Avoid using bleach, which can weaken the thread fibers and fade printed cotton designs.
Reshape the pouch while damp and lay it flat or hang it to dry. If the cotton fabric wrinkles after drying, press the exterior with a warm iron on the cotton setting. Always use a pressing cloth over synthetic ribbon ties to avoid heat damage.
Frequently Asked Questions
What is the best fabric for a lined drawstring bag?
Lightweight to medium-weight 100% quilting cotton is a suitable fabric choice. It holds its shape during cutting, presses flat under an iron, and allows the drawstring casing to gather smoothly without excessive bulk.
Can I use a sewing machine needle size 80/12 for quilting cotton?
Yes, a standard universal size 80/12 needle is the standard choice for medium-weight woven cottons. It pierces the fabric cleanly without snagging threads or leaving visible puncture holes along your seam lines.
How do I ensure my drawstring casing is even?
Mark your stitching lines using a clear ruler and a water-soluble marking pen around the entire perimeter before sewing. Guide your presser foot along these marked lines or align the top edge of the bag with a consistent seam guide mark on your machine plate.
How do you thread ribbon through a casing?
Secure a medium safety pin through the end of the ribbon and close it completely. Push the rounded end of the safety pin into the casing opening, inching it forward by bunching the fabric and pulling the pin through the channel until it exits the opposite opening.
Your Completed Cotton Drawstring Pouch
By completing this lined drawstring bag tutorial, you have constructed a practical, enclosed pouch while mastering fundamental sewing skills like turning gaps, topstitching, and casing construction. The finished 6 in x 8 in (15 cm x 20 cm) size makes an excellent reusable pouch for organizing everyday small items. Remember that consistent seam allowances and thorough steam pressing at every stage make all the difference in achieving clean, professional-looking sewing projects. Keep your extra fabric scraps organized, and use this basic pattern whenever you need a fast, functional handmade project.