In this post
- At a Glance
- Why This Floor Cushion Sewing Pattern Works
- Materials and Tools Needed
- Choosing the Right Fabric for Your Floor Cushion
- Cutting Chart and Preparation
- Step 1: Piecing and Quilting the Cushion Top
- Step 2: Preparing the Gusset and Piping
- Step 3: Assembling and Stuffing the Cushion
- Finishing and Pressing
- Variations and Customizing
- Troubleshooting Common Floor Cushion Issues
- Care and Washing
- Frequently Asked Questions
- Enjoy Your Handmade Floor Cushion
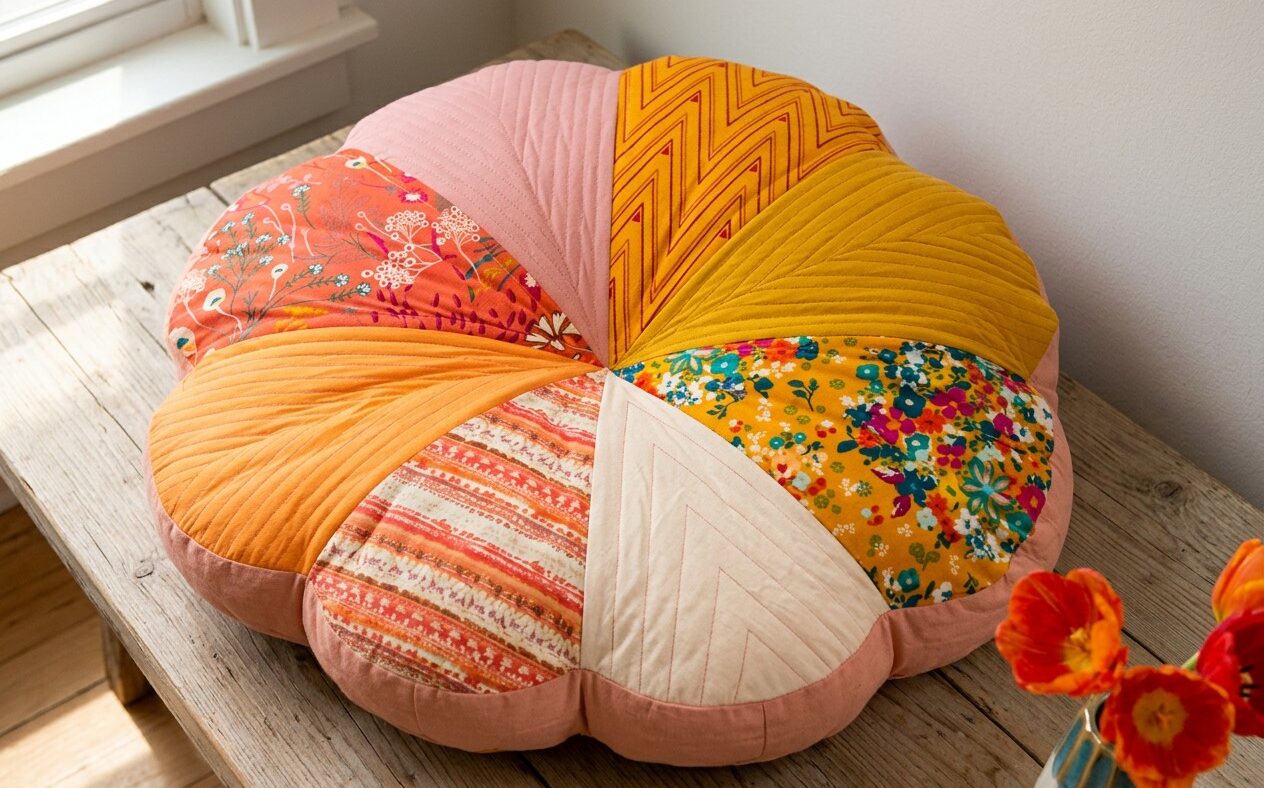
Creating functional home decor allows you to combine practical construction with custom design. This intermediate tutorial guides you through an eye-catching floor cushion sewing pattern that yields an approximately 24-inch (61 cm) round seat. By combining wedge piecing, straight-line quilting, and structured piping, you will produce a durable and supportive cushion designed for everyday lounging. If you have mastered basic straight stitching and want to expand your skills with circular seams, structural gussets, and decorative edge finishes, this project offers a practical next step for your sewing space.
At a Glance
Before gathering your supplies, review the fundamental specifications of this intermediate home decor build.
| Specification | Project Detail |
|---|---|
| Skill Level | Intermediate |
| Estimated Time | 3-4 hours |
| Finished Size | Approx. 24 inches (61 cm) diameter |
| Main Fabrics | Medium weight quilting cotton and cotton canvas |
| Key Techniques | Wedge piecing, straight line quilting, piping insertion, gusset assembly |
Why This Floor Cushion Sewing Pattern Works
Round cushions experience significant pressure when used on the floor, requiring balanced engineering to maintain their shape. This floor cushion sewing pattern utilizes an eight-wedge pieced top that evenly distributes seam tension across the circular face. Because the radial seams meet at a central axis, the fabric resists stretching along bias edges when weight is applied.
Adding dense straight-line quilting directly to each wedge segment reinforces standard medium weight quilting cotton. The quilting secures the fabric to internal batting, preventing the top surface from shifting or wrinkling over time. Combining a quilted cotton top with a heavyweight canvas gusset and base creates a stable foundation capable of holding dense fiberfill without seam blowout.
Intermediate sewists will refine several critical technical skills throughout this build. You will practice aligning multiple acute points at a single center junction, sewing smooth curves along a continuous circle, and attaching pre-made piping with a consistent 1/2-inch (1.3 cm) seam allowance.
Materials and Tools Needed
Achieving a clean, supportive finish requires the correct combination of stable fabrics, structural trims, and sharp cutting tools.
- 1/4 yard (0.25 m) each of 8 coordinating medium weight quilting cotton fabrics (coral pinks, mustards, oranges, and creams)
- 1 yard (0.9 m) solid cotton canvas for the backing panel and side gusset
- 1/3 yard (0.3 m) low-loft cotton or polyester batting (cut to 25 inches / 63.5 cm square)
- 3 yards (2.7 m) pre-made piping or cording
- Poly-fil stuffing (approximately 32 to 40 ounces / 0.9 to 1.1 kg) or a 24-inch (61 cm) round pillow insert
- Sewing machine fitted with a zipper foot and standard presser foot
- Universal sewing needles size 80/12
- Rotary cutter and self-healing cutting mat
- Fabric shears and embroidery snips
- Iron and ironing board
- Sewing pins or wonder clips
- Hand sewing needle and heavy-duty thread
Choosing the Right Fabric for Your Floor Cushion
Fabric weight directly dictates the longevity and crispness of your finished cushion. Medium weight quilting cotton is well-suited for the pieced top wedges. Its tight plain weave holds crisp folds during pressing, cuts cleanly without excessive fraying, and comes in a wide variety of prints and solids to create a striking radial palette.
For the side gusset and the bottom circular base, solid cotton canvas provides the necessary abrasion resistance. Because floor cushions encounter friction against rugs and hard flooring, lightweight cottons on the bottom surface wear prematurely. Canvas provides a dense, firm structure that keeps the vertical side wall upright, preventing the cushion from sagging into a flat pancake shape once stuffed.
Pro tip: Pre-wash and press your quilting cotton and canvas at identical water temperatures before cutting. Canvas shrinks at a different rate than quilting cotton, and pre-shrinking ensures your seams remain flat after future spot cleanings.
Cutting Chart and Preparation
Precision cutting ensures the central points align without puckering. Draft a 45-degree wedge template measuring 12.5 inches (31.8 cm) long from the acute center point to the outer curved edge, accounting for 1/2-inch (1.3 cm) seam allowances on all sides.
| Piece Name | Fabric | Quantity | Cut Dimensions |
|---|---|---|---|
| Wedge Panels | Assorted Quilting Cottons | 8 (1 from each print) | Drafted 45-degree wedge (12.5 in / 31.8 cm radius) |
| Cushion Backing Panel | Solid Cotton Canvas | 1 | 25-inch (63.5 cm) diameter circle |
| Side Gusset Strips | Solid Cotton Canvas | 2 | 4.5 inches x 40 inches (11.4 cm x 101.6 cm) |
| Top Batting Layer | Cotton/Polyester Batting | 1 | 25-inch x 25-inch (63.5 cm x 63.5 cm) square |
Step 1: Piecing and Quilting the Cushion Top
With all pieces cut accurately according to the chart, you can assemble the decorative top circle using a standard 2.5 mm stitch length.
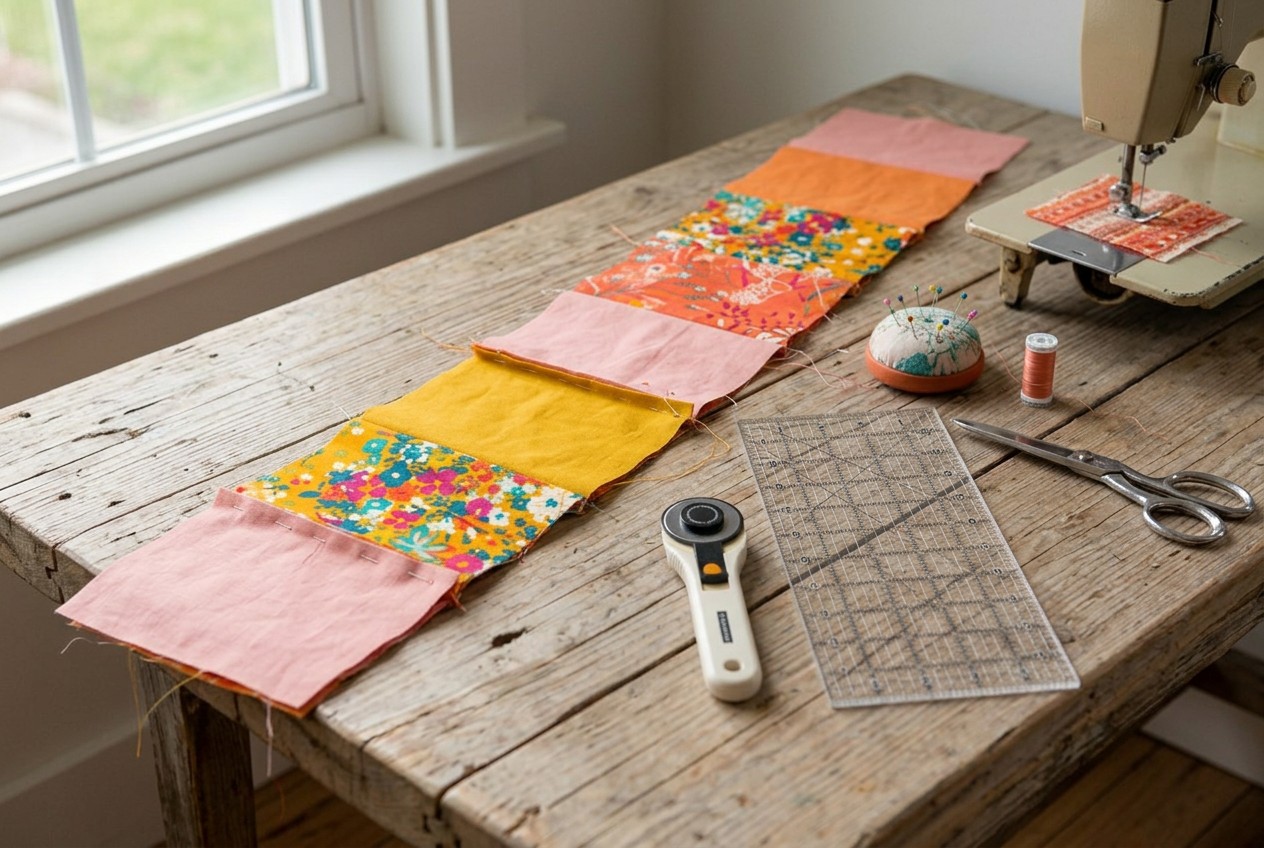
Assembling the Wedge Panels
- Arrange your wedges in a circle. Lay the 8 cut fabric wedges flat on your cutting table, organizing the floral prints, geometric motifs, and solid colors in a balanced radial sequence.
- Join the wedges into pairs. Place two adjacent wedges right sides together, aligning the long straight edges precisely. Pin along the side seam. Sew from the outer wide edge toward the pointed center point using a 1/2-inch (1.3 cm) seam allowance, backstitching at both ends. Repeat for the remaining three pairs.
- Press the seam allowances open. Set the stitches with a hot iron, then press the seam allowances flat and open to reduce bulk at the outer edges and center.
- Assemble the two half-circles. Place two wedge pairs right sides together, matching the center points and outer raw edges. Pin securely, then stitch with a 1/2-inch (1.3 cm) seam allowance. Repeat with the other two pairs so you have two complete half-circles. Press seams open.
- Sew the final center seam. Place the two half-circles right sides together. Align the central intersection precisely and insert a pin directly through the point where all seams meet. Stitch across the entire diameter with a 1/2-inch (1.3 cm) seam allowance. Press the center seam open.
Pro tip: To prevent the center intersection from forming an unsightly lump, fan the seam allowances at the very center point in a spiral direction before applying firm steam with your iron.
Quilting the Pieced Top
- Layer the quilt sandwich. Place the 25-inch square of batting flat on your work surface. Lay the pieced top right side up on top of the batting. Pin the layers together every 3 inches (7.6 cm) using sewing pins, working from the center outward.
- Mark parallel quilting lines. Using a fabric marking pen or seam guide, mark straight lines spaced 1/2 inch (1.3 cm) apart across each wedge, radiating outward from the center point to the outer curved perimeter.
- Quilt each wedge section. Install a size 80/12 universal needle and increase your machine’s stitch length to 3.0 mm. Sew along the marked parallel lines on each wedge, always stitching in the direction from the center point toward the outer edge to prevent fabric ripples.
- Trim to a clean circle. Lay your quilted piece flat on the cutting mat. Use a circular template or a rotary cutter guided by a measured radius string to trim the outer edge cleanly to a 25-inch (63.5 cm) diameter, cutting away excess batting.
Step 2: Preparing the Gusset and Piping
Once the quilted top is stabilized and trimmed, you will build the side wall and apply the structural edge finish.
Joining the Side Gusset Strip
- Stitch the gusset halves together. Place the two 4.5-inch x 40-inch (11.4 cm x 101.6 cm) canvas gusset strips right sides together along one short end. Sew across the 4.5-inch edge using a 1/2-inch (1.3 cm) seam allowance. Press the seam open.
- Check the circumference measurement. The joined strip should measure 4.5 inches (11.4 cm) wide by approximately 79 inches (200.7 cm) long, matching the circumference of your 25-inch (63.5 cm) circular top plus seam allowances. Keep the remaining short ends open for now.
Attaching Piping to the Cushion Top
- Position the piping. Place the pre-made piping on the right side of the quilted cushion top, aligning the raw edge of the piping tape with the raw circular edge of the fabric. The raised cord side should face inward toward the center of the cushion.
- Baste the piping in place. Attach a zipper foot to your sewing machine. Using a 3.5 mm basting stitch, sew the piping to the cushion top, stitching roughly 3/8 inch (1 cm) from the raw edge along the piping stitching line. Clip shallow 1/4-inch (6 mm) notches into the piping tape every 2 inches (5 cm) to help it bend smoothly around the curves without puckering.
- Join the piping ends cleanly. Stop stitching 3 inches (7.6 cm) before your starting point. Open the casing of one piping end by 1 inch (2.5 cm) and trim the internal cord so the two cord ends meet flush without overlapping. Fold the fabric casing under by 1/2 inch (1.3 cm), wrap it around the joined cord junction, and stitch across the overlap to secure.
Step 3: Assembling and Stuffing the Cushion
With the piping anchored securely to the top face, you can complete the three-dimensional assembly of the cushion body.
Sewing the Gusset and Bottom Panel
- Attach the gusset to the top panel. Pin the long edge of the canvas gusset to the piped edge of the cushion top, right sides together. Sew the gusset to the top using a 1/2-inch (1.3 cm) seam allowance and your zipper foot, riding closely against the piping cord. Join the short ends of the gusset strip with a 1/2-inch seam allowance where they meet, then finish stitching the perimeter.
- Pin the bottom canvas panel. Lay the 25-inch (63.5 cm) solid canvas backing circle flat, right side up. Pin the remaining raw edge of the attached side gusset to the backing circle, right sides together, matching raw edges all the way around.
- Sew the bottom seam with an opening. Stitch the gusset to the bottom canvas circle using a 1/2-inch (1.3 cm) seam allowance. Leave a clear 6-to-8-inch (15 to 20 cm) opening unstitched along the seam to allow for turning and stuffing. Backstitch firmly on both sides of the gap.
- Clip and grade the circular seams. Use fabric shears to snip small V-shaped notches along the seam allowance of both circular joins at 2-inch (5 cm) intervals. Be careful not to cut through the stitching line. Clipping releases tension and lets the round seam lay flat.
Pro tip: When sewing the gusset to the piped top, stitch with the quilted top facing upward so you can follow the initial piping stitching line directly, guaranteeing an even reveal of the cord.
Turning and Stuffing
- Turn the cushion right side out. Reach through the 8-inch opening and gently pull the entire cushion body through to the right side. Push the piped seam out fully with your fingertips to establish a crisp circular perimeter.
- Fill the cushion firmly. Pull small tufts of Poly-fil stuffing apart to aerate the fibers. Insert the stuffing through the opening, packing the outer circumference and gusset edges firmly first. Continue filling toward the center until the cushion is dense, level, and measures approximately 24 inches (61 cm) across.
- Pin the opening closed. Turn the 1/2-inch seam allowances of the opening to the inside. Align the folded edges flush with the bottom seam line and insert sewing pins perpendicular to the fold to hold it shut.
- Close with an invisible ladder stitch. Thread a hand sewing needle with doubled heavy-duty thread and tie a secure knot. Work a tight ladder stitch (slip stitch) across the opening, taking small 1/8-inch (3 mm) bites on alternating sides. Pull the thread taut every inch to conceal the stitches, then knot securely and bury the thread tail inside the cushion.
Finishing and Pressing
Applying steam to the finished cushion helps shape the fibers and sets the seam lines. Hold a hot steam iron roughly 1 inch (2.5 cm) above the quilted top surface, allowing the steam to relax the cotton fibers without flattening the internal loft of the Poly-fil. Use your hands to firmly pat the side gusset all the way around, distributing the fill evenly into the vertical walls so the cushion rests flat on the floor.
Variations and Customizing
You can adapt this pattern to match different interior spaces and scrap collections.
- Monochrome Solid Wedge Palette: Use eight gradating shades of a single color (such as soft neutrals or blues) for a contemporary, minimalist aesthetic.
- High-Contrast Piping: Select a bold accent color for the pre-made piping that contrasts sharply with both the top prints and the side gusset.
- Sixteen-Wedge Layout: Halve the wedge angle to 22.5 degrees and cut 16 wedges instead of 8 to incorporate a wider variety of small scrap prints.
- Textured Base Fabric: Swap the cotton canvas for a heavy cotton duck or bull denim to provide a different texture on smooth wooden floors.
Troubleshooting Common Floor Cushion Issues
If you encounter uneven seams or misshapen panels during construction, consult this guide for quick solutions.
| Problem | Likely Cause | Corrective Action |
|---|---|---|
| Center points do not align neatly | Wedge seams shifted during sewing or seam allowances were inconsistent | Unpick the center 2 inches of the seams, align the central points using a pin through the exact intersection, and re-stitch carefully. |
| Wavy or rippled circle perimeter | Bias edges stretched during straight-line quilting | Sew a stay-stitch line 1/4 inch (6 mm) from the edge before attaching piping, gently easing the fabric flat as you stitch. |
| Piping tape visible on finished exterior | The final gusset seam was sewn too far from the piping cord | Use a zipper foot to sew directly over the original piping basting line, keeping the needle tight against the internal cord. |
| Lumpy or uneven cushion surface | Stuffing inserted in large dense clumps rather than small teased layers | Massage the cushion firmly from the outside to separate fiber clumps, or reach through the opening to redistribute fill evenly along the gusset walls. |
Care and Washing
Because this cushion contains loose fiberfill and dense quilting, spot cleaning is the recommended care method. Mix a mild liquid detergent with cold water and blot stains gently using a clean microfiber cloth. Allow the cotton canvas and quilting cotton to air dry completely in a well-ventilated area away from direct sunlight to prevent fiber fading. Avoid submerging the entire cushion in water, as thoroughly drying dense internal Poly-fil requires extended drying times that may cause the fill to shift.
Frequently Asked Questions
Can I use a pre-made pillow insert instead of loose fiberfill?
Yes, you can use a 24-inch (61 cm) round pillow insert with a 4-to-5-inch loft. Make sure your opening along the bottom gusset seam is at least 12 inches (30.5 cm) wide so you can compress and insert the pre-formed pillow without ripping the canvas seam allowances.
How do I ensure all my wedge points meet neatly in the center?
Pin directly through the seam intersection of both halves before sewing the final center seam. Stitch at a slow speed, keeping your 1/2-inch (1.3 cm) seam allowance uniform, and press all previous seams open to prevent uneven fabric bulk at the center point.
What is the best needle size for sewing through quilted layers and piping?
Use a universal sewing needle size 80/12 as specified in the tools list. The larger needle easily penetrates the multiple layers of canvas, piping tape, and quilted cotton without deflecting or breaking.
Can I make this floor cushion without adding piping trim?
You can omit the piping and sew the side gusset directly to the pieced top right sides together. However, keeping the piping provides significant structural integrity to the 24-inch perimeter, helping the cushion maintain a defined circular shape when sat upon.
Enjoy Your Handmade Floor Cushion
Completing this 24-inch patchwork project gives you a durable, comfortable seating option tailored to your home decor style. By combining steady wedge piecing, radiant straight-line quilting, and structural canvas assembly, you have transformed flat yardage into a supportive floor piece. Keep this versatile floor cushion sewing pattern on hand to create coordinated seating sets, making sure to maintain consistent 1/2-inch seam allowances throughout every build for a balanced circular finish.