In this post
- At a Glance: Simple Tote Bag Project
- Why This Simple Tote Bag Tutorial Works for Beginners
- Materials and Tools Needed
- Choosing the Right Fabric for Your Tote
- Cutting Chart and Preparation
- Piecing the Front and Back Panels
- Preparing and Attaching the Straps
- Assembling and Finishing the Bag
- Finishing, Pressing, and Care
- Troubleshooting Common Sewing Issues
- Frequently Asked Questions
- Your Completed Everyday Cotton Tote
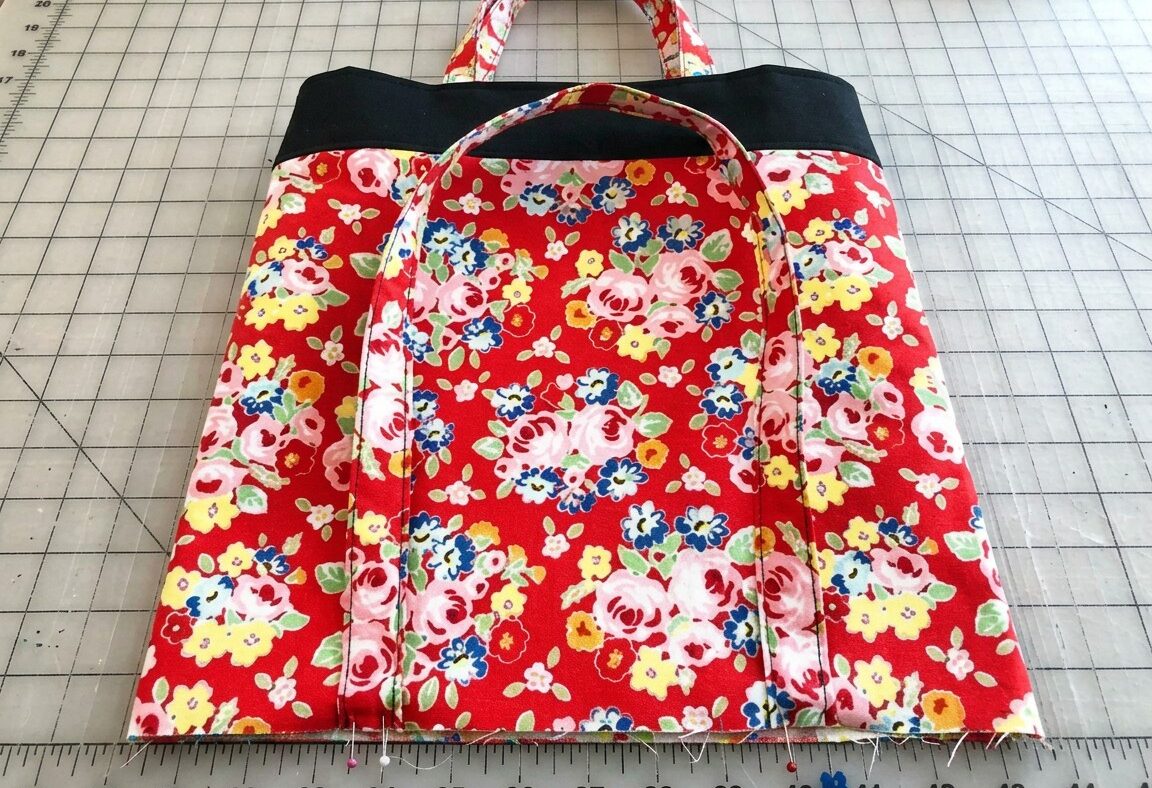
Learning how to stitch your own everyday bag is one of the most practical skills you can develop at your machine. This simple tote bag tutorial walks you through creating a durable, unlined everyday carryall measuring approximately 14 in x 16 in (35 cm x 40 cm). Featuring a vibrant red floral body accented with a contrasting solid black top band, this beginner-friendly project teaches you core assembly methods without overcomplicating the process. You will practice straight stitching, piecing color-blocked panels, pressing crisp seams, and securing sturdy fabric straps. In just about 1 hour, you can transform basic cotton yardage into a functional bag that holds books, groceries, or current craft projects.
At a Glance: Simple Tote Bag Project
Before preparing your fabric, check the essential specifications for this project to ensure you have the required materials and workspace ready.
| Project Detail | Specification |
|---|---|
| Skill Level | Beginner |
| Time Required | 1 hour |
| Finished Size | Approx. 14 in x 16 in (35 cm x 40 cm) |
| Main Fabrics | Medium weight quilting cotton or canvas |
| Key Techniques | Piecing panels, attaching straps, straight line topstitching |
| Standard Seam Allowance | 1/2 inch (1.3 cm) |
Why This Simple Tote Bag Tutorial Works for Beginners
Starting with an unlined tote allows you to focus on the mechanical fundamentals of sewing straight seams and handling fabric grain. Rather than wrestling with complex zippers, magnetic snaps, or tricky linings, this design focuses on clean lines and sound construction. The contrasting top band adds visual interest while teaching you how to join two panels with neat, matching horizontal seams.
You will also gain hands-on experience sewing exterior straps directly to the bag panels. This technique teaches you how to measure strap placement accurately and reinforce high-stress points using topstitching. Each technique practiced here serves as a building block for advanced garment construction and complex bag making in the future.
Materials and Tools Needed
Gathering the correct supplies before cutting keeps your workspace organized and prevents interruptions during construction.
- Red floral cotton fabric: 1/2 yard (0.5 m) of medium weight quilting cotton or lightweight canvas
- Black cotton fabric: 1/4 yard (0.25 m) of matching medium weight cotton for the top band and straps
- All-purpose sewing thread: Matching polyester or cotton thread for structural seams and topstitching
- Sewing machine: Standard domestic machine with straight stitch and zigzag stitch capabilities
- Machine needle: Universal sewing needle size 80/12
- Cutting tools: Cutting mat, rotary cutter, and fabric shears
- Pressing tools: Steam iron and ironing board
- Sewing pins: Pins
Pro tip: Always insert a fresh universal 80/12 needle before starting. A dull needle can push woven threads aside or cause skipped stitches when sewing through the multiple layers of your fabric straps.
Choosing the Right Fabric for Your Tote
The structure of an unlined bag depends entirely on the weight and weave of your chosen textile. Medium weight quilting cotton offers a soft, foldable finish that is easy to press, while lightweight cotton canvas or duck cloth provides extra rigidity and durability for heavier loads. Both options feed smoothly through a domestic sewing machine without requiring specialized presser feet.
Avoid lightweight fabrics such as rayon, silk, or voile, as they lack the body needed to support their own shape and will sag under weight. Stretchy knit fabrics are also unsuitable for this design because they will distort when seam stress is applied. If you select 100% cotton, always pre-wash and press your yardage before cutting to eliminate shrinkage and remove factory sizing.
Cutting Chart and Preparation
Accurate cutting ensures that your panels match cleanly at the side seams and the finished bag measures true to size.
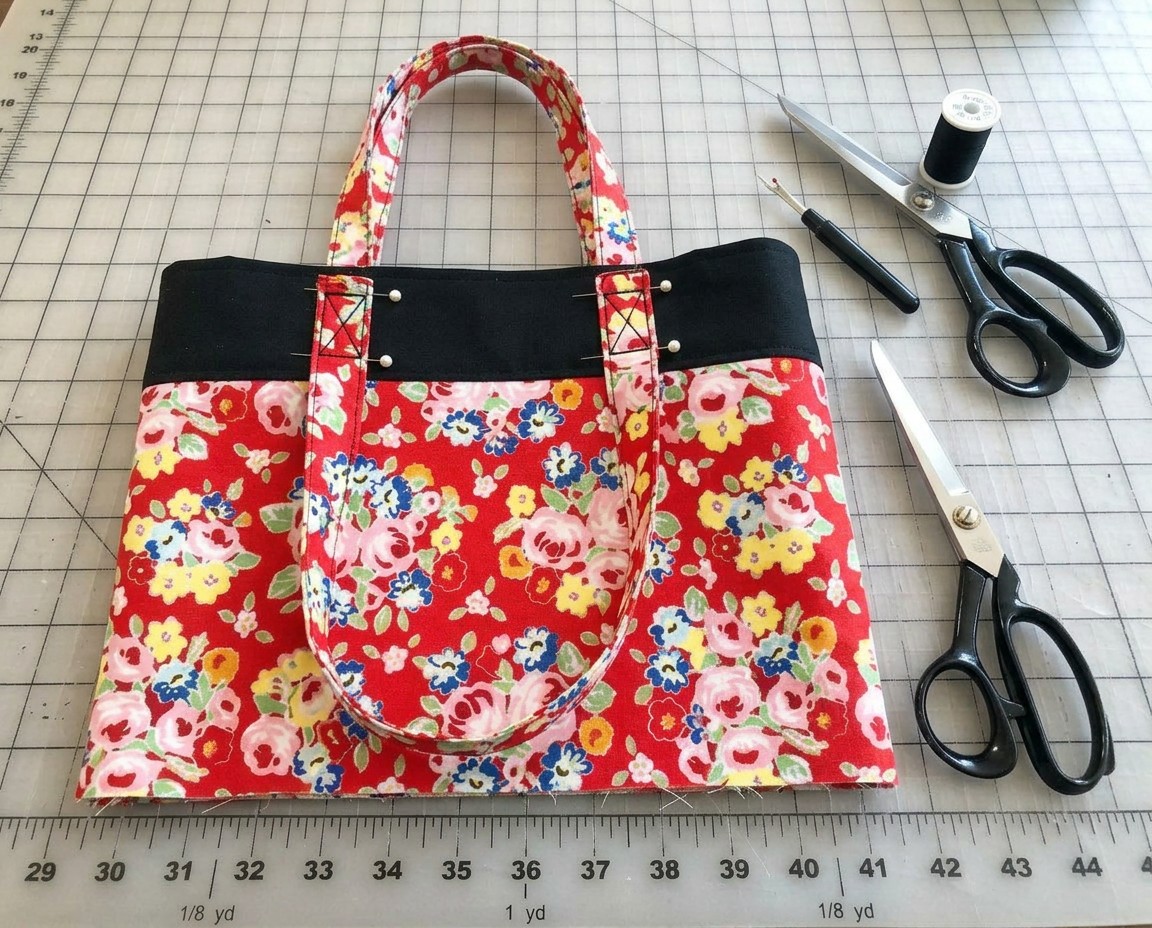
| Piece Name | Fabric | Quantity | Cut Dimensions (Width x Height) |
|---|---|---|---|
| Main Body Panel | Red Floral Cotton | 2 | 15 in x 13.5 in (38 cm x 34.3 cm) |
| Top Band Panel | Black Cotton | 2 | 15 in x 4.5 in (38 cm x 11.4 cm) |
| Strap Piece | Black Cotton | 2 | 4 in x 21 in (10 cm x 53.3 cm) |
Always close your rotary cutter blade immediately after making each cut to prevent accidental injuries or fabric snips.
Piecing the Front and Back Panels
Joining the accent band to the floral body forms the complete exterior rectangles for both the front and back of your tote.
Joining the Top Band
- Align the raw edges: Lay one floral main body piece right side up on your work surface. Place one black top band piece right side down along the top 15-inch edge, matching raw edges and corners. Pin securely along the seam line.
- Stitch the horizontal seam: Using a straight stitch (stitch length 2.5 mm), sew across the pinned edge using a 1/2 inch (1.3 cm) seam allowance. Backstitch 3 to 4 stitches at both the start and end of the seam to lock the threads.
- Press the seam flat: Take the pieced panel to the ironing board. Press the seam flat as stitched to set the stitches, then press the seam allowances open or downward toward the floral panel.
- Repeat for the second panel: Join the remaining black top band to the second floral body piece in the exact same manner. You now have two complete bag panels measuring 15 in wide by 17 in high (38 cm x 43 cm).
Preparing and Attaching the Straps
Stout handles require proper folding and edge-stitching so they sit comfortably in the hand and support everyday weight without unraveling.
Folding and Topstitching Straps
- Press the center crease: Take one 4 in x 21 in (10 cm x 53.3 cm) black strap piece and fold it in half lengthwise, wrong sides together. Press along the entire fold with a hot steam iron to create a sharp center crease.
- Fold raw edges inward: Open the strip flat. Fold both long raw edges inward until they meet precisely at the center crease line. Press firmly along both folded edges.
- Fold and press closed: Re-fold the strap along the original center crease. Your raw edges are now completely enclosed inside a four-layer strap measuring 1 in wide by 21 in long (2.5 cm x 53.3 cm). Press one final time. Repeat this folding process for the second strap.
- Topstitch the edges: Set your machine stitch length to 3.0 mm for a clean topstitch finish. Sew 1/8 inch (3 mm) away from the long folded edge along the entire length of the strap. Turn the strap around and sew an identical line 1/8 inch (3 mm) from the opposite edge.
Securing Straps to the Panels
- Mark strap placement: Lay the front bag panel right side up. Measure 3.5 inches (9 cm) inward from the left and right outer raw edges. Mark these points along the upper black band.
- Position the strap ends: Place the raw ends of one strap onto the right side of the black band, aligning the raw strap ends with the top edge of the panel. Ensure the strap is not twisted. Pin the strap ends firmly in place.
- Stitch structural reinforcement: Sew across the strap ends 1/4 inch (6 mm) from the top raw edge to baste them down. For maximum strength, sew a 1-inch box with an interior ‘X’ or two vertical parallel lines of topstitching through the strap and black band just below the top edge.
- Attach back strap: Repeat the exact measurement, pinning, and stitching process to secure the second strap to the back bag panel.
Pro tip: When positioning your handles, run your hand along the loop from one pinned end to the other. This quick check ensures the strap lays completely flat and does not contain a half-twist before you sew it down permanently.
Assembling and Finishing the Bag
With both exterior panels fully prepared and straps anchored, you can now construct the main body of the tote.
Sewing Side and Bottom Seams
- Pin panels right sides together: Place the front panel and back panel right sides together. Carefully match the horizontal seams where the black band meets the floral body, pinning directly through the intersection to keep them aligned. Pin down both side edges and across the bottom edge.
- Sew the perimeter: Using a 1/2 inch (1.3 cm) seam allowance and a 2.5 mm stitch length, sew down the left side, pivot at the corner, sew across the bottom, pivot again, and sew up the right side. Leave the entire top edge open. Backstitch securely at the beginning and end of the seam.
- Finish raw seam allowances: Because this tote is unlined, seal the raw interior seam allowances to prevent fraying during use. Finish the raw interior seam allowances with a zigzag stitch or serger.
- Pin around the entire upper circumference.
Finishing, Pressing, and Care
Proper finishing steps give handmade cotton items their structured shape and crisp corners.
Reach inside the bag and push the bottom corners out gently using a point turner or a blunt wooden chopstick. Avoid using sharp scissor tips, which can easily poke through freshly stitched corner seams. Take the turned bag to your pressing station and press all side and bottom seams flat, pulling the fabric taut along the seam line so no folds are trapped inside.
To care for your 100% cotton tote, machine wash on a gentle cycle in cold water with mild detergent. Reshape the bag while damp and hang it to air dry to minimize wrinkles and preserve the integrity of the seams. Press with medium-high steam to restore the bag’s crisp shape whenever necessary.
Troubleshooting Common Sewing Issues
If you encounter uneven stitching or misaligned pieces during construction, use this guide to identify the source and correct it quickly.
| Problem | Likely Cause | Solution |
|---|---|---|
| Top band seams do not align at side edges | Panels shifted under the presser foot while sewing side seams | Pin directly through the seam junction from both sides; use a walking foot or reduce presser foot pressure to prevent layers from creeping. |
| Puckering along the strap topstitching | Stitch length too short or upper thread tension too tight | Increase stitch length to 3.0 mm or 3.5 mm for topstitching and slightly lower top thread tension. |
| Twisted handle after assembly | Strap was rotated before the second end was pinned down | Unpick the reinforcement stitches on one strap end, lay the loop flat against the panel, and re-stitch. |
| Skipped stitches through thick strap layers | Needle is dull or too fine for multiple fabric plies | Replace your needle with a fresh universal size 80/12 needle. |
Frequently Asked Questions
Can I make this simple tote bag without a sewing machine?
A sewing machine is recommended to complete the project as instructed in the steps. Hand sewing will take considerably longer than the 1-hour machine estimate, but it creates strong, durable seams if your stitches are kept small and evenly spaced.
How can I make the bottom of the tote bag wider?
This adds depth to the base while slightly reducing the overall height and width of the finished bag.
What is the best needle size to use for quilting cotton and canvas?
Use a universal sewing needle size 80/12 for this project.
Do I need to interface this unlined tote bag?
Interfacing is not strictly required for medium weight cotton or canvas, allowing the bag to remain lightweight and foldable.
Your Completed Everyday Cotton Tote
By completing this simple tote bag tutorial, you have assembled a durable 14 in x 16 in (35 cm x 40 cm) carryall using fundamental cutting, piecing, and topstitching skills. The combination of the red floral print with the black accent band gives this unlined project a clean, intentional finish. As a final practical tip, always keep a spare set of wound bobbins in your primary thread colors before starting any quick sewing project so you can work straight through without pausing.